Subaru Outback (BR): Clock
NOTE
Your SUBARU dealer can change the settings of activating/deactivating the automatic adjustment of the clock by the GPS (Global Positioning System) (for models with the genuine SUBARU navigation system). Contact your SUBARU dealer for details.
The clock shows the time while the ignition switch is in the “Acc” or “ON” position.
To adjust the time shown by the clock, press the “+” button or the “−” button. If you press the “+” button, the indicated time will change in one-minute increments. If you press the “−” button, the indicated time will change in one-minute decrements. If you keep the button pressed, the rate at which the indicated time changes will speed up.
READ NEXT:
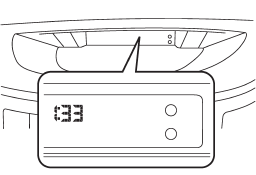
 Multi function display
1) Multi function display switching knob
With the ignition switch in the “ON” position, each successive press of the multi
function display switching knob toggles the display in the followi
Outside temperature indicator
1) U.S.-spec. models
2) Except U.S.-spec. models
The outside temperature indicator shows the outside temperature in a range from
−22 to 1228F (−30 to 508C).
The indicator can give a
Road surface freeze warning indication
1) U.S.-spec. models
2) Except U.S.-spec. models
When the outside temperature drops to 378F (38C) or lower, the temperature indication
flashes to show that the road surface may be frozen.
If th
SEE MORE:
Front turn signal light
NOTE
It may be difficult to replace the bulbs. We recommend that you have the bulbs
replaced by your SUBARU dealer if necessary.
1. Turn over the protective cover of the engine compartment.
2. Turn the socket counterclockwise and pull it out.
3. Pull out the bulb from the socket and replac
Turn signal lever
To activate the right turn signal, push the turn signal lever up. To activate
the left turn signal, push the turn signal lever down. When the turn is finished,
the lever will return automatically. If the lever does not return after cornering,
return the lever to the neutral position by hand.
© 2010-2026 Copyright www.suoutback.com
