Subaru Outback (BR): Rear center seating position
CAUTION
The head restraint is not intended to be used at the lowest position. Before sitting on the seat, raise the head restraint to the extended position.
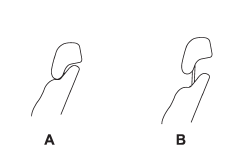
A) When not used (retracted position) B) When used (extended position)
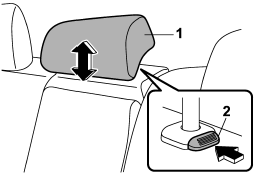
1) Head restraint
2) Release button
To raise: Pull the head restraint up.
To lower: Push the head restraint down while pressing the release button on the top of the seatback.
To remove: While pressing the release button, pull out the head restraint.
To install: Install the head restraint into the holes that are located on the top of the seatback until the head restraint locks.
When the rear-center seating position is occupied, raise the head restraint to the extended position. When the rear center seating position is not occupied, lower the head restraint to improve rearward visibility.
READ NEXT:
 Armrest
To lower the armrest, pull on the top edge of the armrest.
WARNING
To avoid the possibility of serious injury, passengers must never be allowed
to sit on the center armrest while the vehicle is
SEE MORE:
DTC P0026, P0028, P0030, P0031, P0032, P0037, P0038, P0068, P0076, P0077,
P0082, P0083, P0101, P0102, P0103
A: DTC P0026 INTAKE VALVE CONTROL SOLENOID CIRCUIT RANGE/PERFORMANCE
(BANK 1)
1. OUTLINE OF DIAGNOSIS
Judge as NG with either Low NG or High NG.
A variable valve lift diagnosis oil pressure switch is installed for diagnosis.
It is possible to determine whether
the intake valve is in high mode (inc
Most common causes of corrosion
The most common causes of corrosion are:
1. The accumulation of moisture retaining dirt and debris in body panel sections,
cavities, and other areas.
2. Damage to paint and other protective coatings caused by gravel and stone chips
or minor accidents.
Corrosion is accelerated on the vehicle w
