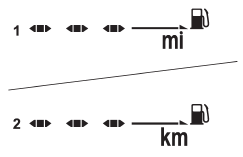
Subaru Outback (BR): Driving range on remaining fuel
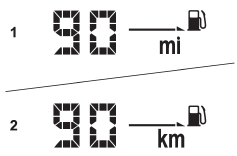
1) U.S.-spec. models
2) Except U.S.-spec. models
The driving range indicates the distance that can be driven taking into account the amount of fuel remaining in the tank and the average rate of fuel consumption. When the low fuel warning light illuminates, the driving range indication flashes for 5 seconds. (The display first switches to the driving range indication if it was originally giving some other indication.)
1) U.S.-spec. models
2) Except U.S.-spec. models
If the driving range is shown as “ ”, there is only a tiny amount of fuel left in the tank. You must refuel the vehicle immediately.
NOTE
The driving range on remaining fuel is only a guide. The indicated value may differ from the actual driving range on remaining fuel, so you must immediately fill the tank when the low fuel warning light illuminates.
READ NEXT:
 Light control switch
The light control switch only operates when the key is inserted into the ignition
switch.
Regardless of the position of the light control switch, the illuminated lights
are turned off when the ke
Headlights
To turn on the headlights, turn the knob on the end of the turn signal lever.
first position
Instrument panel illumination, tail lights, front side marker lights and license
plate lights are on
Sensor for the auto on/off headlights
The sensor is on the instrument panel as shown in the illustration.
CAUTION
If any object is placed on or near the sensor, the sensor may not detect the
level of the ambient light correctly and
SEE MORE:
Converter Case
A: REMOVAL
1) Remove the transmission assembly from the vehicle. <Ref. to CVT-55,
REMOVAL, Automatic Transmission
Assembly.>
2) Remove the air breather hose. <Ref. to CVT-132, REMOVAL, Air Breather Hose.>
3) Remove the oil pan and control valve body. <Ref. to CVT-111, REMOVAL, Cont
General Description of Fuel Injection System
A: SPECIFICATION
B: COMPONENT
1. INTAKE MANIFOLD
Intake manifold
Gasket
Intake manifold protector RH
Intake manifold protector LH
Fuel gallery RH
Fuel gallery LH
Fuel pipe
Fuel delivery pipe
Injector
Seal ring
Cap
Clip
O-ring
