Subaru Outback (BR): Front Sub Sensor
A: REMOVAL
1) Disconnect the ground cable from battery and wait for at least 60 seconds before starting work.
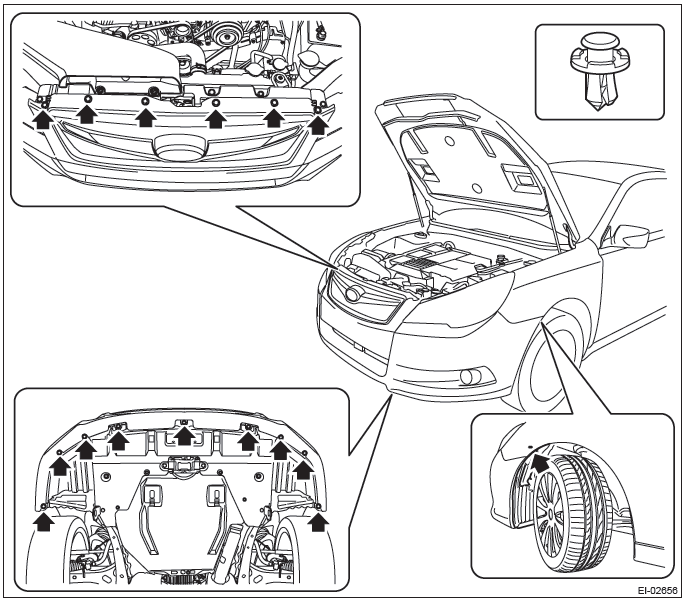
2) Remove the front bumper face assembly.
- Remove the clips, turn over the front mud guard, and disconnect the fog light connector. (Model with fog light)
- Remove the clips at the upper side of the bumper.
- Remove the clips from the fender.
- Remove the clips at the lower side of bumper.
- Detach the flange section on the bumper face side from the bracket side front UPR.
CAUTION: Do not pull forcibly. It may damage the flange sections of the bumper face.
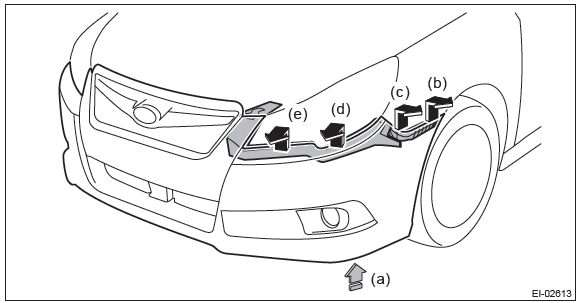
NOTE: Pushing up the lower side (a) of the fog light, remove from (b) to (e).
Detach the opposite side in the same manner.
3) Remove the headlight assembly.
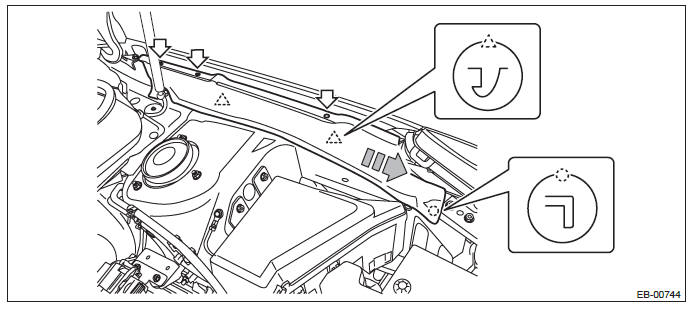
- Remove the fender cover assembly UPR.
- Remove the clip.
- Release the claws of the fender cover assembly UPR by pulling it forward and remove the fender cover.
- Remove the headlight assembly.
NOTE: When removing the RH headlight, remove the air intake duct.
- Remove the bolts and clips, and pull out the headlight assembly to the front of the vehicle.
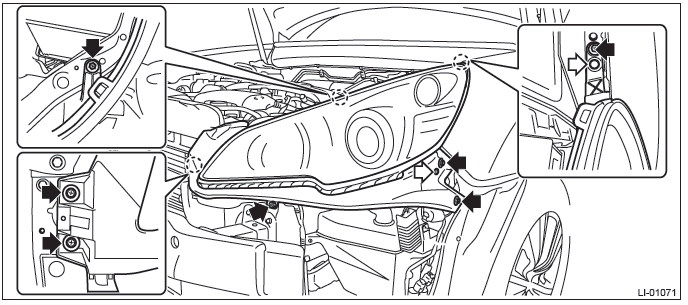
- Disconnect the connector and remove the headlight assembly.
- RH headlight connector
- LH headlight connector

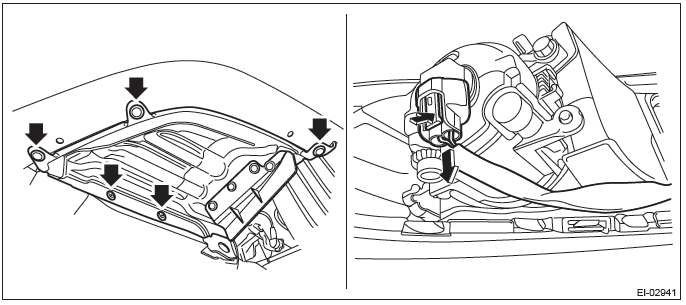
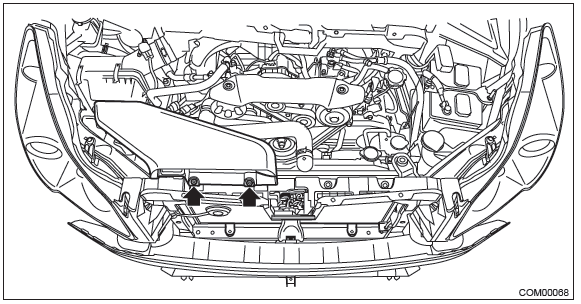
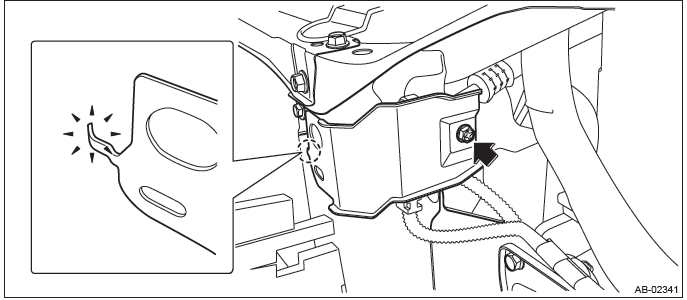
4) Remove the front sub sensor assembly.
- Remove the bolt, and remove the sensor cover plate.
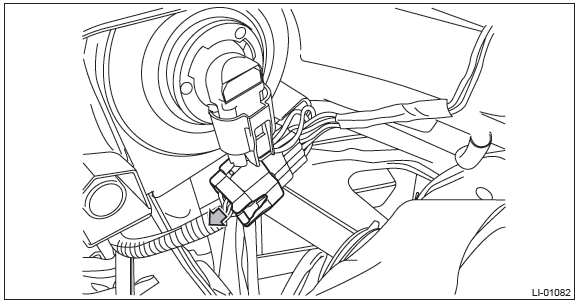
- Remove the front sub sensor by removing the bolt and disconnect the connector.
- LH side
Holding outer part of the slide lock, pull it in the direction of arrow.
- RH side
- Push the lock arm.
- Holding outer part, pull it one step in the direction of arrow.
- Push the lock arm again.
- Holding outer part, pull it in the direction of arrow to disconnect the connector.

B: INSTALLATION
CAUTION:
- If the airbag has been activated, replace the front sub sensor assembly with a new part.
- Do not reuse the bolt and nut.
Always replace with the specified new bolts and nuts.
- When installing the sensor, insert the set pin on the backside of the sensor into the hole on the body side securely.
- After the installation of headlight assembly, be sure to perform headlight beam adjustment.
1) Before installation, inspect the following items and replace any faulty part with a new part.
- Front sub sensor damage
- Connector damage
- Sensor cover plate deformation or damage
2) Install each part in the reverse order of removal.
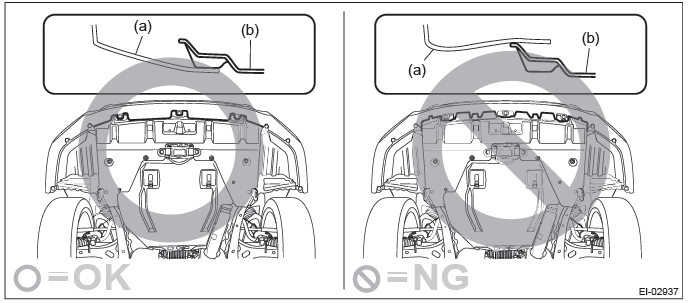
CAUTION: Install the bumper face so that the under cover front end (b) comes inside the front bumper face (a).
Tightening torque:
Front sub sensor: 13 N*m (1.33 kgf-m, 9.6 ft-lb)
Headlight assembly: 7.5 N*m (0.76 kgf-m, 5.5 ft-lb)
3) Adjust the fog light beam. (Model with fog light) <Ref. to LI-41, FOG LIGHT AIMING, ADJUSTMENT, Front Fog Light Assembly.>
Front Door Impact Sensor
A: REMOVAL
1) Operate the power window switch to close the front door glass.
2) Turn the ignition switch to OFF.
3) Disconnect the ground cable from battery and wait for at least 60 seconds before starting work.
4) Remove the gusset cover.
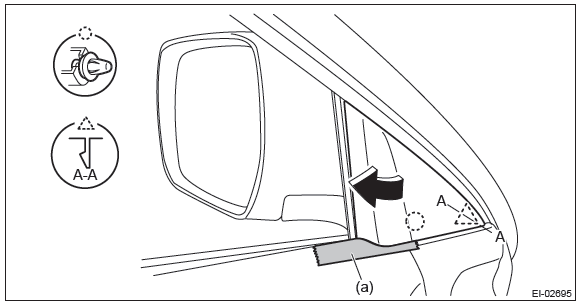
- Attach the protective tape (a) to the door trim.
- Release the clips and claws, then detach the gusset cover.
5) Remove the door trim assembly.
- Open the cover and remove the screw.
- Remove the clips in the order of (A) to (J) and remove the door trim assembly from the door panel.
CAUTION: When removing the door trim, be sure to remove the clips in the correct order. Forcibly removing clips may damage the door panel assembly.
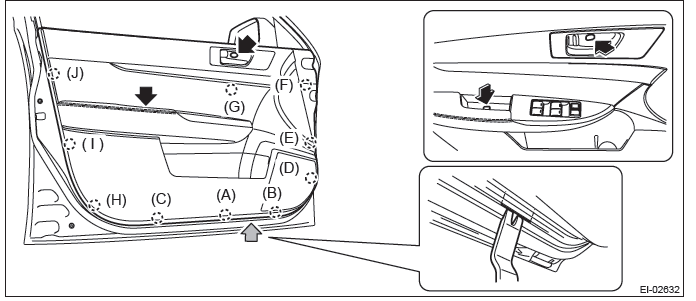
NOTE: Insert a plastic clip remover into the slit at the bottom of the door trim, to lift the door trim.
- Remove the cables (a) and (b) from the cable holder of inner remote.
- Disconnect the harness connector and remove the door trim assembly.
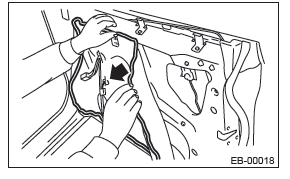
6) Remove the sealing cover.
CAUTION:
- Carefully remove the butyl tape. Excessive force will easily break the cover.
- If the sealing cover gets broken, replace it with a new part.
- Remove the screw to remove the door trim bracket.
- Carefully remove the butyl tape to remove the sealing cover.
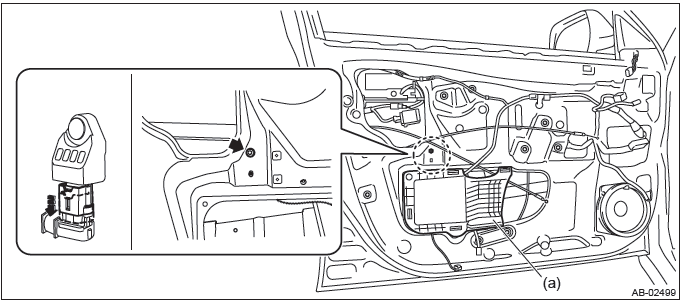
7) Remove the front door impact sensor.
- Remove the front door inner pad (a).
- Remove the nut, and then remove the center assembly.
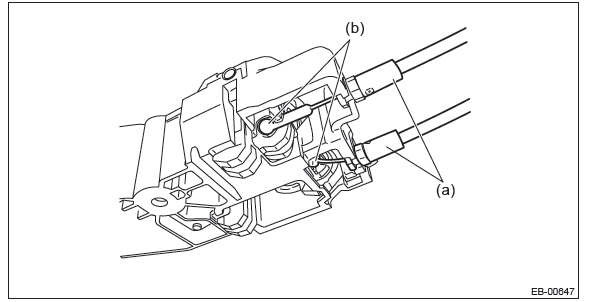
- Pull outer part of slide lock in the direction of arrow to disconnect the connector, and remove the front door impact sensor.
B: INSTALLATION
CAUTION: Do not reuse the bolt and nut.
Always replace with the specified new bolts and nuts.
1) Before installation, inspect the following items and replace any faulty part with a new part.
- The front door impact sensor or connector is damaged.
- Front door inner panel area is deformed.
- Side airbag has been activated.
Tightening torque:
Front door impact sensor: 7.5 N*m (0.76 kgf-m, 5.5 ft-lb)
2) Install each part in the reverse order of removal.
READ NEXT:
 Side Airbag Sensor
A: REMOVAL
1) Move the seat all the way forward, from which the airbag sensor is to be
removed.
NOTE:
To remove the seat belt retractor assembly.
2) Turn the ignition switch to OFF.
3) Disconnect
Curtain Airbag Sensor
A: REMOVAL
1. SEDAN MODEL
1) Disconnect the ground cable from battery and wait for at least 60 seconds
before starting work.
CAUTION:
The airbag system is fitted with a backup power supply. After dis
Roll Connector
A: REMOVAL
1) Position the front wheels straight ahead. (After moving a vehicle 5 m (16
ft) or more with front wheels positioned
straight ahead, make sure that the vehicle moves straight ahead.)
2) T
SEE MORE:
General Description of Vehicle Dynamics Control
A: SPECIFICATION
B: COMPONENT
1. ABS WHEEL SPEED SENSOR
Front ABS wheel speed sensor
Front axle housing
Rear ABS wheel speed sensor
Rear axle housing
Hub unit bearing
Magnetic encoder
Tightening torque:N*m (kgf-m, ft-lb)
T: 7.5 (0.76, 5.5)
2. STEERING ANGLE
Drinking and driving
WARNING
Drinking and then driving is very dangerous. Alcohol in the bloodstream delays
your reaction and impairs your perception, judgment and attentiveness. If you drive
after drinking – even if you drink just a little – it will increase the risk of
being involved in a serious or fatal a
