Subaru Outback (BR): Side Airbag Sensor
A: REMOVAL
1) Move the seat all the way forward, from which the airbag sensor is to be removed.
NOTE: To remove the seat belt retractor assembly.
2) Turn the ignition switch to OFF.
3) Disconnect the ground cable from battery and wait for at least 60 seconds before starting work.
4) Release the claws, and then remove the side sill cover-front INN. (On the side where airbag sensor is removed)
CAUTION: Do not pull with excessive force. Doing so may damage the claws of the side sill cover INN.
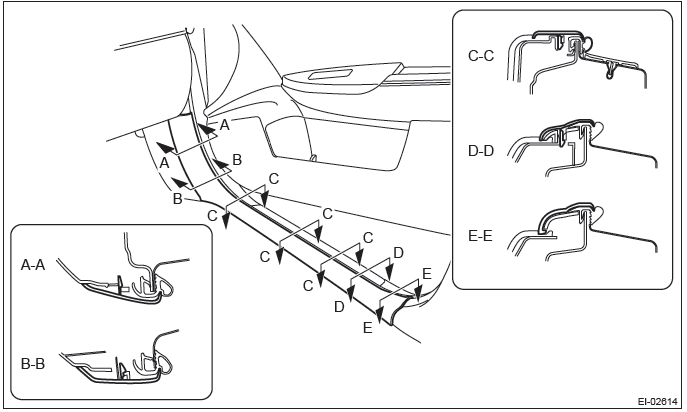
NOTE: To release the claws of the side sill cover INN, the following steps are recommended.
1. Take out the weather strip from under the side sill cover INN.
2. Turn over the floor mat and release the claw (C-C) by accessing from behind the side sill cover INN.
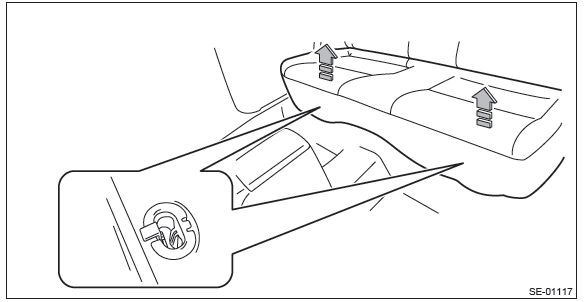
5) Remove the rear seat cushion assembly.
- Pull up the seat cushion and release the hook.
CAUTION: If the hook is disconnected from the vehicle body, replace the hook with the new part to prevent the decline of the fixed force of the seat.
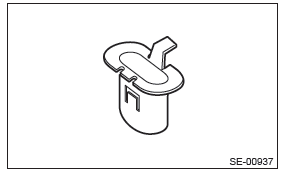
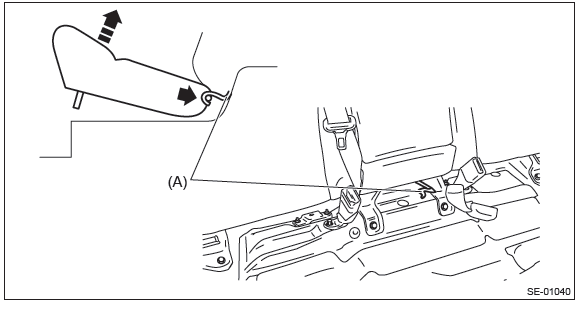
- Remove the hook (A) by pushing it back while lifting the front side of the seat cushion, and remove the seat cushion assembly.
6) Release the clips and claws, and then remove the side sill cover - rear INN. (On the side where airbag sensor is removed) CAUTION: Do not pull with excessive force. Doing so may damage the claws of the side sill cover INN.
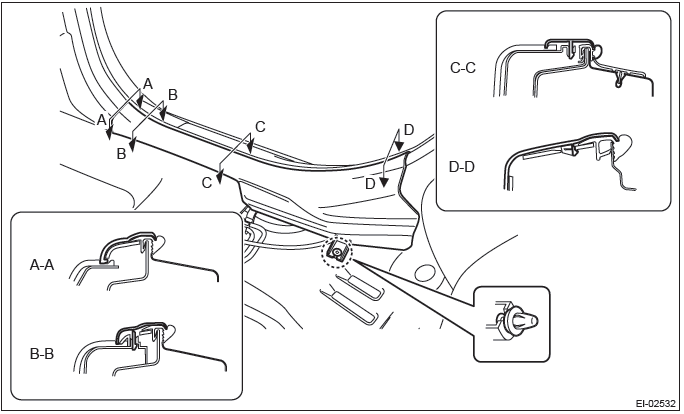
NOTE: To release the claws of the side sill cover INN, the following steps are recommended.
1. Take out the weather strip from under the side sill cover INN.
2. Turn over the floor mat and release the claw (C-C and D-D) by accessing from behind the side sill cover INN.
7) Remove the center pillar trim LWR. (On the side where airbag sensor is removed)
- Release the clip by pulling the center pillar trim LWR toward you.
- Expand the claws of center pillar trim LWR outward and remove it from the center pillar trim UPR.
CAUTION: Do not expand the center pillar trim LWR excessively. Doing so may damage the trim.
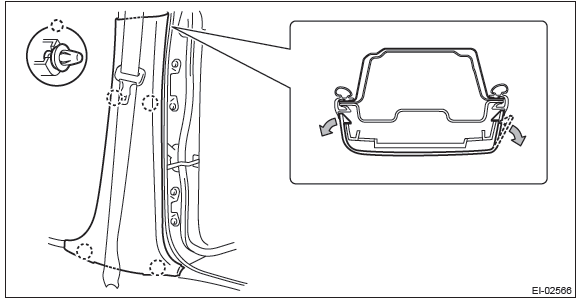
NOTE: First release the claw located to the rear of the vehicle.
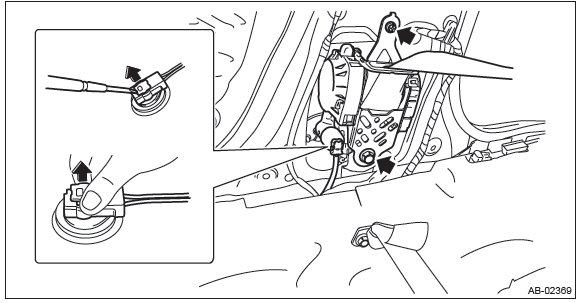
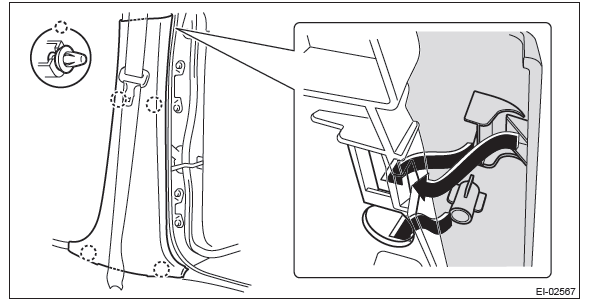
8) Remove the seat belt retractor. (On the side where airbag sensor is removed)
- Turn over the floor mat to disconnect the belt tension sensor connector.
- Remove the bolt to remove the seat belt retractor.
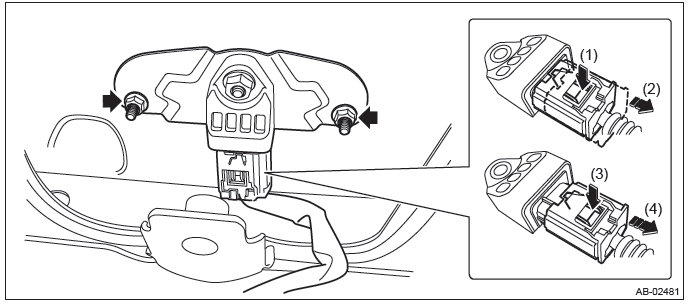
9) Remove the nuts and then remove the side airbag sensor assembly.
CAUTION:
- Do not separate the side airbag sensor and bracket. It cause the airbag system malfunction.
- If the sensor is removed from the bracket, be sure to replace with a new part.
- Push the lock arm.
- Holding outer part, pull it one step in the direction of arrow.
- Push the lock arm again.
- Holding outer part, pull it in the direction of arrow to disconnect the connector.
B: INSTALLATION
CAUTION: Do not reuse the bolt and nut.
Always replace with the specified new bolts and nuts.
1) Before installation, inspect the following items and replace any faulty part with a new part.
- The side airbag sensor, sensor bracket, or connector are damaged.
- Side airbag has been activated.
Tightening torque:
Side airbag sensor: 7.5 N*m (0.76 kgf-m, 5.5 ft-lb)
2) Install each part in the reverse order of removal.
CAUTION: If the hook is disconnected from the vehicle body, replace the hook with the new part to prevent the decline of the fixed force of the seat.

NOTE: Assemble the center pillar trim LWR to the center pillar trim UPR securely.
Tightening torque:
Front seat belt: <Ref. to SB-2, FRONT SEAT BELT, COMPONENT, General
Description.>
READ NEXT:
 Curtain Airbag Sensor
A: REMOVAL
1. SEDAN MODEL
1) Disconnect the ground cable from battery and wait for at least 60 seconds
before starting work.
CAUTION:
The airbag system is fitted with a backup power supply. After dis
Roll Connector
A: REMOVAL
1) Position the front wheels straight ahead. (After moving a vehicle 5 m (16
ft) or more with front wheels positioned
straight ahead, make sure that the vehicle moves straight ahead.)
2) T
SEE MORE:
Wheel balance
Each wheel was correctly balanced when your vehicle was new, but the wheels will
become unbalanced as the tires become worn during use. Wheel imbalance causes the
steering wheel to vibrate slightly at certain vehicle speeds and detracts from the
vehicle’s straight-line stability. It can also
To temporarily cancel the cruise control
The cruise control can be temporarily canceled in the following ways.
● Press the “CANCEL” button.
● Depress the brake pedal.
● Depress the clutch pedal (MT models only).
● Shift the select lever into the “N” position (AT and CVT models).
● Shift the shif
