Subaru Outback (BR): AUX Input Terminal
A: REMOVAL
1. AUX INPUT TERMINAL
1) Disconnect the ground cable from battery.
2) Remove the console front cover assembly.
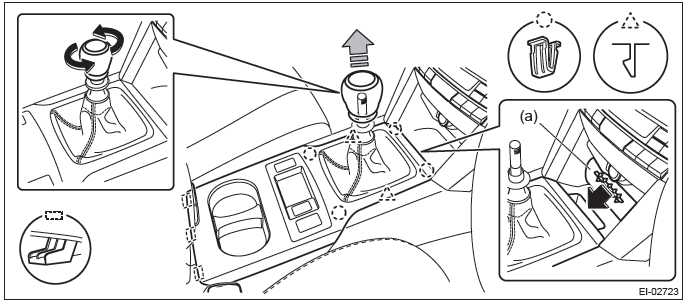
- MT model
1. Remove the shift knob.
2. Release the clips and claws, then pull up the console front cover assembly.

NOTE: Turn over the front center pocket mat (a) and pull up the console front cover from the slit.
3. Disconnect the harness connector and remove the console front cover assembly.
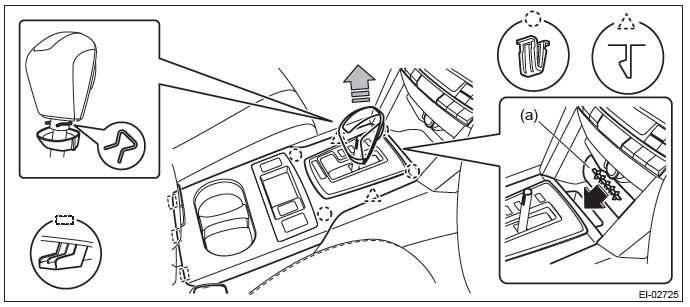
- AT/CVT model
1. Remove the select lever knob.
- Lower the cover grip AT.
- Remove the clamp grip pin, then remove the select lever knob.
2. Release the clips and claws, then pull up the console front cover assembly.
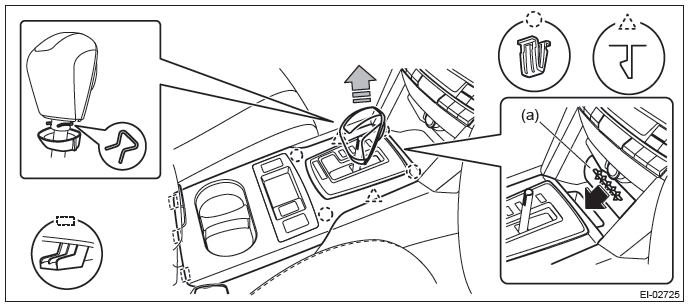
NOTE: Turn over the front center pocket mat (a) and pull up the console front cover from the slit.
3. Disconnect the harness connector and remove the console front cover assembly.
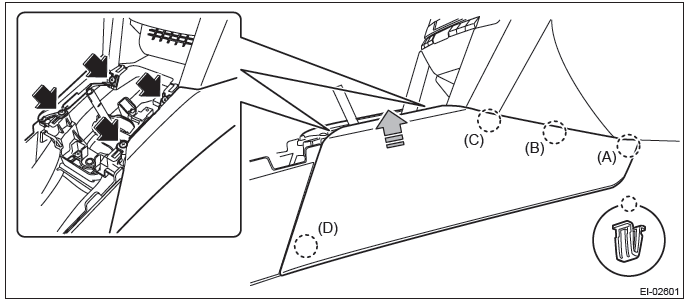
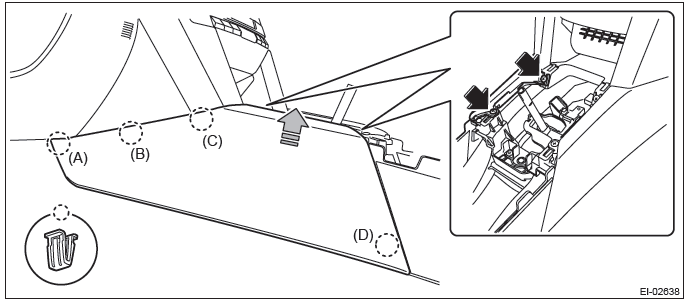
3) Remove the console front side cover assembly.
- Remove the screws and release the clips (A) to (D) in order.
- Remove the console front side cover assembly by pulling it up.
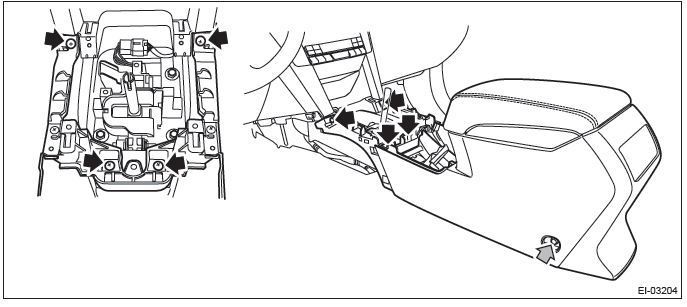
4) Remove the console box assembly.
- Move the seat forward, and remove the bolts after detaching the left and right caps.
NOTE: For a model with power seat, connect the battery ground cable and move the seat. Then, disconnect the battery ground cable again and wait for 60 seconds at least before restarting the work.
- Remove the screws, disconnect the harness connector and remove the console box assembly.
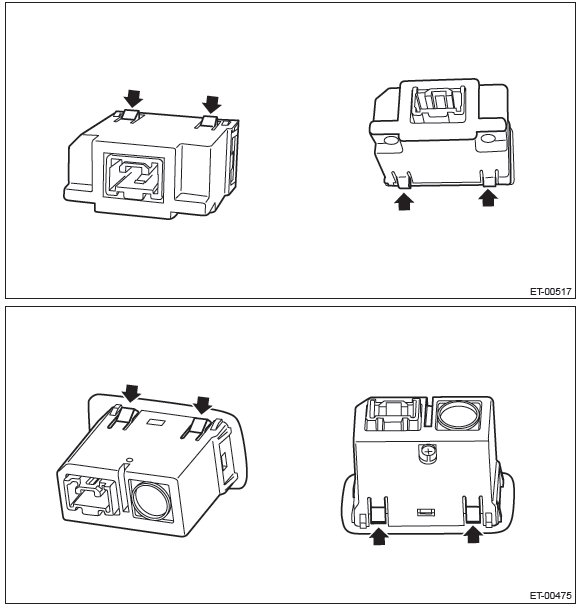
5) Remove the AUX input terminal.
- Remove the claws at four locations.
- Remove the AUX input terminal assembly by pushing it into the console box.
2. AUX TERMINAL HARNESS
1) Disconnect the ground cable from battery.
2) Remove the console front cover assembly.
- MT model
1. Remove the shift knob.
2. Release the clips and claws, then pull up the console front cover assembly.
NOTE: Turn over the front center pocket mat (a) and pull up the console front cover from the slit.
3. Disconnect the harness connector and remove the console front cover assembly.
- AT/CVT model
1. Remove the select lever knob.
- Lower the cover grip AT.
- Remove the clamp grip pin, then remove the select lever knob.
2. Release the clips and claws, then pull up the console front cover assembly.
NOTE: Turn over the front center pocket mat (a) and pull up the console front cover from the slit.
3. Disconnect the harness connector and remove the console front cover assembly.
3) Remove the console front side cover assembly LH.
- Remove the screws and release the clips (A) to (D) in order.
- Remove the console front side cover assembly by pulling it up.
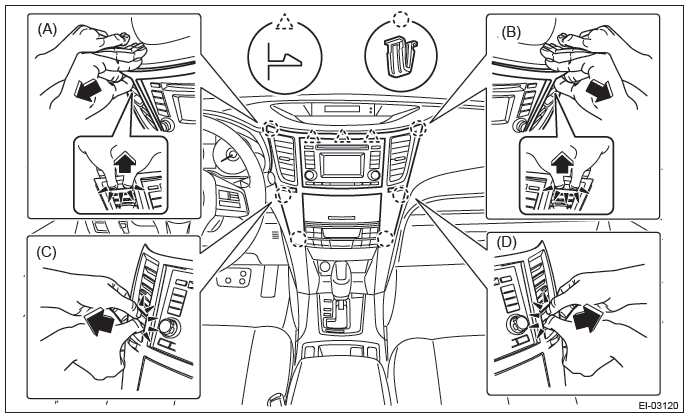
4) Remove the center panel assembly.
CAUTION: Do not put your finger on the fin of the air vent grille. Doing so may damage the fin.
- Attach the protective tape (a) to the meter visor.
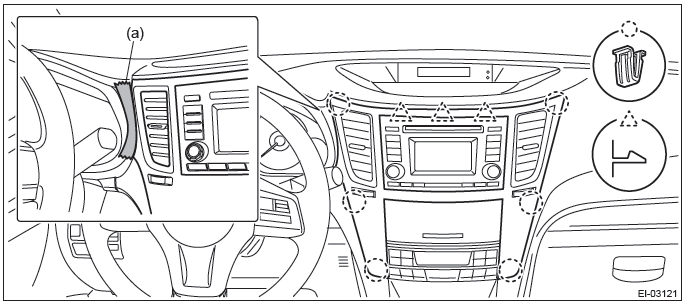
- Insert a finger into the air vent grille and release the left and right
clips at the top of the center panel.
(A), (B)
- Insert a finger into the air vent grille and release the left and right
clips at the center of the center panel.
(C), (D)
- Release the clips at the bottom of the center panel and remove the center panel assembly.
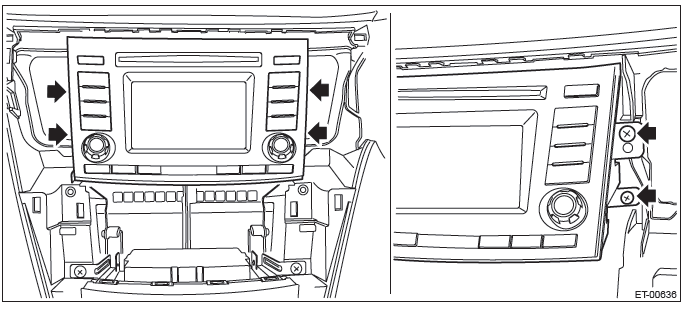
5) Remove the audio assembly.
- Remove the left and right screws, and partially pull the audio out from center console.
- Disconnect the connectors, and remove the audio assembly.
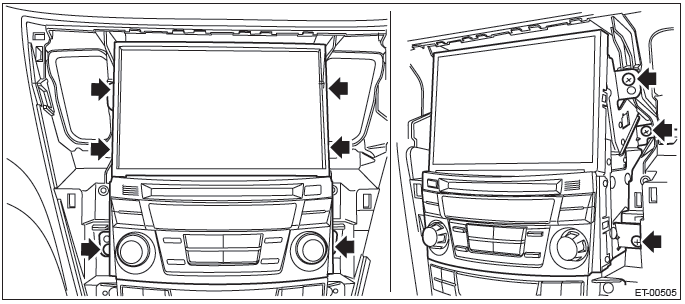
6) Remove the navigation assembly. (model with navigation)
- Remove the left and right screws.
- Disconnect the connectors, and remove the navigation assembly.
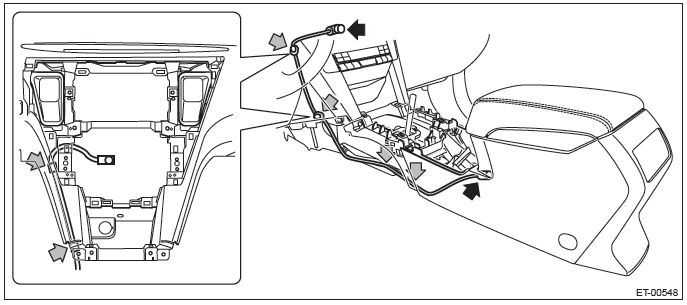
7) Remove the AUX terminal harness.
- Remove the harness clamp.
- Disconnect the connector from the AUX input terminal assembly, and remove the AUX terminal harness.
B: INSTALLATION
Install each part in the reverse order of removal.
Tightening torque:
Center console: 6.5 N*m (0.66 kgf-m, 4.8 ft-lb)
READ NEXT:
 Communication System
General Description
A: COMPONENT
Hi pitch side horn
Lo pitch side horn
Roll connector
Horn switch (driver's airbag module
ASSY)
Horn relay
B: CAUTION
Before disassembling or reassembling pa
General Description of Glass, Windows, Mirrors
A: COMPONENT
1. FIXED GLASS (SEDAN MODEL)
Windshield glass
Dam rubber
Molding
Seal upper side
Locating pin
Rearview mirror mount
Rear window glass
Seal A
SEE MORE:
Rear window wiper blade rubber (Outback)
1. Pull out the end of the blade rubber assembly to unlock it from the plastic
support.
2. Pull the blade rubber assembly out of the plastic support.
1) Metal spines
3. If the new blade rubber is not provided with two metal spines, remove the
metal spines from the old blade rubber and i
Maintenance precautions
When maintenance and service are required, it is recommended that all work be
done by an authorized SUBARU dealer.
If you perform maintenance and service by yourself, you should familiarize yourself
with the information provided in this section on general maintenance and service
for your SUBA
