Subaru Outback (BR): Back-up Light Bulb
A: REMOVAL
1. SEDAN MODEL
1) Disconnect the ground cable from battery.
2) Release the lock and remove the bulb inspection cover of trunk room trim.
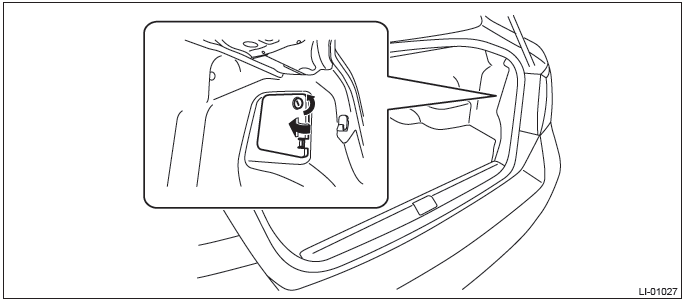
3) Remove the bulb socket and back-up light bulb.

2. OUTBACK MODEL
1) Disconnect the ground cable from battery.
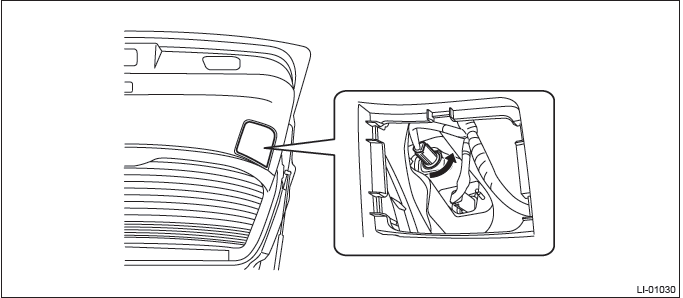
2) Release the claws and remove the bulb inspection cover of rear gate trim.
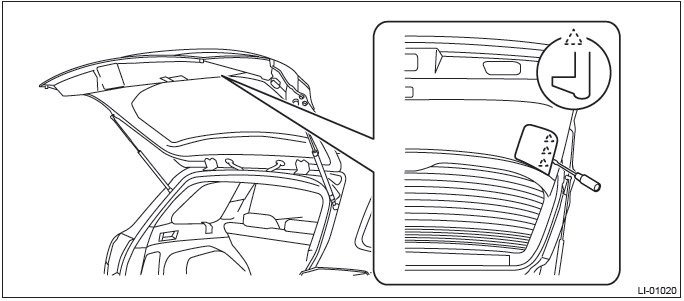
3) Remove the bulb socket and back-up light bulb.
B: INSTALLATION
Install each part in the reverse order of removal.
C: INSPECTION
1) Visually check the bulb for blow out.
2) Check the bulb specification. <Ref. to LI-2, SPECIFICATION, General Description.>
3) Replace the bulb if it is found defective.
License Plate Light
A: REMOVAL
1. SEDAN MODEL
1) Disconnect the ground cable from battery.
2) Remove the trunk lid trim. <Ref. to EI-127, TRUNK LID TRIM, REMOVAL, Trunk Room Trim.>
3) Remove the trunk lid garnish. <Ref. to EI-163, REMOVAL, Trunk Lid Garnish.>
4) Disconnect the connector and remove the bulb socket.
5) Remove the license plate light.
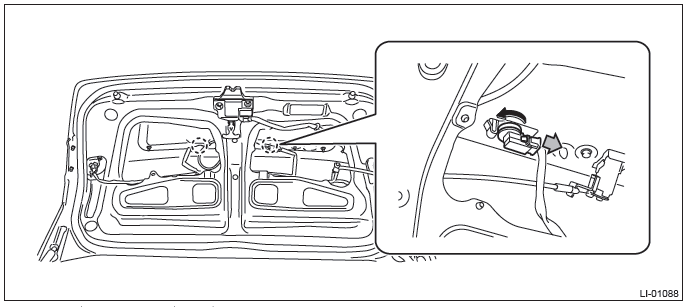
2. OUTBACK MODEL
1) Disconnect the ground cable from battery.
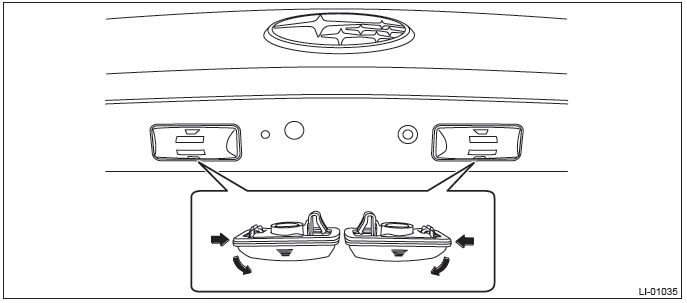
2) Remove the screws and remove the license plate light.

NOTE: When removing the license plate light assembly harness, remove the following parts.
- Rear gate garnish: <Ref. to EI-164, REMOVAL, Rear Gate Garnish.>
- Rear gate opener button: <Ref. to SL-43, REMOVAL, Rear Gate Opener Button.>
B: INSTALLATION
Install each part in the reverse order of removal.
C: INSPECTION
1) Visually check the bulb for blow out.
2) Check the bulb specification. <Ref. to LI-2, SPECIFICATION, General Description.>
3) Replace the bulb if it is found defective.
High-mounted Stop Light
A: REMOVAL
1. SEDAN MODEL
1) Disconnect the ground cable from battery.
2) Remove the rear shelf trim. <Ref. to EI-120, REMOVAL, Rear Shelf Trim.>
3) Remove the high-mounted stop light.
- Disconnect the connector.
- Remove the lock washers and remove the high-mounted stop light.
2. OUTBACK MODEL
1) Disconnect the ground cable from battery.
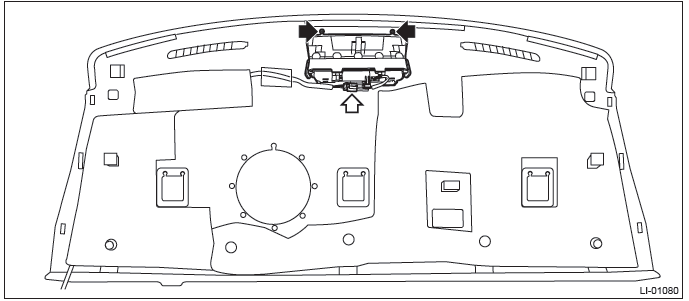
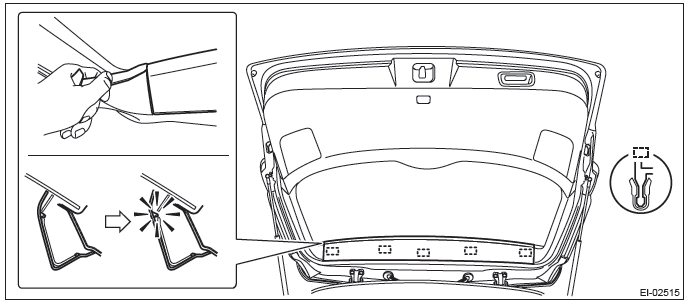
2) Remove the rear gate upper trim.
- Release the claws in the trim end.
- Disconnect the claws in the center of trim, and remove the rear gate upper trim.
3) Remove the high-mounted stop light.
- Remove the nuts and take out the high-mounted stop light toward vehicle rear.
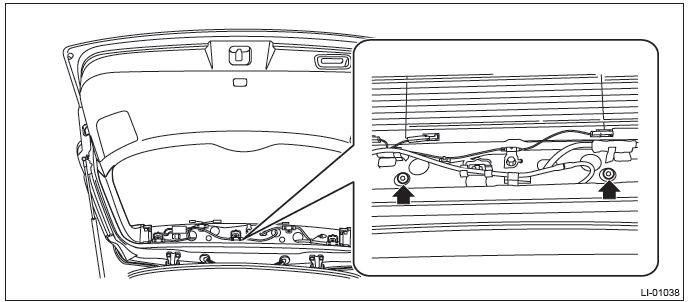
- Disconnect the connector and remove the high-mounted stop light.
B: INSTALLATION
Install each part in the reverse order of removal.
Tightening torque:
High-mounted stop light: 4.5 N*m (0.46 kgf-m, 3.3 ft-lb)
C: INSPECTION
1) Install the high-mounted stop light to test if it illuminates normally.
2) If it fails to illuminate normally, replace the high-mounted stop light with a new part.
NOTE: Since LED (Light Emitting Diode) is used for the high-mounted stop light, replace the high-mounted stop light assembly if the LED burns out.
READ NEXT:
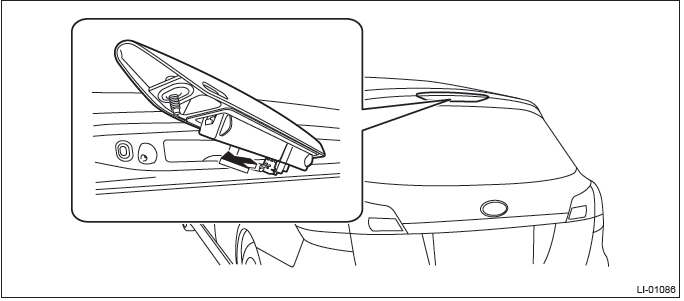
 Spot Map Light
A: REMOVAL
NOTE:
The spot map light is a single unit with the overhead console.
1) Disconnect the ground cable from battery.
2) Remove the overhead console assembly.
Push and open the rear end of t
Ignition Switch Illumination
A: REMOVAL
1) Disconnect the ground cable from battery.
2) Remove the steering column cover.
Remove the screws by turning the steering wheel to right and left.
Release the claws and remove the
SEE MORE:
Safety precautions
WARNING
● For safety reasons, avoid operating of the cell phone while driving.
● Do not make a phone call while driving. When you have an incoming call, stop the
vehicle in a safe location before taking the incoming phone call. When you have
to absolutely take a phone call, tell th
Cowl Panel
A: REMOVAL
1) Open the front hood.
2) Remove the front wiper arm assembly.
CAUTION:
Follow the steps below when standing up the wiper arm. Not following the steps
may cause contacting
of wiper arms and damages of wiper arms.
1. Stand up the driver's side wiper arm.
2. Stand up the passenger's si
