Subaru Outback (BR): General Description of Seat Belt System
A: COMPONENT
1. FRONT SEAT BELT

- Adjustable anchor ASSY
- Outer belt ASSY
- Seat belt retractor ASSY (Outer belt ASSY)
- Center pillar trim UPR
- Inner belt ASSY
Tightening torque: N*m (kgf-m, ft-lb)
T1: 7.5 (0.76, 5.5)
T2: 30 (3.06, 22.1)
T3: 38 (3.87, 28.0)
T4: 53 (5.4, 39.1)
2. REAR SEAT BELT (SEDAN MODEL)

- Outer belt ASSY RH
- Shoulder belt ASSY CTR
- Outer belt ASSY LH
- Center belt ASSY LH
Tightening torque: N*m (kgf-m, ft-lb)
T1: 30 (3.06, 22.1)
T2: 53 (5.4, 39.1)
3. REAR SEAT BELT (OUTBACK MODEL)
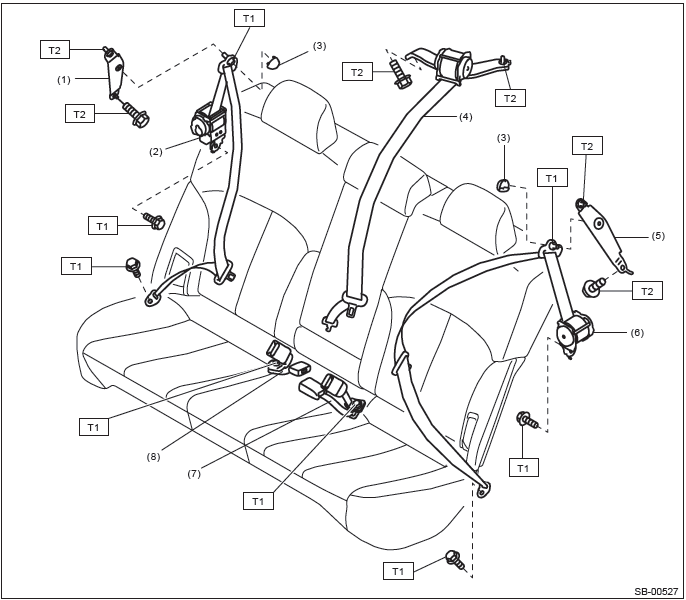
- Shoulder anchor bracket RH
- Outer belt ASSY RH
- Shoulder anchor cover
- Shoulder belt ASSY CTR
- Shoulder anchor bracket LH
- Outer belt ASSY LH
- Center belt ASSY LH
- Center belt ASSY RH
Tightening torque: N*m (kgf-m, ft-lb)
T1: 30 (3.06, 22.1)
T2: 53 (5.4, 39.1)
B: CAUTION
- Before starting the work, turn the ignition switch to OFF, disconnect the battery ground cable and wait for 60 seconds or more.
- The pretensioner system is fitted with a backup power supply. After disconnecting the battery ground cable, the pretensioner may operate if you do not wait for 60 seconds or more before starting pretensioner system servicing.
- Do not drop or apply any impact to the pretensioner.
- If oil, grease or water gets on the pretensioner, wipe it off immediately with a dry cloth.
- Do not expose the pretensioner to high temperature or flame.
- Do not allow current to flow through or voltage to reach the pretensioner. Do not use a circuit tester to check resistance of the pretensioner.
- Do not disassemble or attempt to repair the pretensioner. If it is dented, cracked or deformed, replace it with a new genuine part.
- Do not use the airbag or pretensioner parts from other vehicles. Always use a new genuine part for replacement.
- When handling a seat belt with deployed pretensioner, wear gloves and goggles. Wash your hands afterwards.
- Do not reuse a seat belt with deployed pretensioner.
- Before disposal, make sure to perform an operation process to the pretensioners.
- If material from the pretensioner enters the eyes or contacts skin during operation process, wash it away with clean water, and then consult a doctor.
C: PREPARATION TOOL
1. SPECIAL TOOL
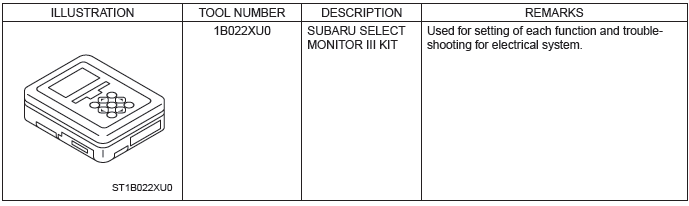
- Subaru Select Monitor
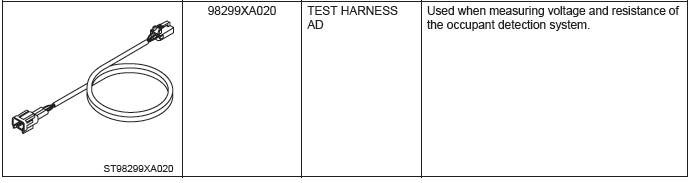
- TEST HARNESS AD

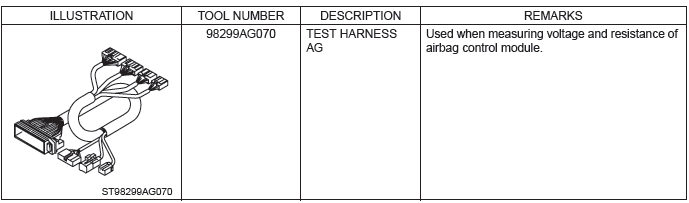
- TEST HARNESS AG
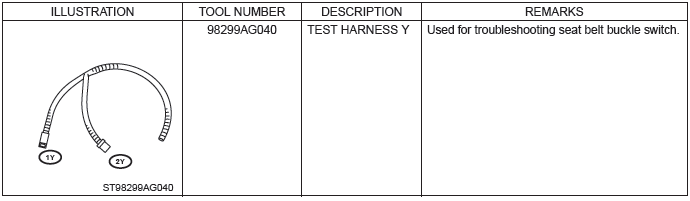
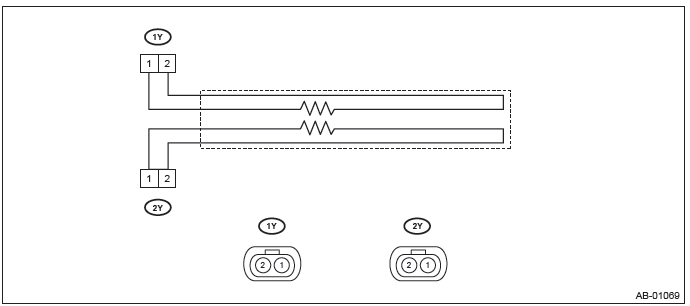
- TEST HARNESS Y
- AIRBAG RESISTOR

2. GENERAL TOOL

Pretensioner Connector
A: PROCEDURE
For connectors of seat belt pretensioner and buckle switch RH, refer to "Airbag System" or "Occupant Detection System".
- Airbag system: <Ref. to AB-18, PROCEDURE, Airbag Connector.>
- Occupant detection system: <Ref. to OD(diag)-8, PROCEDURE, Airbag Connector.>
Inspection Locations after a Collision
A: INSPECTION
Refer to "Inspection Locations After a Collision" in the AIRBAG SYSTEM section. <Ref. to AB-29, Inspection Locations after a Collision.>
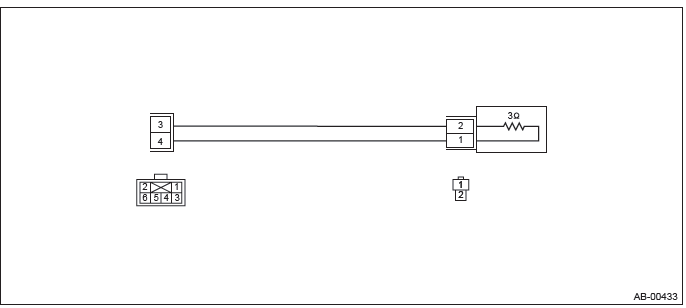
Seat Belt Warning System
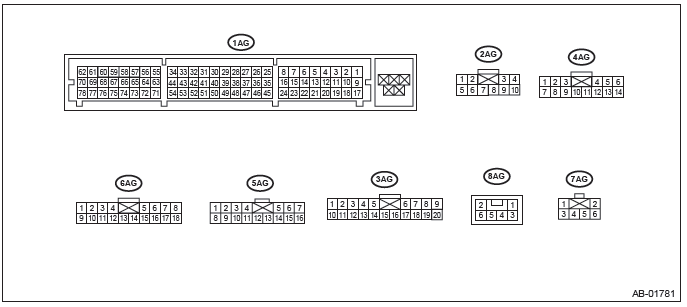
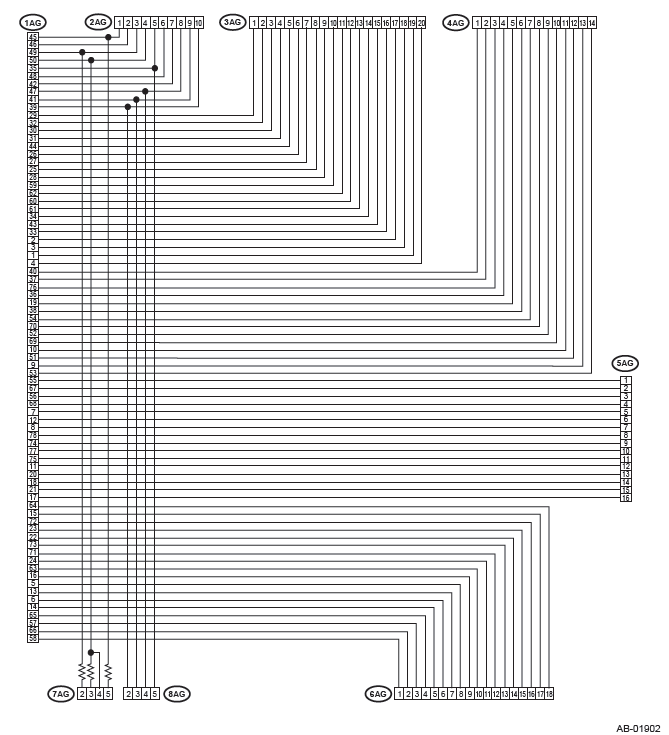
A: WIRING DIAGRAM
Refer to "Seat Belt Warning System" in the wiring diagram. <Ref. to WI-226, WIRING DIAGRAM, Seat Belt Warning System.>
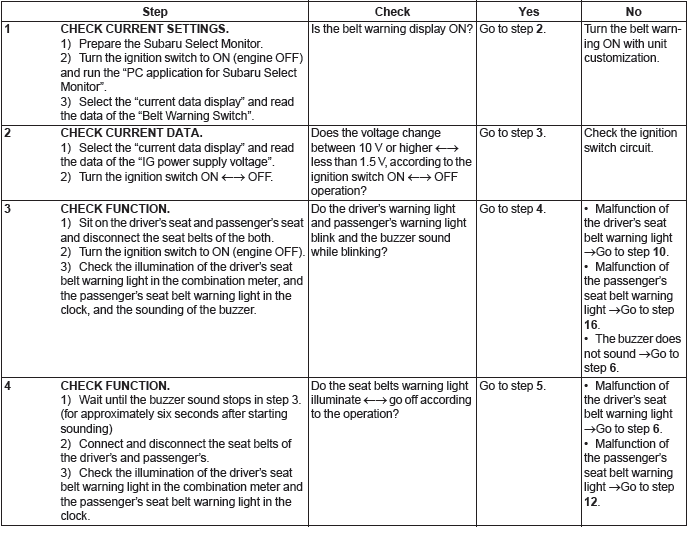
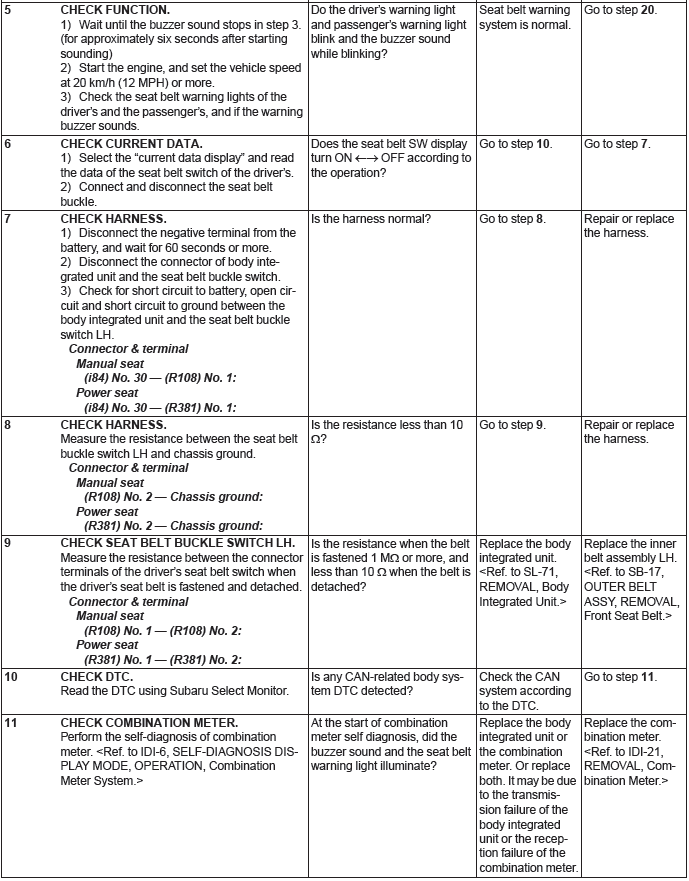
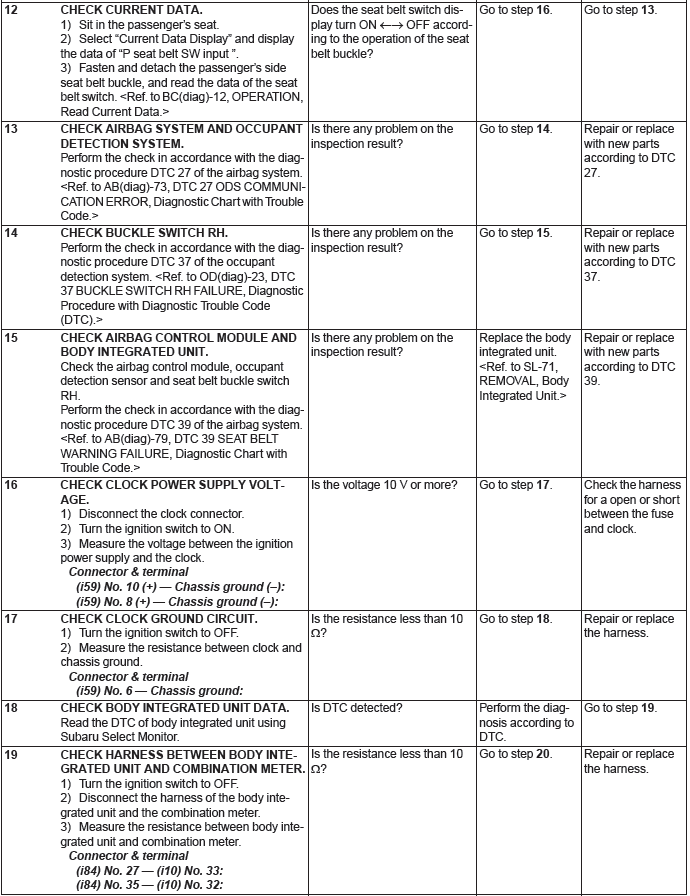
B: INSPECTION
CAUTION:
- Before diagnosing the airbag system, always turn the ignition switch to OFF, disconnect the battery ground cable, and then wait for 60 seconds or more.
- When replacing the airbag module, seat belt pretensioner, roll connector, control module, or sensors, reconnect the replacement part and check that the warning light operates normally.
- When inspecting the airbag main harness, disconnect the airbag module connectors of the driver's and passenger's seats for safety.
- When inspecting the airbag rear harness, disconnect the side airbag module connector, curtain airbag module connector and seat belt pretensioner connector for safety reasons.
READ NEXT:
 Front Seat Belt
A: REMOVAL
1. OUTER BELT ASSY
CAUTION:
The airbag system is fitted with a backup power supply. After
disconnecting the battery ground cable,
the airbag may operate if you do not wait for 60 secon
Rear Seat Belt
A: REMOVAL
1. OUTER BELT ASSEMBLY RH & LH (SEDAN MODEL)
1) Disconnect the ground cable from battery and wait for at least 60 seconds
before starting work.
CAUTION:
The airbag system is fitted wit
SEE MORE:
Daytime running light system
WARNING
The brightness of the illumination of the high beam headlights is reduced by
the daytime running light system. The light switch must always be turned to the
“” position when it is dark outside.
The high beam headlights will automatically illuminate at reduced brightness
when the
Keyless Entry Control Module
A: REMOVAL
1. SEDAN MODEL
1) Disconnect the ground cable from battery.
2) Remove the rear shelf trim. <Ref. to EI-120, REMOVAL, Rear Shelf Trim.>
3) Remove the keyless entry control module.
Disconnect the connector.
Remove the bolt and remove the keyless entry control module.
2. OUTBACK
