Subaru Outback manuals

Subaru Outback (BR): GVWR and GAWR (Gross Vehicle Weight Rating and Gross Axle Weight Rating)
Subaru Outback (BR) 2010-2015 Owners Manual / Driving tips / Loading your vehicle / GVWR and GAWR (Gross Vehicle Weight Rating and Gross Axle Weight Rating)

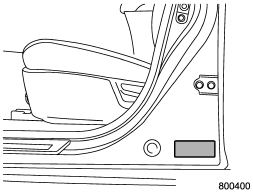
Certification label


Certification label

The certification label attached to the driver’s side door shows GVWR (Gross Vehicle Weight Rating) and GAWR (Gross Axle Weight Rating).

The GVW (Gross Vehicle Weight) must never exceed the GVWR. GVW is the combined total of weight of the vehicle, fuel, driver, all passengers, luggage, any optional equipment and trailer tongue load. Therefore, the GVW changes depending on the situation.

In addition, the total weight applied to each axle (GAW) must never exceed the GAWR. The front and rear GAWs can be adjusted by relocating luggage inside the vehicle.

Even if the total weight of your luggage is lower than the vehicle capacity weight, either front or rear GAW may exceed the GAWR, depending on the distribution of the luggage.

When possible, the load should be evenly distributed throughout the vehicle. If you carry heavy loads in the vehicle, you should confirm that GVW and front and rear GAWs are within the GVWR and GAWR by putting your vehicle on a vehicle scale, found at a commercial weighing station.

Do not use replacement tires with a lower load range than the originals because they may lower the GVWR and GAWR limitations. Replacement tires with a higher load range than the originals do not increase the GVWR and GAWR limitations.

READ NEXT:

 Roof rails with integrated crossbars (Outback)

1) Integrated crossbars CAUTION ● For cargo carrying purposes, the bars must be used as crossbars and be used together with the genuine SUBARU carrying attachment. The bars must never be u

 Installing carrying attachments on the crossbars

When installing any carrying attachment such as a bike carrier, ski carrier, kayak carrier, cargo basket, etc. on the crossbars, follow the manufacturer’s instructions and make sure that the att

 How to use as crossbars

CAUTION ● Do not raise the bar higher than necessary. The base of the bar may be damaged. ● Be careful not to contact the bars while sliding them. Otherwise, the bars may be scratched

SEE MORE:

 General Description of Clutch System

A: SPECIFICATION B: COMPONENT 1. CLUTCH ASSEMBLY Dust cover Lever spring Pivot Release lever (non-turbo model) Clip (non-turbo model) Release bearing (non-turbo model) Release lever (turbo model) Release bearing (turbo model) Clutch cover Cl

 Inserting a disc in a desired position

1. Briefly press the “LOAD” button. If the magazine in the player has an idle position where you can insert a disc, the disc number indicator associated with the idle position will blink. The positions in the magazine the indicator of which steadily lights up are already loaded with dis

© 2010-2025 Copyright www.suoutback.com