Subaru Outback (BR): Heater Duct
A: REMOVAL
1) Remove the front seats. <Ref. to SE-10, REMOVAL, Front Seat.>
2) Remove the instrument panel face assembly. <Ref. to EI-76, REMOVAL, Instrument Panel Assembly.>
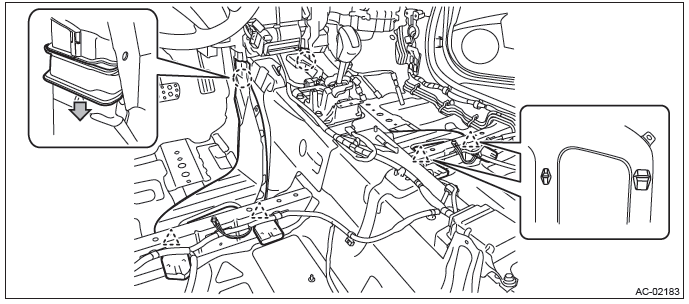
3) Remove the rear heater duct.
- Pull off the floor carpet to disengage the rear heater duct slide lock.
- Release the claws, and then remove the rear heater duct LH and RH.
B: INSTALLATION
Install each part in the reverse order of removal.
C: INSPECTION
1) Check installation condition of duct. Connect the duct properly if defective.
2) Check that no foreign matter is mixed in the duct. Remove the foreign matter if any.
Heater Vent Duct
A: REMOVAL
1) Remove the instrument panel face assembly. <Ref. to EI-76, REMOVAL, Instrument Panel Assembly.>
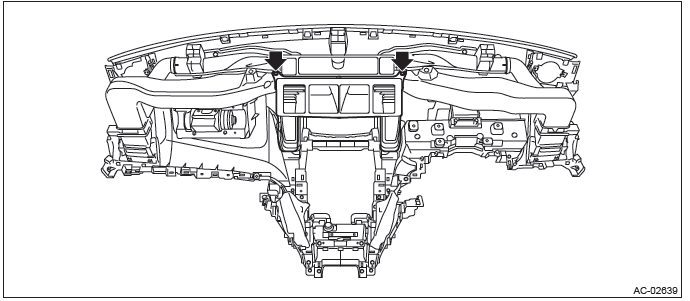
2) Remove the heater vent duct.
- Remove the screws, and then remove the front vent duct.
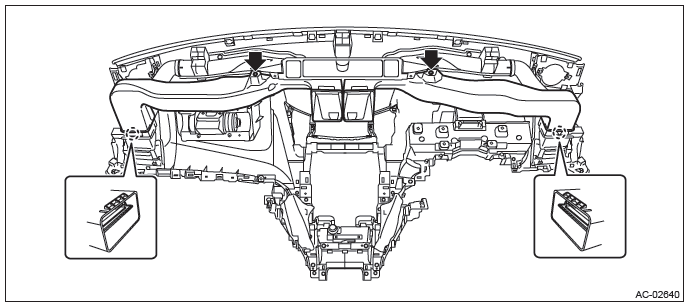
- Release the claws and remove the screws, then detach the side vent duct LH and RH.
B: INSTALLATION
Install each part in the reverse order of removal.
C: INSPECTION
1) Check installation condition of duct. Connect the duct properly if defective.
2) Check that no foreign matter is mixed in the duct. Remove the foreign matter if any.
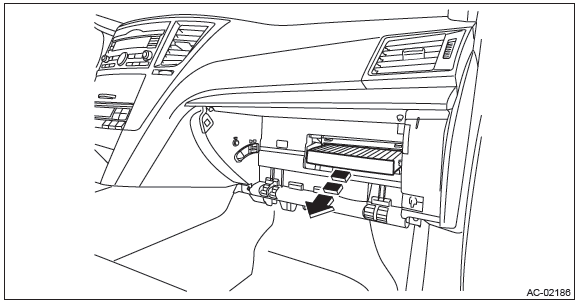
A/C Filter
A: REPLACEMENT
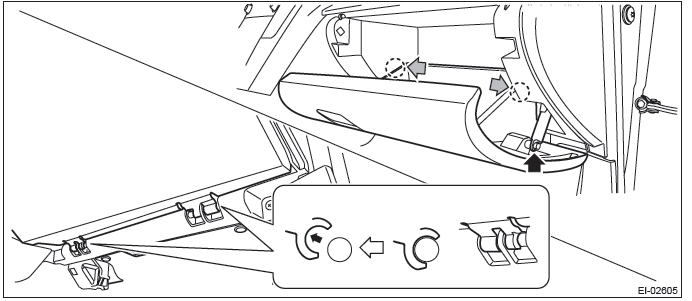
1) Remove the glove box lid assembly.
- Remove the glove box damper.
- Release the stoppers and remove the glove box lid assembly by pulling it toward you.
2) Remove the A/C filter.
- Release the lock and remove the A/C filter cover.

- Remove the A/C filter.
3) Install each part in the reverse order of removal.
B: INSPECTION
Check the A/C filter for dust or dirt, and clean or replace as necessary.
Diagnostics with Phenomenon
A: INSPECTION
Refer to "Diagnostics with Phenomenon" of "HVAC SYSTEM (DIAGNOSTICS)" section. <Ref. to AC(diag)- 13, Diagnostics with Phenomenon.>
READ NEXT:
 Basic Diagnostic Procedure of HVAC System
A: PROCEDURE
NOTE: When the sunload sensor check is performed indoors or in the shade, it could be diagnosed as sensor having an open circuit. Always perform the inspection in direct sunlight.
Ge
HVAC System - List of Diagnostic Trouble Code (DTC)
A: LIST
NOTE: When the sunload sensor check is performed indoors or in the shade, it could be diagnosed as having an open circuit. Always check the sunload sensor in direct sunlight.
NOTE:
*1:
SEE MORE:
Double trip meter
1) Trip knob
This meter displays the two trip meters when the ignition switch is in the “ON”
position.
The trip meter shows the distance that the vehicle has been driven since you
last set it to zero.
If you press the trip knob when the ignition switch is in the “LOCK” or “Acc”
Engine coolant - Subaru super coolant
The specified coolant quantity serves as a general reference and may vary slightly based on temperature and other variables. For comprehensive information regarding maintenance and servicing, consult the "Cooling system" section.
