Subaru Outback (BR): Passenger’s frontal airbag ON and OFF indicators
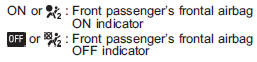
The front passenger’s frontal airbag ON and OFF indicators show you the status of the front passenger’s SRS frontal airbag. The indicators are located next to the clock in the center portion of the dashboard.
When the ignition switch is turned to the “ON” position, both the ON and OFF indicators illuminate for 6 seconds during which time the system is checked. Following the system check, both indicators turn off for 2 seconds. After that, one of the indicators illuminates depending on the status of the front passenger’s SRS frontal airbag determined by the SUBARU advanced frontal airbag system monitoring.
If the front passenger’s SRS frontal airbag is activated, the passenger’s frontal airbag ON indicator will illuminate while the OFF indicator will remain off.
If the front passenger’s SRS frontal airbag is deactivated, the passenger’s frontal airbag ON indicator will remain off while the OFF indicator will illuminate.
With the ignition switch turned to the “ON” position, if both the ON and OFF indicators remain illuminated or off simultaneously even after the system check period, the system is malfunctioning. Contact your SUBARU dealer immediately for an inspection.
READ NEXT:
 Conditions in which front passenger’s SRS frontal airbag is not activated
The front passenger’s SRS frontal airbag will not be activated when any of the
following conditions are met regarding the front passenger’s seat:
● The seat is empty.
● The seat is
Conditions in which front passenger’s SRS frontal airbag is activated
The front passenger’s SRS frontal airbag will be activated for deployment upon
impact when any of the following conditions is met regarding the front passenger’s
seat.
● When the seat i
Effect vehicle modifications made for persons with disabilities may have on
SUBARU advanced frontal airbag system operation (U.S. only)
Changing or moving any parts of the front seats, seat belts, front bumper, front
side frame, instrument panel, combination meter, steering wheel, steering column,
tire, suspension or floor panel c
SEE MORE:
Locking and unlocking from the outside
To lock the driver’s door from the outside with the key, turn the key toward
the rear. To unlock the door, turn the key toward the front.
Pull the outside door handle to open an unlocked door.
Locking without the key
1) Rotate the lock lever rearward.
2) Close the door.
To lock the door
Cruise control indicator light
The cruise control indicator light illuminates when the ignition switch is turned
to the “ON” position and turns off after approximately 3 seconds.
The light illuminates when the “CRUISE” main switch is pressed.
NOTE
● If you press the “CRUISE” main switch button while turni
