Subaru Outback (BR): Rear combination lights
Legacy
NOTE
It may be difficult to replace the bulbs. We recommend that you have the bulbs replaced by your SUBARU dealer if necessary.
1. Turn the knobs of the cover 90 degrees counterclockwise to remove the cover.
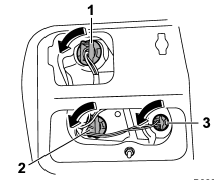
1) Brake/tail and rear side marker light 2) Rear turn signal light 3) Back-up light
2. Remove the bulb holder from the rear combination light assembly by turning it counterclockwise. Use pliers if necessary.
3. Pull the bulb out of the bulb holder and replace it with a new one.
4. Set the bulb holder into the rear combination light assembly and turn it clockwise until it locks.
5. Securely lock the cover against the trunk trim.
Outback
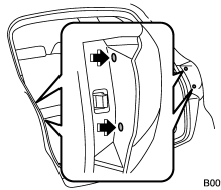
1. Undo the clips. For the method to undo the clips, refer to “Type C clips” F11-6.
2. Remove the cover.
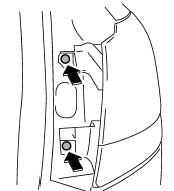
3. Remove the upper and lower screws.
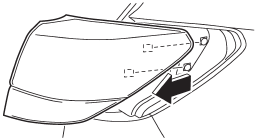
4. Slide the rear combination light assembly straight rearward and remove it from the vehicle.
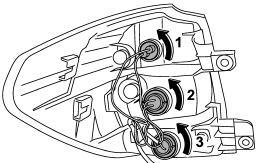
1) Tail and rear side marker light
2) Brake light
3) Rear turn signal light
5. Remove the bulb holder from the rear combination light assembly by turning it counterclockwise.
6. Pull the bulb out of the bulb holder and replace it with a new one.
7. Set the bulb holder into the rear combination light assembly and turn it clockwise until it locks.
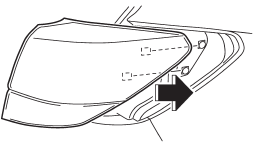
8. Reinstall the rear combination light assembly by sliding the two-pronged part of the combination light assembly securely to each holder of the vehicle side.
9. Tighten the upper and lower screws.
10. Reinstall the side cover.
READ NEXT:
 Tail/Back-up light (Outback)
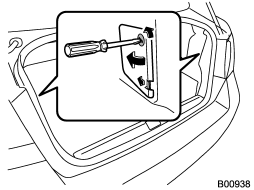
1. Apply a flat-head screwdriver to the light cover as shown in the illustration,
and pry the light cover off from the rear gate trim.
1) Back-up light
2) Tail light
2. Turn the bulb socket c
Outback License plate light
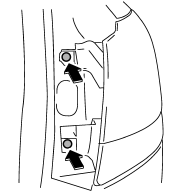
1. Remove the mounting screws using a Phillips screwdriver.
2. Remove the lens.
3. Pull the bulb out of the socket.
4. Install a new bulb.
5. Reinstall the lens.
6. Tighten th
SEE MORE:
Parking your vehicle
WARNING
● Never leave unattended children or pets in the vehicle. They could accidentally
injure themselves or others through inadvertent operation of the vehicle. Also,
on hot or sunny days, the temperature in a closed vehicle could quickly become high
enough to cause severe or possibl
How to jump start
1. Make sure the booster battery is 12 volts and the negative terminal is grounded.
2. If the booster battery is in another vehicle, do not let the two vehicles
touch.
3. Turn off all unnecessary lights and accessories.
4. Connect the jumper cables exactly in the sequence illustrated.
1) Con
