Subaru Outback (BR): Rear Gate
A: REMOVAL
CAUTION: Rear gate panels are heavy. When removing and installing them, always work in a team of two or more persons.
1. REAR GATE PANEL
1) Disconnect the ground cable from battery.
2) Remove the following parts. <Ref. to EI-164, REMOVAL, Rear Gate Garnish.>
- Rear gate trim
- Rear wiper arm assembly and rear wiper motor assembly
- Rear gate garnish
3) Remove the high-mounted stop light assembly and rear washer nozzle. <Ref. to WW-43, REMOVAL, Rear Washer.>
4) Remove the rear finisher light assembly. <Ref. to LI-54, OUTBACK MODEL, REMOVAL, Rear Finisher Light Assembly.>
5) Remove the rearview camera assembly. <Ref. to ET-46, OUTBACK MODEL, REMOVAL, Rearview Camera System.>
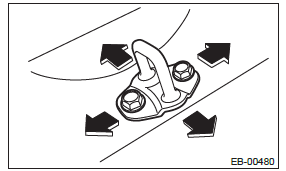
6) Remove the rear gate latch & actuator assembly. <Ref. to SL-47, REMOVAL, Rear Gate Latch and Actuator Assembly.>
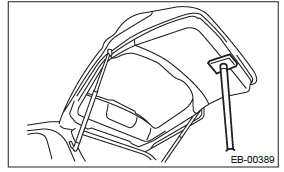
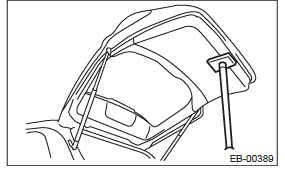
7) Remove the clips, and then remove the rear gate drip rubber.
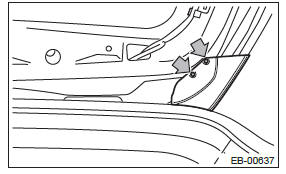
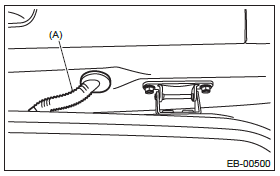
8) Disconnect the rubber duct (A) connection.
9) Pull out the harnesses and washer hose from the rear gate.
10) Remove harness clip of each connector from the rear gate panel.
11) Before removing the rear gate damper stay, prevent the rear gate from closing using prop or the like.
CAUTION: If the prop comes off, operators may get injured and vehicle may get damaged. Make sure to support the rear gate with secure material to prevent injury or damage.
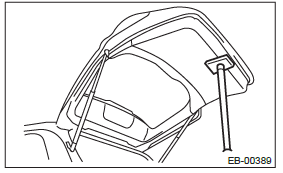
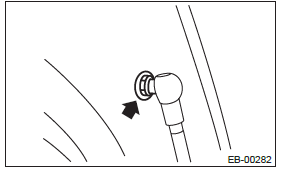
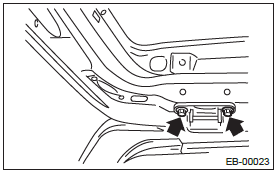
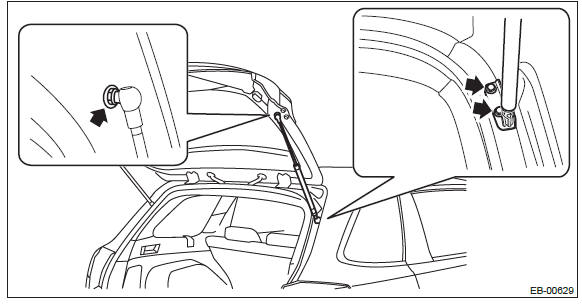
12) Remove the mounting bolt of rear gate damper stay.
13) Remove the rear gate hinge bolt, and remove the rear gate panel.
CAUTION: Rear gate panels are heavy. When removing and installing them, always work in a team of two or more persons.
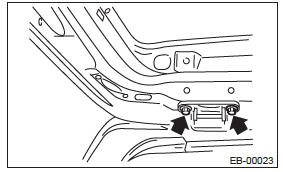
14) Remove the rear gate hinge from the vehicle.
2. REAR GATE DAMPER STAY
CAUTION:
- Do not damage piston rods and oil seals.
- Never disassemble cylinders: They contain gas.
- Rear gate panels are heavy. When removing and installing them, always work in a team of two or more persons.
1) Before removing the rear gate damper stay, prevent the rear gate from closing using prop or the like.
CAUTION: If the prop comes off, operators may get injured and vehicle may get damaged. Make sure to support the rear gate with secure material to prevent injury or damage.
2) Remove the rear gate damper stay by removing mounting bolts.
B: INSTALLATION
1. REAR GATE PANEL
CAUTION: Rear gate panels are heavy. When removing and installing them, always work in a team of two or more persons.
1) Install the rear gate hinges to the vehicle body.
2) Temporarily install the rear gate panel to the rear gate hinges.
NOTE: When installing, make sure that a uniform clearance is created around the rear gate panel.
3) Adjust the clearance around the rear gate panel. <Ref. to EB-52, ADJUSTMENT, Rear Gate.>
4) Tighten the rear gate hinge bolts.
Tightening torque: 25 N*m (2.55 kgf-m, 18.4 ft-lb)
5) Install each part in the reverse order of removal.
Tightening torque:
Rear gate parts: <Ref. to EB-7, REAR GATE, COMPONENT, General Description.>
Rear gate garnish: 4.5 N*m (0.46 kgf-m, 3.3 ft-lb)
Rear wiper motor & rear wiper arm: <Ref. to WW-4, REAR WIPER, COMPONENT, General
Description.>
2. REAR GATE DAMPER STAY
CAUTION:
Rear gate panels are heavy. When removing and installing them, always work in a team of two or more persons.
1) Prevent the rear gate from closing using prop or the like.
CAUTION: If the prop comes off, operators may get injured and vehicle may get damaged. Make sure to support the rear gate with secure material to prevent injury or damage.
2) Install each part in the reverse order of removal.
Tightening torque: Refer to "COMPONENT" of "General Description". <Ref. to EB-7, REAR GATE, COMPONENT, General Description.>
C: ADJUSTMENT
Adjust the clearance around the rear gate panel as follows.
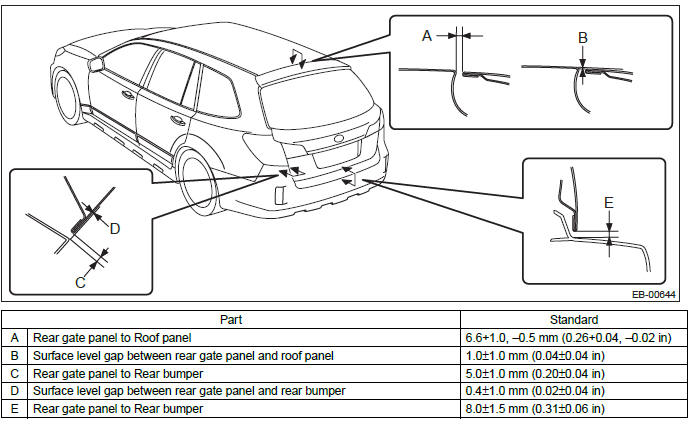
1) Align the rear gate panel longitudinal and lateral position.
- Loosen the hinge attaching bolts.
- Align the rear gate panel longitudinal and lateral panel dimension.
Tightening torque: 25 N*m (2.55 kgf-m, 18.4 ft-lb)
2) Adjust the gap between rear gate panel and body surface.
- Loosen the bolt.
- Tap striker using plastic hammer to adjust the gap between rear gate panel and body surface.
Tightening torque: 25 N*m (2.55 kgf-m, 18.4 ft-lb)
D: DISPOSAL
1. REAR GATE DAMPER STAY
CAUTION: Gas is colorless, odorless, and harmless. However, gas pressure may spray cutting powder or oil. Be sure to wear dust-resistant goggles.
1) Cover with a vinyl sack as shown in the figure.
- Rear gate damper stay
- Vinyl sack
NOTE: Prevent the vinyl sack from being caught by drill cutting edge.
2) Lift the body side slightly with piston rods fully extended, and secure the body side with vise.
Drill a hole of 2 to 3 mm (0.08 to 0.12 in) diameter at a point 10 to 200 mm (0.39 to 7.87 in) from the body side, and bleed the gas in the rear gate damper stay completely.
- Door side
- Body side
- 190 mm (7.48 in)
- 10 mm (0.39 in)
- Piston rod
- Cylinder
- Portion to be drilled
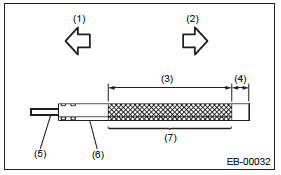
Protector Tape
A: INSTALLATION
Apply the protector tape by the following steps.
1. REAR DOOR PROTECTOR (OUTBACK MODEL)
- Type A
- Rear door garnish end
- Rear door panel end
- Align the application paper to the rear door garnish terminal.
- Align the protector tape to the end of rounded corner.
- Type B
- Rear door garnish end
- Rear door panel end
- Align the application paper to the rear door garnish terminal.
- Align the protector tape to the end of rounded corner.
1) Clean the area around applying position to remove any foreign objects on body.
2) Detach the backing paper and apply the protector tape after positioning it correctly.
3) Detach the backing papers, and moisten the applying area and the backside of protector tape by spraying liquid (mild detergent solution at 3% concentration).
4) Apply the protector tape to the vehicle body.
CAUTION: Remove the water or air bubbles out of the protector tape by using the plastic or rubber spatula.
5) Detach the application tape and temporary retention tape.
READ NEXT:
 Cruise Control System
General Description
A: COMPONENT
Engine control module (ECM)
Cruise control command switch
Stop light and brake switch
Cruise indicator light and cruise
set indicator light
Transmission contro
Cruise Control System (Diagnostics)
Basic Diagnostic Procedure
A: PROCEDURE
CAUTION:
When performing diagnosis, observe the legal speed limit on the road.
The cancel code will be also appear when cruise control is cancelled
by the
Immobilizer (Diagnostics)
Basic Diagnostic Procedure
A: PROCEDURE
General Description
A: CAUTION
CAUTION:
Do not use electrical test devices on any airbag
system wiring harnesses and connector
circuits.
Be careful not t
SEE MORE:
Tire pressures and wear
Maintaining the correct tire pressures helps to maximize the tires’ service lives
and is essential for good running performance. Check and, if necessary, adjust the
pressure of each tire (including the spare) at least once a month (for example,
during a fuel stop) and before any long journey
Difference between screen and actual road
The distance markers show the distance for a level road when the vehicle is not
loaded. It may be different from the actual distance depending on the loading conditions
or road conditions.
When there is an upward slope at the back
1) 3 feet (1 m)
The distance on the screen looks farther tha
