Subaru Outback (BR): Wiper Blade
A: REMOVAL
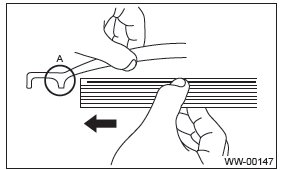
1. FRONT
Remove the blade assembly.
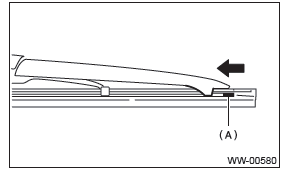
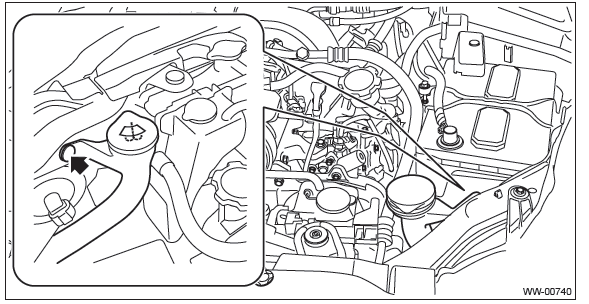
1) Lift up the locking clip (A).
2) Turn the blade assembly in the arrow direction.
3) Press the arm in.
4) Pull out the arm while lifting it, and remove the blade assembly from the arm.
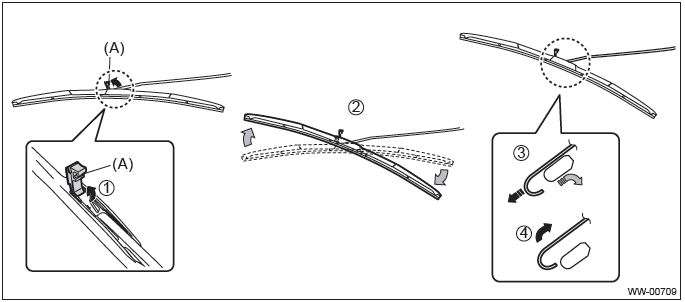
2. REAR
Turn the blade in the direction of arrow (A) and remove it from arm.
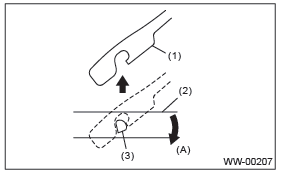
- Turn the wiper blade.
- Wiper arm
- Wiper blade
- Wiper blade attachment section
B: INSTALLATION
1) Install each part in the reverse order of removal.
2) Confirm that the clip is locked securely.
C: DISASSEMBLY
1. FRONT
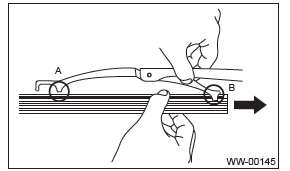
Pull side (A) of the wiper rubber stopper and remove the rubber from the blade assembly.
2. REAR
Pull the wiper rubber top slightly from stopper (A) and pull out completely.
D: ASSEMBLY
1. FRONT
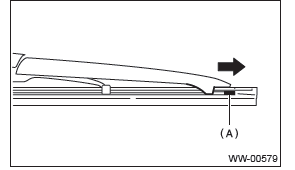
1) Insert the wiper rubber onto the blade so that the stopper is in the position shown in the figure.

2) Make sure the wiper rubber is securely fastened to the pull stopper (A).
2. REAR
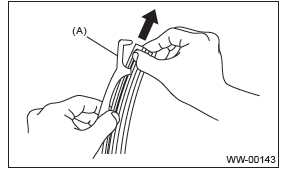
1) Insert the wiper rubber into claw (B).
2) Insert the wiper rubber until its top end protrudes approx. 20 mm (0.79 in) from stopper (D).
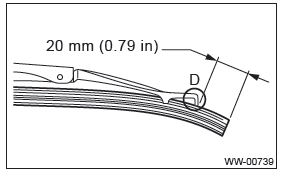
3) Insert the wiper rubber into claw (A).
E: INSPECTION
1) When the wiper does not operate properly, inspect the following item.
- Make sure that the movable part of blade assembly moves smoothly.
- Make sure the wiper rubber is not deformed or damaged.
2) If damaged, replace with a new part.
Washer Tank and Motor
A: REMOVAL
1) Open the front hood.
2) Disconnect the ground cable from battery.
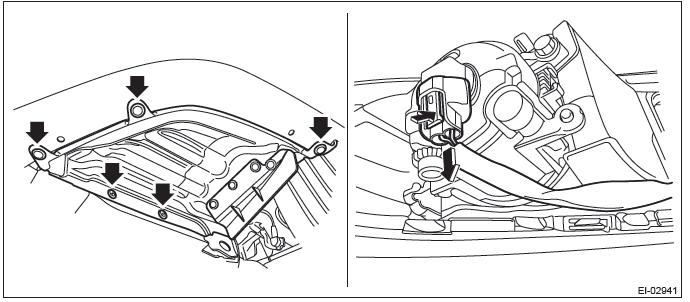
3) Remove the bumper face.
- Remove the clips, turn over the front mud guard, and disconnect the fog light connector. (Model with fog light)
- Remove the clips at the upper side of the bumper.
- Remove the clips from the fender.
- Remove the clips at the lower side of bumper.
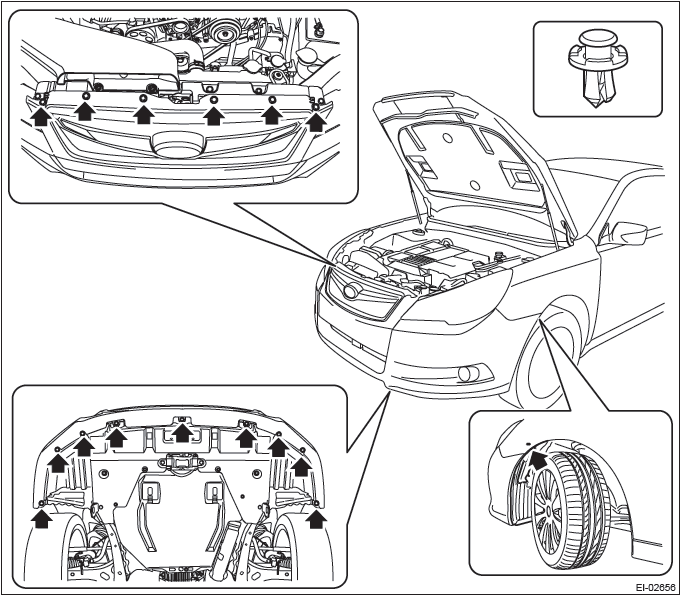
- Detach the flange section on the bumper face side from the bracket side front UPR.
CAUTION: Do not pull forcibly. It may damage the flange sections of the bumper face.
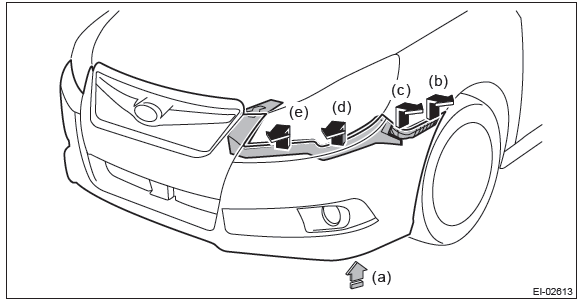
NOTE: Pushing up the lower side (a) of the fog light, remove from (b) to (e).
Detach the opposite side in the same manner.
4) Remove the washer tank assembly.
- Remove the clip of the washer tank duct.
- Prepare a container before disconnecting the washer hose and drain all washer fluid in the tank.
- Disconnect the connector from the washer motor and washer tank level sensor, and then remove the harness clip.
- Remove the bolt and nuts and remove the washer tank assembly.
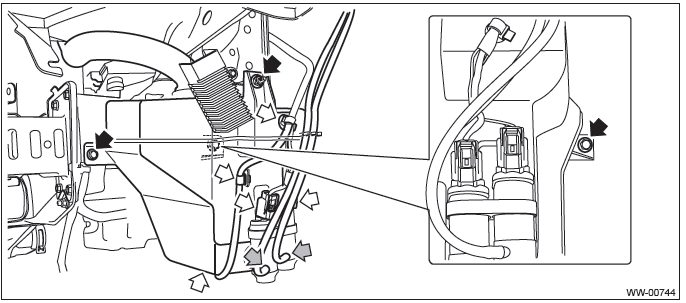
5) Remove the washer motor from the tank.
B: INSTALLATION
1) Install each part in the reverse order of removal.
CAUTION: Install the bumper face so that the under cover front end (b) comes inside the front bumper face (a).

2) Add new washer fluid.
Tightening torque:
6 N*m (0.61 kgf-m, 4.4 ft-lb)
3) Adjust the fog light beam. (Model with fog light) <Ref. to LI-41, FOG LIGHT AIMING, ADJUSTMENT, Front Fog Light Assembly.>
C: INSPECTION
Apply battery voltage to the connector terminal of the washer motor and make sure that the motor operates.

Front Wiper Arm
A: REMOVAL
CAUTION: Follow the steps below when standing up the wiper arm. Not following the steps may cause contacting of wiper arms and damages of wiper arms.
1. Stand up the driver's side wiper arm.
2. Stand up the passenger's side wiper arm.
Fold the wiper arms in the reverse order.
1) Open the front hood.
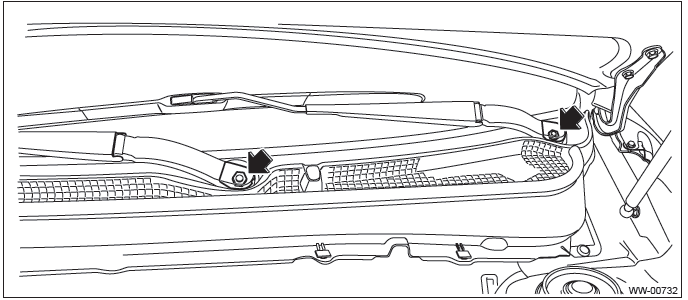
2) Remove the front wiper arm assembly.
- Remove the cap.
- Remove the nuts, and remove the front wiper arm assembly.
B: INSTALLATION
CAUTION: Follow the steps below when tilting the wiper arm. Not following the steps may cause contacting of wiper arms and damages of wiper arms.
1. Tilt the passenger's side wiper arm.
2. Tilt the driver's side wiper arm.
1) Install the wiper arm assembly.
Tightening torque: 22 N*m (2.24 kgf-m, 16.2 ft-lb)
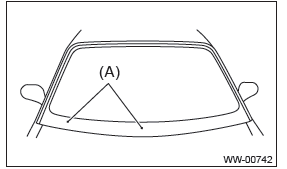
- Install the wiper arm assembly so that the wiper blade aligns with the ceramic print point mark (A) on windshield glass.
- Tighten the wiper arm assembly to specified torque and install the cap.
2) Operate the wiper to check whether the wiper blade aligns with the point mark. If not, perform installation over again.
READ NEXT:
 Front Wiper Motor and Link
A: REMOVAL
1) Disconnect the ground cable from battery.
2) Remove the front wiper arm assembly.
CAUTION:
Follow the steps below when standing up the wiper arm. Not following the steps
may cause cont
Rear Wiper Arm
A: REMOVAL
1) Pull up the wiper arm cover.
2) Remove the nut and remove the wiper arm.
B: INSTALLATION
1) Install in the reverse order of removal.
2) Operate the rear wiper once.
3) Align the blad
SEE MORE:
Roof Molding
A: REMOVAL
CAUTION:
Be careful not to damage the body.
1) Remove the roof rail assembly. (OUTBACK model) <Ref. to EI-59, REMOVAL,
Roof Rail.>
2) Turn over the front end of roof molding.
3) Using a flat tip screwdriver, slide the internal clip in the direction of
arrow.
Right: Slide toward
Heater operation
NOTE
● When the “” button or “”
button is pressed the air conditioner compressor automatically operates to quickly
defog the windshield. However the indicator on the air conditioner button will not
illuminate. At the same time, the air inlet selection is automatically set to “
