Subaru Outback (BR): Cradle
A: REMOVAL
1) Set the vehicle on a lift.
2) Adjust the tilt position of the steering column to the lowest position and lock the tilt lever.
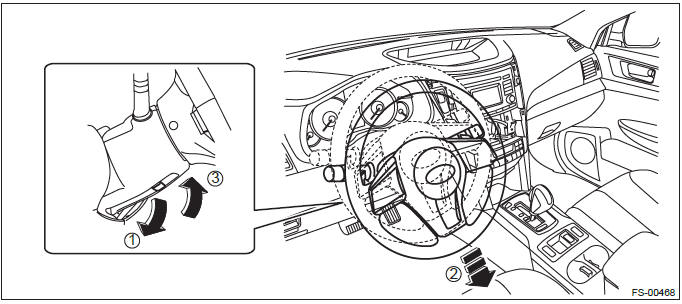
3) Prevent the steering wheel from turning using the seat belt.
4) Remove the front wheels.
5) Disconnect the ground cable from battery.
6) Remove the air intake duct. <Ref. to IN(H4SO)-9, REMOVAL, Air Intake Duct.>
7) Remove the air intake boot assembly. (non-turbo model)
- H4 model: <Ref. to IN(H4SO)-8, REMOVAL, Air Intake Boot.>
- H6 model: <Ref. to IN(H6DO)-7, REMOVAL, Air Intake Boot.>
8) Remove the intercooler and the intercooler stay. (turbo model) <Ref. to IN(H4DOTC)-17, REMOVAL, Intercooler.>
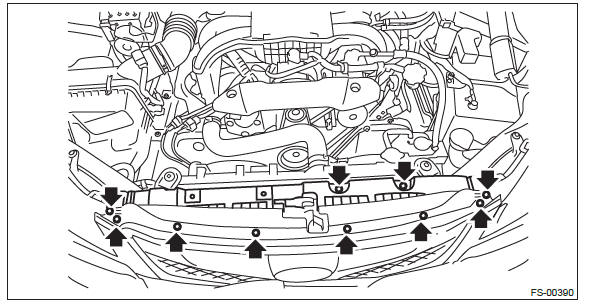
9) Remove the clips and remove the grille bracket.
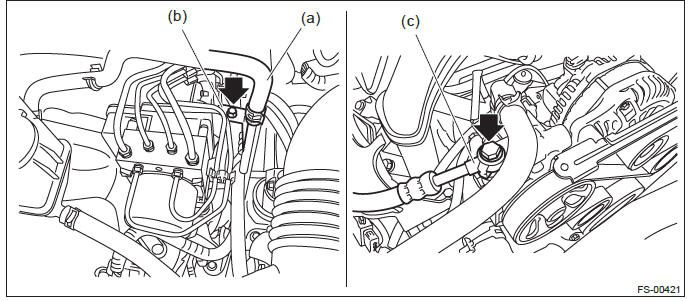
10) Remove the power steering hose bracket and power steering hose.
CAUTION: Plug the removed hose and pipe to prevent foreign matter from entering.
- Remove the hose clamp, and disconnect the power steering hose (a).
- Remove the bolt, and remove the power steering hose bracket (b).
- Remove the bolt, and disconnect the hose (c) from the power steering pump.
11) Remove the throttle body from the intake manifold.
NOTE: Do not disconnect the inlet and outlet hoses of engine coolant.
12) Replace the engine hanger installed on the engine with the SUBARU genuine engine hanger (H4 non-turbo model) or ST (H6 model).
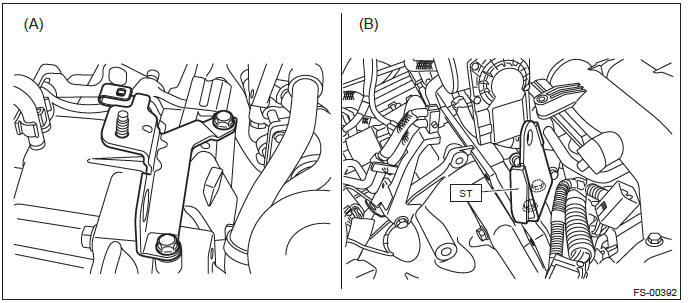
- H4 non-turbo model (SUBARU genuine part): HANGER CP ENGINE RR (10004AA180)
- H6 model (ST): HANGER (18360AA020)
Tightening torque: 16 N*m (1.63 kgf-m, 11.8 ft-lb)
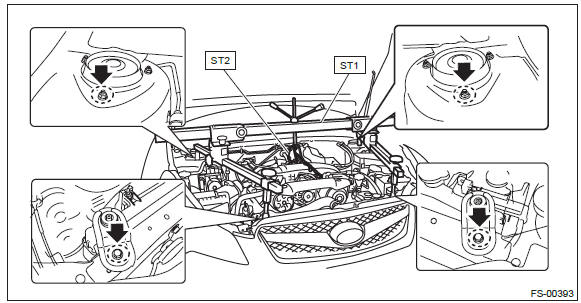
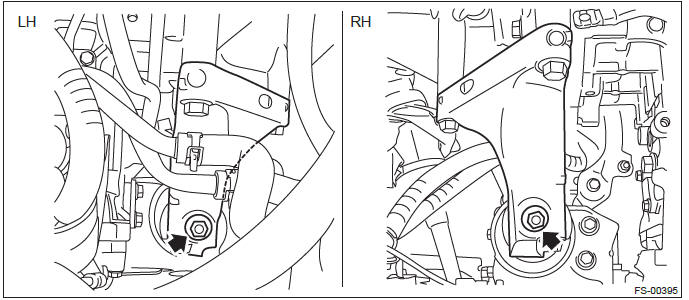
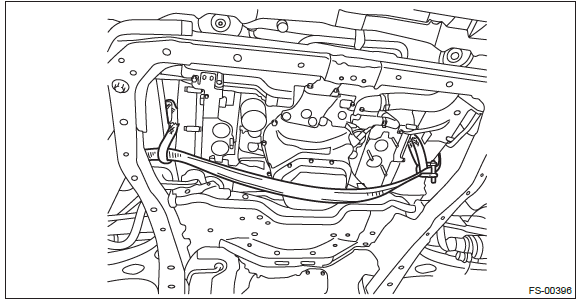
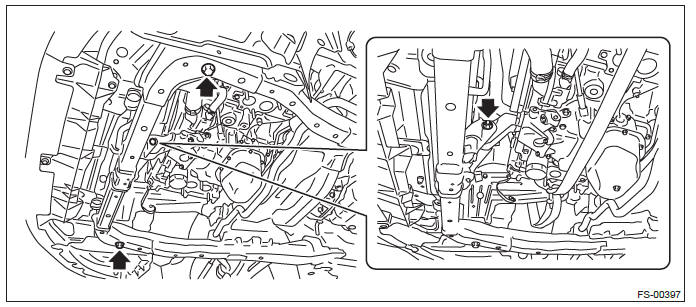
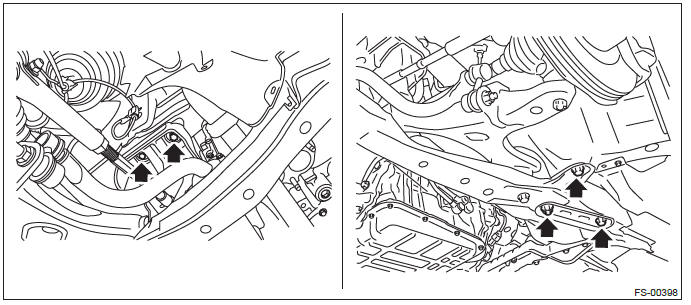
13) Suspend the engine using ST, chain sling, and shackle.
- Set the ST on the vehicle.
CAUTION: Set the arms of ST (ENGINE HANGER) at the locations shown in the figure.
PREPARATION TOOL:
ST1: ENGINE HANGER (99099AJ000)
ST2: CHAIN BALANCER (99099AJ010)
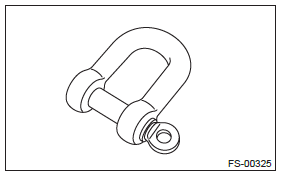
- Attach the shackle to the both ends of chain sling.
- Pass the chain sling through the CHAIN BALANCER and secure the both ends to the hooks on the engine.
CAUTION:
- Set the chain sling so that it does not contact the engine parts.
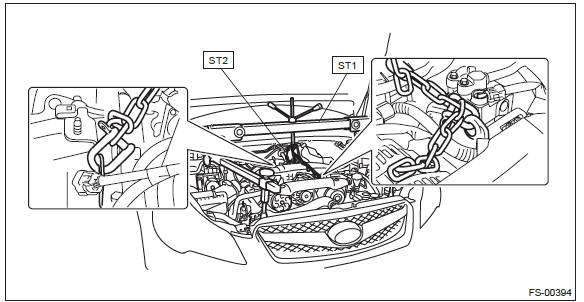
- Be sure to use chain slings that satisfy the following requirements:
- Length: 0.8 - 1 m (2.6 - 3.3 ft)
- Load capacity: 1.2 t (2646 lb) or more
- Wire diameter: 6 mm (0.24 in) or 6.3 mm (0.25 in)
- Internal width: 8.5 mm (0.33 in) or more
- External width: 23.5 mm (0.93 in) or less
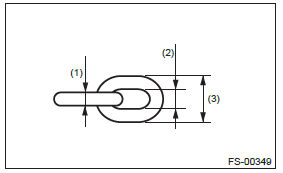
- Wire diameter: 6 mm (0.24 in) or 6.3 mm (0.25 in)
- Internal width: 8.5 mm (0.33 in) or more
- External width: 23.5 mm (0.93 in) or less
- Use a shackle with the load capacity of 250 kg (551 lb) or more.
14) Remove the nuts connecting the main mount and the transmission mounting bracket.
15) Remove the universal joint. <Ref. to PS-21, REMOVAL, Universal Joint.>
CAUTION: To prevent damage to the universal joint and error of handling force, make sure to remove the universal joint.
16) Remove the front exhaust pipe.
- H4 turbo model: <Ref. to EX(H4DOTC)-5, REMOVAL, Front Exhaust Pipe.>
- H4 non-turbo model: <Ref. to EX(H4SO)-5, REMOVAL, Front Exhaust Pipe.>
- H6 model: <Ref. to EX(H6DO)-5, REMOVAL, Front Exhaust Pipe.>
17) Remove the bolt, and disconnect the left and right front arms.
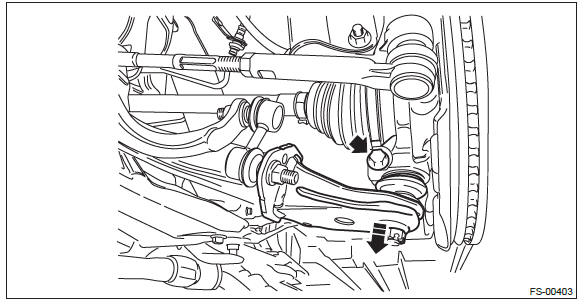
18) Disconnect the left and right tie-rod ends.
- Pull out the cotter pin.
- Remove the castle nut.
- Extract the tie-rod end from the front axle housing.
PREPARATION TOOL: Tie-rod end puller
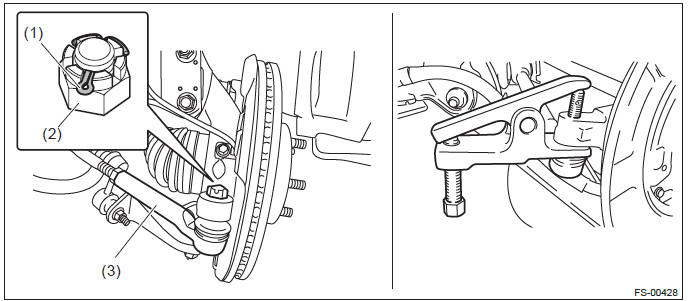
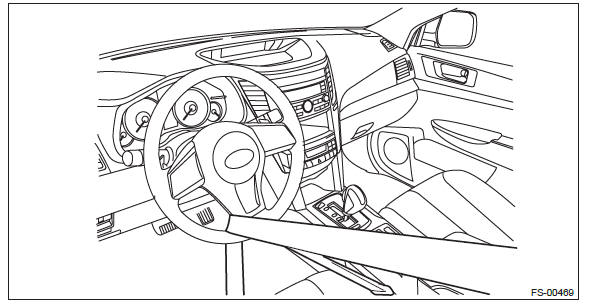
19) Attach the sling belt so that it wraps around the both frames using the shackle.
CAUTION:
- Be sure to attach the sling belt to ensure safety in operation.
- Use a sling belt with the length of 2 m (6.6 ft), the width of 35 - 40 mm (1.38 - 1.57 in) and the load capacity of 1 t (2205 lb) or more.
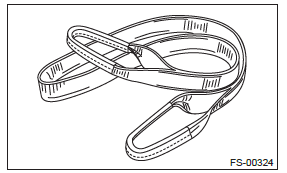
- Use a shackle with the load capacity of 0.5 t (1103 lb) or more.

20) Remove the cradle from the vehicle.
CAUTION: The cradle is heavy. Remove it carefully by paying attention to the balance.
- Support the cradle with the transmission jack.
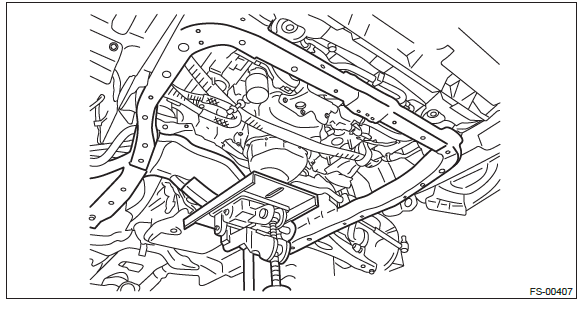
- Remove the bolt from the front cushion rubber, and remove the bolt securing the front of the cradle.
- Remove the left and right bolts and nuts.
- Remove the cradle from the vehicle.
21) To remove the stud bolt, use the ST.
CAUTION: Do not remove the stud bolt unless necessary. Always replace the parts with new parts when removed.
PREPARATION TOOL: ST: STUD BOLT SOCKET (20299AG020)
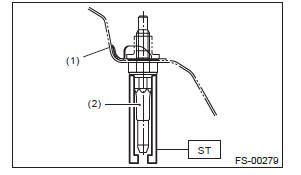
- Vehicle body
- Stud bolt
B: INSTALLATION
1) Install each part in the reverse order of removal.
CAUTION:
- Use a new bolt and self-locking nut. For parts which are not
reusable, refer to "COMPONENT".
<Ref. to FS-3, COMPONENT, General Description.>
- Perform installation of the universal joint when the tilt position of the steering column is at the lowest position.
- Tighten the bolts of the universal joint in the order of gearbox side and column shaft side.
- Be sure to follow the tightening order and tightening torque of universal joint to avoid the steering effort from becoming heavy.
NOTE: Replace the gasket of the throttle body with a new gasket.
Tightening torque:
Front suspension-related parts: <Ref. to FS-3, COMPONENT, General
Description.>
Steering gearbox-related parts: <Ref. to PS-6, STEERING GEARBOX, COMPONENT,
General Description.>
2) Inspect the wheel alignment and adjust if necessary.
- Inspection: <Ref. to FS-9, INSPECTION, Wheel Alignment.>
- Adjustment: <Ref. to FS-14, ADJUSTMENT, Wheel Alignment.>
READ NEXT:
 Front Stabilizer
A: REMOVAL
1) Lift up the vehicle, and then remove the left and right front wheels.
2) Remove the front under cover. <Ref. to EI-35, REMOVAL, Front Under Cover.>
3) Remove the center exhaust p
Front Ball Joint
A: REMOVAL
1) Lift up the vehicle, and then remove the front wheels.
2) Remove the left and right stabilizer brackets.
3) Remove the ball joint.
Extract the cotter pin (a) from the ball stud.
Rem
Front Arm
A: REMOVAL
1) Lift up the vehicle, and then remove the front wheels.
2) Remove the front arm.
Remove the nut and disconnect the front stabilizer link.
Remove the bolt, and then remove the ball joi
SEE MORE:
Registering the phonebook data
1. Input the phone number to be registered. Refer to “Inputting the phone number”
F5-36.
2. Say the name to be registered.
3. “Confirm” is displayed.
4. Press the “TUNE/TRACK/CH” dial.
5. “Stored” is displayed.
6. Select “Speed Dial” by operating the “TUNE/TRACK/CH” di
Woofer
A: REMOVAL
1. SEDAN MODEL
NOTE:
harman/kardon audio system only.
1) Disconnect the ground cable from battery.
2) Remove the rear shelf trim. <Ref. to EI-120, REMOVAL, Rear Shelf Trim.>
3) Remove the woofer.
Remove the screws.
Disconnect the harness connector and remove the woofer assembly
