Subaru Outback (BR): Flywheel
A: REMOVAL
1) Remove the transmission assembly. <Ref. to 6MT-25, REMOVAL, Manual Transmission Assembly.>
2) Remove the clutch cover and clutch disc. <Ref. to CL-11, REMOVAL, Clutch Disc and Cover.>
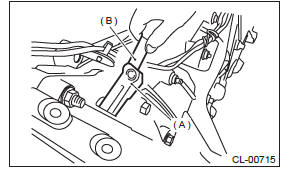
3) Using the ST, remove the flywheel.
ST 498497100 CRANKSHAFT STOPPER
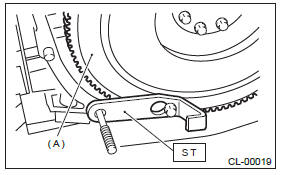
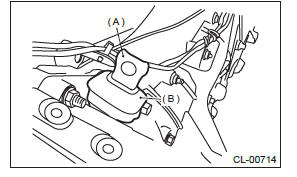
- Flywheel
B: INSTALLATION
1) Temporarily tighten the flywheel, and attach the ST.
ST 498497100 CRANKSHAFT STOPPER

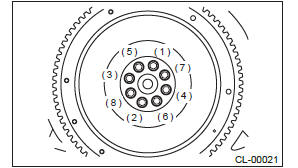
2) Tighten the flywheel mounting bolts to the specified torque.
NOTE: Tighten the flywheel attachment bolts gradually.
Each bolt should be tightened to the specified torque in crisscross order.
Tightening torque: 75 N*m (7.6 kgf-m, 55.3 ft-lb)
3) Install the clutch disc and cover. <Ref. to CL-11, INSTALLATION, Clutch Disc and Cover.>
4) Install the transmission assembly. <Ref. to 6MT- 29, INSTALLATION, Manual Transmission Assembly.>
C: INSPECTION
CAUTION: Because the center bearing is grease-sealed and is a non-lubrication type, do not wash with gasoline or solvents.
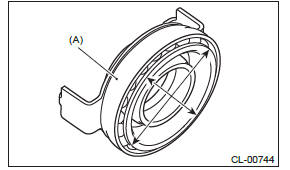
1) If there is damage or defectiveness in the facing sliding surface or ring gear, replace the flywheel.
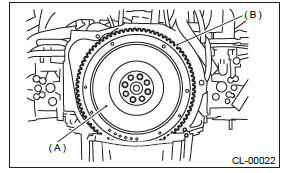
- Flywheel
- Ring gear
2) Smoothness of rotation
Rotate the ball bearing while applying pressure in the thrust direction.
3) If noise or excessive play is noted, replace the flywheel.
Release Bearing and Lever
A: REMOVAL
1) Remove the transmission assembly from vehicle body. <Ref. to 6MT-25, REMOVAL, Manual Transmission Assembly.>
2) Remove the two clips from the clutch release lever. (non-turbo model)
CAUTION: Be careful not to deform the clips.
3) Remove the release bearing. (non-turbo model)
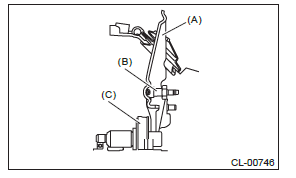
4) Remove the dust cover.
- Release lever
- Dust cover
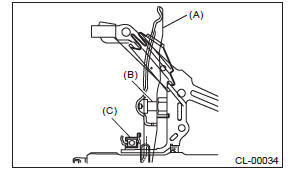
5) Remove the lever spring from the pivot with a screwdriver by accessing it through the clutch housing release lever hole. Then remove the release lever. (non-turbo model)
- Release lever
- Screwdriver
6) Remove the lever spring from the pivot with a screwdriver by accessing it through the clutch housing release lever hole. Then remove the release lever and release bearing as a unit. (turbo model)

- Release lever
- Screwdriver
B: INSTALLATION
NOTE: Apply the specified grease to lubricate to the following points before installation.
- Contact surface of lever and pivot
- Contact surface of lever and bearing
- Transmission main shaft spline
Grease
NICHIMOLY N-130 or equivalent
1) Temporarily assemble the release bearing to the release lever. (turbo model)
2) While pushing the release lever to the pivot and twisting it to both sides, fit the lever spring onto the raised portion of the pivot. (non-turbo model)
NOTE: Observing from the main case hole, check that the lever spring is installed securely.
3) Install the release bearing by inserting the release lever into the clutch housing release lever hole. Then, fit the lever spring onto the raised portion of the pivot by pushing the release lever to the pivot and twisting it to both sides. (turbo model)
4) Install the release bearing and fasten it with two clips. (non-turbo model)
5) Install the dust cover.
- Release lever
- Dust cover
6) Check the bearing for smooth movement by operating the release lever.
7) Apply grease to the contact point of the release lever and operating cylinder.
Grease
NICHIMOLY N-130 or equivalent
8) Install the transmission assembly. <Ref. to 6MT- 29, INSTALLATION, Manual Transmission Assembly.>
C: INSPECTION
1. RELEASE BEARING
CAUTION: Because this bearing is grease-sealed and is a non-lubrication type, do not wash with gasoline or solvents when servicing the clutch.
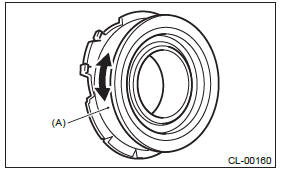
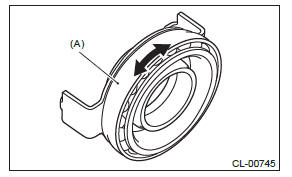
1) Check the bearing for smooth movement by applying force to the bearing in the radial direction.
Radial direction stroke: 1.6 mm (0.063 in)
- Non-turbo model

- Bearing case
- Turbo model
- Bearing case
2) While applying force to the bearing in the rotational direction, check the bearing for smooth rotation.
- Non-turbo model
- Bearing case
- Turbo model
- Bearing case
3) Check for wear or damage at the bearing case surface in contact with the lever.
2. RELEASE LEVER
Check the pivot portion of the lever and the contact area with the release bearing case for wear.
- Non-turbo model
- Release lever
- Pivot
- Release bearing
- Turbo model
- Release lever
- Pivot
- Release bearing
READ NEXT:
 Operating Cylinder
A: REMOVAL
NOTE:
The illustration below is suitable for every model.
Perform the same procedures for the other models.
1) Remove the collector cover. (turbo model)
2) Remove the air intake boot ass
Clutch Pipe and Hose
A: REMOVAL
1) Disconnect the ground cable from battery.
2) Remove the collector cover. (turbo model)
3) Remove the air intake boot assembly. (non-turbo
model) <Ref. to IN(H4SO)-8, REMOVAL, Air Int
Clutch Fluid
A: INSPECTION
1) Park the vehicle on a level surface.
2) Check the clutch fluid level using the scale on
the outside of the reservoir tank. If the clutch fluid
level is below "MIN", fill the clutch f
SEE MORE:
Windshield wiper blade rubber
1) Support
1. Grasp the locked end of the blade rubber assembly and pull it firmly until
the stoppers on the rubber are free of the support.
1) Metal spines
2. If the new blade rubber is not provided with two metal spines, remove the
metal spines from the old blade rubber and install them
Photosensors
The mirror has a photosensor attached on both the front and back sides. During
nighttime driving, these sensors detect distracting glare from vehicle headlights
behind you and automatically dim the mirror to eliminate glare and preserve your
vision. For this reason, use care not to cover the
