Subaru Outback (BR): Front Axle
A: REMOVAL
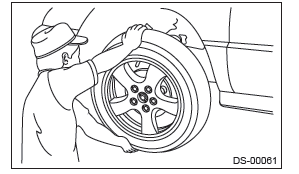
1) Lift up the vehicle, and then remove the front wheels.
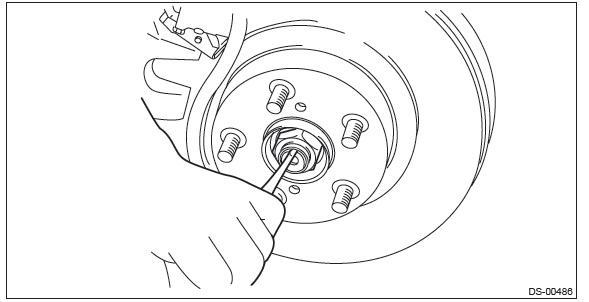
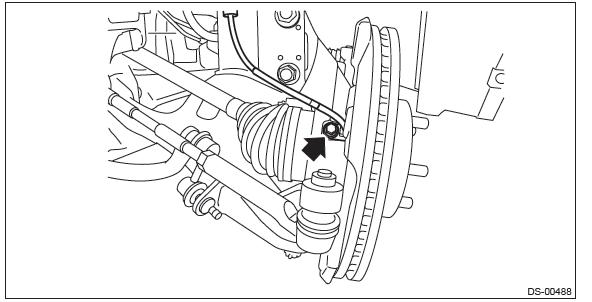
2) Remove the axle nut.
CAUTION: Do not loosen the axle nut while the front axle is loaded. Doing so may damage the hub bearing.
- Lift the crimped section of axle nut.
- Remove the axle nut using a socket wrench while depressing the brake pedal.
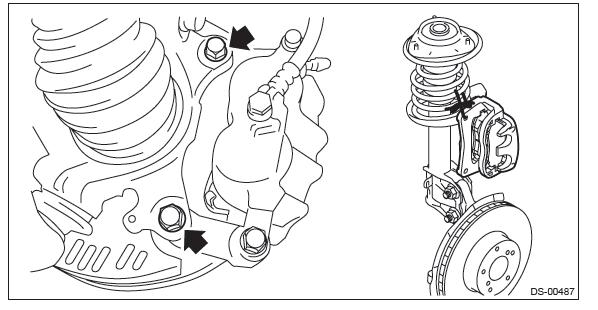
3) Remove the front disc brake caliper from the front axle housing.
- Remove the mounting bolts, and then remove the front disc brake caliper.
- Prepare wiring harnesses etc. to be discarded, and suspend the front disc brake caliper from the shock absorber with the harnesses.
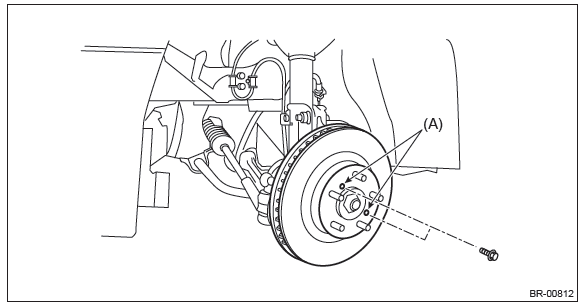
4) Remove the disc rotor.
NOTE: When the disc rotor is difficult to be removed from the front hub unit bearing, screw in 8 mm (0.31 in) bolt to the threaded part of the disc rotor (A), and remove the disc rotor.
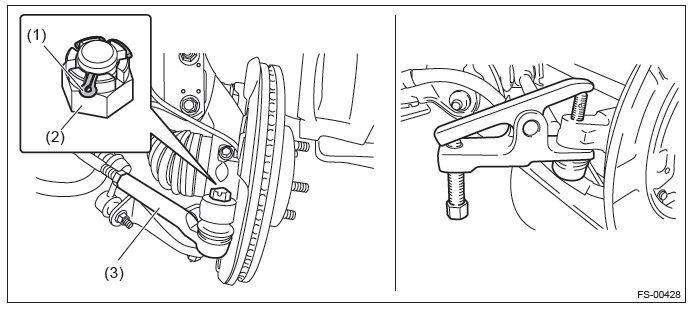
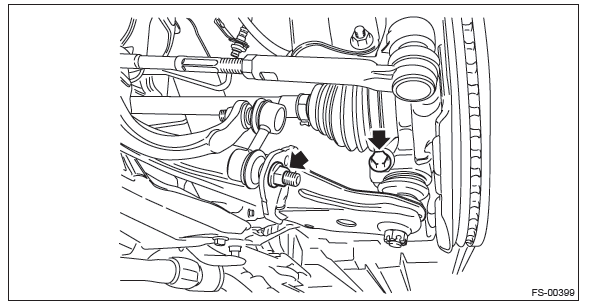
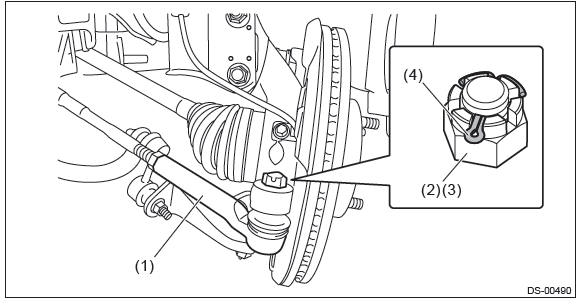
5) Disconnect the tie-rod end.
- Pull out the cotter pin.
- Remove the castle nut.
- Extract the tie-rod end from the front axle housing.
PREPARATION TOOL: Tie-rod end puller
6) Remove the bolts, and remove the front ABS wheel speed sensor.
7) Remove the stabilizer link and ball joint.
8) Using a bar, remove the front drive shaft from transmission.
CAUTION: Be careful not to allow the bar to damage holder area.
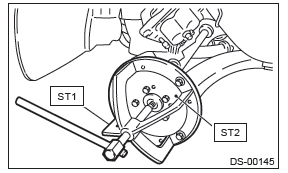
9) Remove the front drive shaft assembly from the hub. If it is hard to remove, use the ST.
PREPARATION TOOL:
ST1: AXLE SHAFT PULLER (926470000)
ST2: AXLE SHAFT PULLER PLATE (28099PA110)
10) Place an alignment marks on the camber adjusting bolt and front axle housing.
11) Remove two bolts to remove the front axle housing from the strut.
B: INSTALLATION
1) Install the front drive shaft. <Ref. to DS-49, INSTALLATION, Front Drive Shaft.>
2) Install the ball joint to the front axle housing.
CAUTION: Before tightening, make sure the lower side of front axle housing and stepped section of ball joint are in contact.
- Lower side of front axle housing
- Raised section of ball joint
- Front axle housing
- Ball joint
Tightening torque: 50 N*m (5.1 kgf-m, 36.9 ft-lb)
3) Install the front ABS wheel speed sensor.
Tightening torque: 7.5 N*m (0.76 kgf-m, 5.5 ft-lb)
4) Install the disc rotor.
5) Install the disc brake.
Tightening torque: 120 N*m (12.24 kgf-m, 88.5 ft-lb)
6) Install the stabilizer link.
Tightening torque: 60 N*m (6.12 kgf-m, 44.3 ft-lb)
7) Connect the tie-rod ends.
- Connect the tie-rod ends from the front axle housing.
- Tighten the castle nuts to the specified torque.
CAUTION: When connecting the tie-rod, do not hit the cap at bottom of tie-rod end with a hammer.
Tightening torque: 27 N*m (2.75 kgf-m, 19.9 ft-lb)
- Tighten the castle nut within the range of 60º so that the cotter pin hole and cutout portion of the castle nut are aligned.
- Insert the cotter pin, and bend the tip of the pin to fix it.
8) While depressing the brake pedal, tighten a new axle nut to the specified torque and lock it securely.
CAUTION: Do not load the front axle before tightening the axle nut. Doing so may damage the hub bearing.
Tightening torque: 220 N*m (22.43 kgf-m, 162.3 ft-lb)
9) Inspect the lean of axis direction using a dial gauge. Replace the bearing if the load range exceeds the limitation.
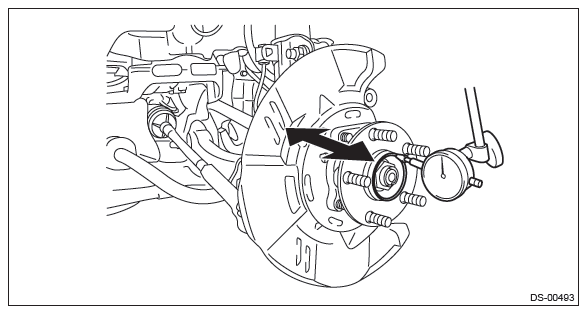
Service limit: Maximum: 0.05 mm (0.0020 in)
10) After tightening the axle nut, lock it securely.
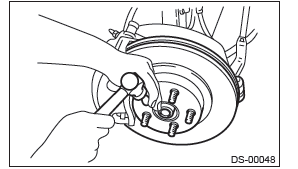
11) Install the wheel.
Tightening torque: 120 N*m (12.24 kgf-m, 88.5 ft-lb)
12) Moving the front tire up and down by hand, check there is no play in bearing, and check the wheel rotates smoothly.
CAUTION: If there is any fault in the bearing, replace hub unit bearing.
13) Inspect the wheel alignment and adjust if necessary.
- Inspection: <Ref. to FS-9, INSPECTION, Wheel Alignment.>
- Adjustment: <Ref. to FS-14, ADJUSTMENT, Wheel Alignment.>
C: DISASSEMBLY
1) Remove bolt from the front axle housing, and remove the front hub unit bearing and disc brake cover.

- Front axle housing
- Disc brake cover
- Front hub unit bearing
CAUTION:
- Do not get closer the tool which charged magnetism to magnetic encoder.
- Be careful not to damage the magnetic encoder.
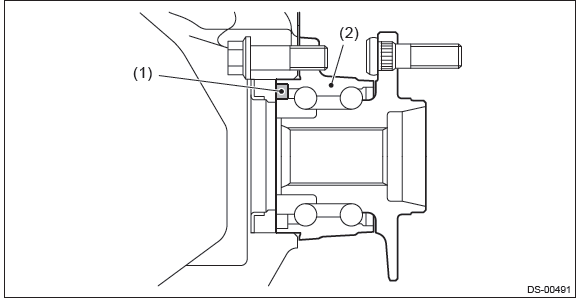
- Magnetic encoder
- Front hub unit bearing
2) Disassemble the front hub unit bearing. <Ref. to DS-28, DISASSEMBLY, Front Hub Unit Bearing.>
D: ASSEMBLY
1) Assemble the front hub unit bearing. <Ref. to DS-28, ASSEMBLY, Front Hub Unit Bearing.>
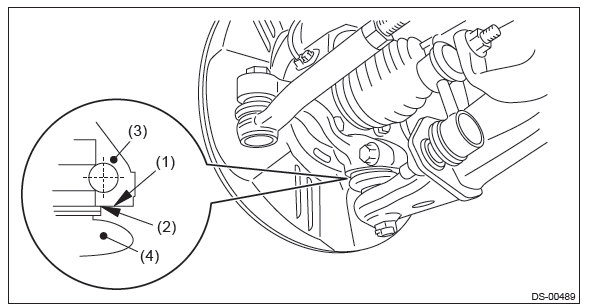
2) Install the front axle housing (a) and front hub unit bearing (c) to the disc brake cover (b) as shown in the figure, and tighten the bolt.
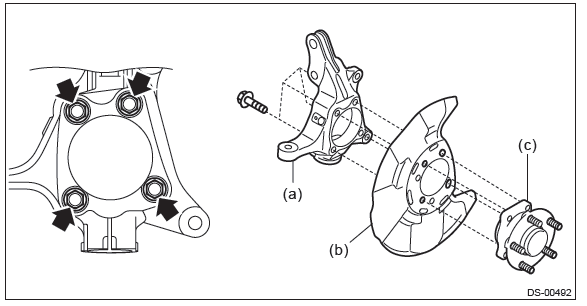
Tightening torque: 65 N*m (6.63 kgf-m, 47.9 ft-lb)
CAUTION:
- Do not get closer the tool which charged magnetism to magnetic encoder.
- Be careful not to damage the magnetic encoder.

- Magnetic encoder
- Front hub unit bearing
READ NEXT:
 Front Hub Unit Bearing
A: REMOVAL
1) Lift up the vehicle, and then remove the front wheels.
2) Remove the axle nut.
CAUTION:
Do not loosen the axle nut while the front axle is loaded. Doing so may damage
the hub bearing.
Rear Axle
A: REMOVAL
1) Lift up the vehicle, and then remove the rear wheels.
2) Remove the axle nut.
CAUTION:
Do not loosen the axle nut while the rear axle is loaded. Doing so may damage
the hub bearing.
Rear Hub Unit Bearing
A: REMOVAL
1) Lift up the vehicle, and then remove the rear wheels.
2) Remove the axle nut.
CAUTION:
Do not loosen the axle nut while the rear axle is loaded. Doing so may damage
the hub bearing.
SEE MORE:
Air Conditioning System
A: WIRING DIAGRAM
Refer to "Air Conditioning System" in the wiring diagram. <Ref. to WI-53,
WIRING DIAGRAM, Air Conditioning
System.>
B: ELECTRICAL SPECIFICATION
Refer to "Auto A/C Control Module I/O Signal" of "HVAC SYSTEM (DIAGNOSTICS)"
section. <Ref. to AC(diag)-
6, ELECTRICAL SPECIFIC
Remote engine start system (dealer option)
WARNING
● Do not remote start a vehicle in an enclosed environment (e.g. closed garage).
Prolonged operation of a motor vehicle in an enclosed environment can cause a harmful
build-up of Carbon Monoxide. Carbon Monoxide is harmful to your health. Exposure
to high levels of Carbon Monoxi
