Subaru Outback (BR): Front Brake Pad
A: REMOVAL
1) Lift up the vehicle, and then remove the front wheels.
2) Remove the front brake pad.
- Remove the caliper bolt.
- Raise the caliper body and support it.
NOTE: Do not disconnect the brake hose from the caliper body.
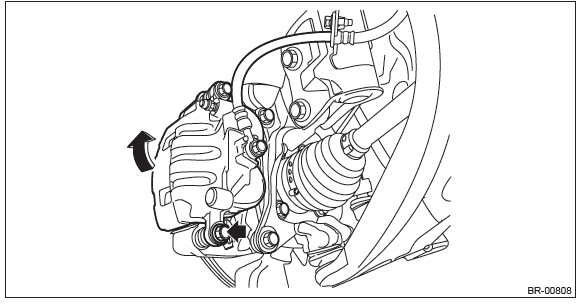
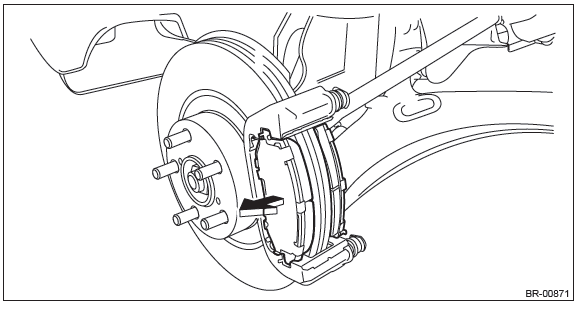
- Remove the brake pad from support.
B: INSTALLATION
1. 16-INCH TYPE
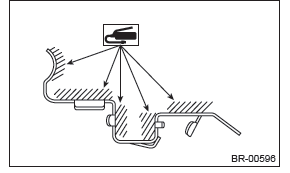
NOTE: Before installation, remove mud and foreign matter from the caliper body and support.
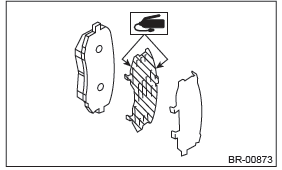
1) Before installation, check the brake pad. <Ref. to BR-17, INSPECTION, Front Brake Pad.>
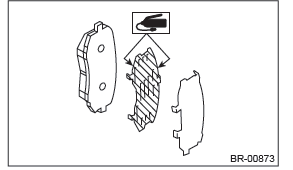
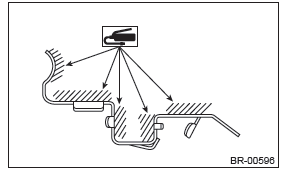
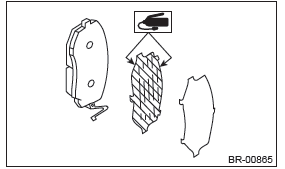
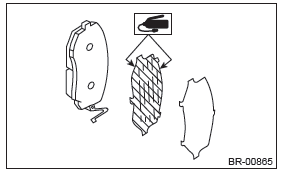
2) Apply a thin coat of Molykote M7439 (Part No. 003602001) or grease contained in the pad kit to the pad clip.
3) Apply a thin coat of Molykote AS880N (Part No. K0777YA010) or grease contained in the pad kit to both surfaces of the pad and inner shim.
4) Install the brake pad to the support.
5) Install the caliper body to the support.
Tightening torque: Caliper bolt: 27 N*m (2.75 kgf-m, 19.9 ft-lb)
6) Install the front wheels.
2. 17-INCH TYPE
NOTE: Before installation, remove mud and foreign matter from the caliper body and support.
1) Before installation, check the brake pad. <Ref. to BR-17, INSPECTION, Front Brake Pad.>
2) Apply a thin coat of Molykote M7439 (Part No. 003602001) or grease contained in the pad kit to the pad clip.
3) Apply a thin coat of Molykote AS880N (Part No. K0777YA010) or grease contained in the pad kit to both surfaces of the pad and inner shim.
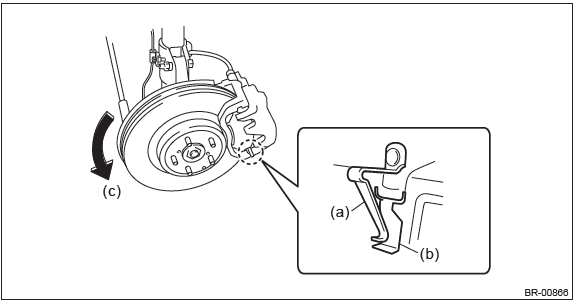
4) Install the brake pad to the support.
CAUTION:
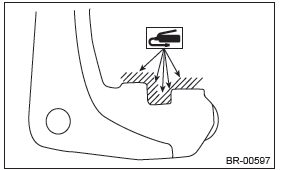
- Be sure to install so that the pad return spring faces the input side of the direction of brake rotor rotation, as shown in the figure.
- Correctly install the pad return spring to the supporting surface of the pad clip as shown in the figure.
- If the pad return spring is deformed or damaged, replace the brake pad.

- Pad return spring
- Supporting surface of pad clip
- Direction of brake rotor rotation
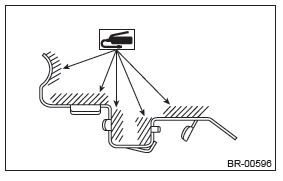
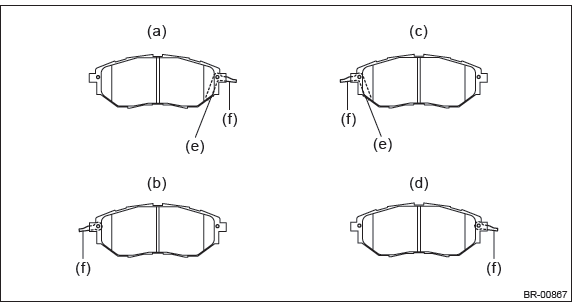
NOTE: Install the brake pad indicator in proper direction.
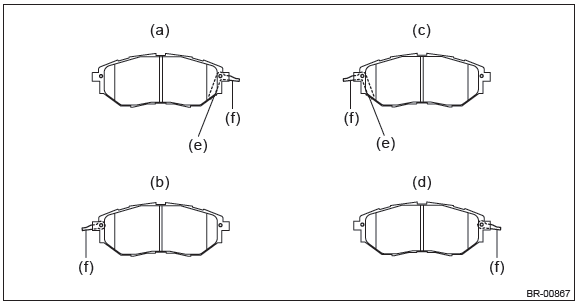
- LH - IN
- LH - OUT
- RH - IN
- RH - OUT
- Pad indicator
- Pad return spring
5) Install the caliper body to the support.
Tightening torque: Caliper bolt: 27 N*m (2.75 kgf-m, 19.9 ft-lb)
6) Install the front wheels.
C: INSPECTION
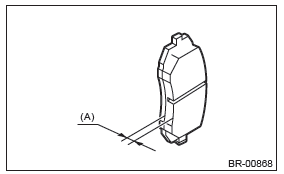
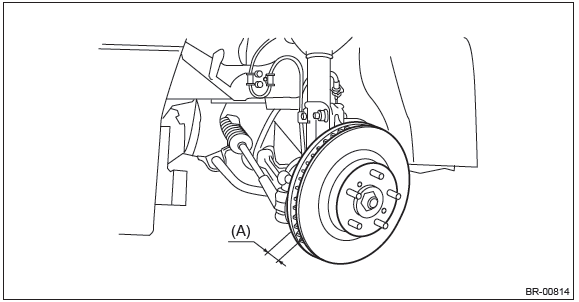
1) Check the pad thickness (A).
NOTE:
- Always replace the pads of both wheels and both sides as a set.
- Replace pad clips if they are twisted or worn.
- Replace the pad if there is oil or grease on it.

2) If the wear limit is exceeded in the inspection, replace the brake pad.
Front Disc Rotor
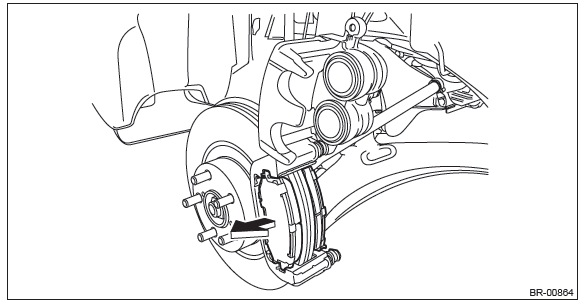
A: REMOVAL
1) Lift up the vehicle, and then remove the front wheels.
2) Remove the caliper body assembly from the front axle housing.
- Remove the bolt from the brake hose bracket.
- Remove the mounting bolt, and remove the caliper body assembly.
- Prepare wiring harnesses etc. to be discarded, and suspend the caliper body assembly from the shock absorber with the harnesses.
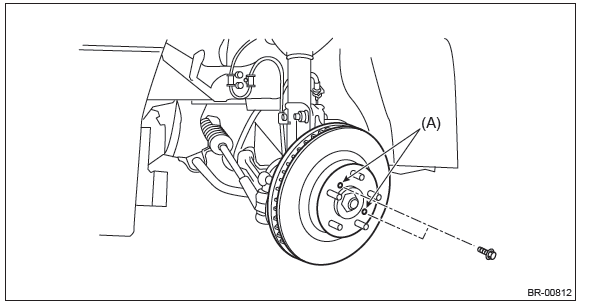
3) Remove the front disc rotor.
NOTE: When the disc rotor is difficult to be removed from the front hub unit bearing, screw in 8 mm (0.31 in) bolt to the threaded part of the disc rotor (A), and remove the disc rotor.
B: INSTALLATION
NOTE: Before installation, remove mud and foreign matter from the caliper body assembly.
1) Before installation, check the front disc rotor. <Ref. to BR-19, INSPECTION, Front Disc Rotor.>
2) Install each part in the reverse order of removal.
Tightening torque:
Brake hose bracket: 33 N*m (3.36 kgf-m, 24.3 ft-lb)
Mounting bolt: 120 N*m (12.24 kgf-m, 88.5 ft-lb)
C: INSPECTION
1. DISC ROTOR RUNOUT CHECK
1) Check the front hub unit bearing for free play and runout before the inspection of disc rotor runout limit.
<Ref. to DS-29, INSPECTION, Front Hub Unit Bearing.>
2) Tighten the wheel nuts to secure disc rotor.
3) Set a dial gauge 10 mm (0.39 in) inward from the disc rotor outer circumference, and check the disc rotor runout while rotating the disc rotor.
Disc rotor runout limit: 0.05 mm (0.0020 in)
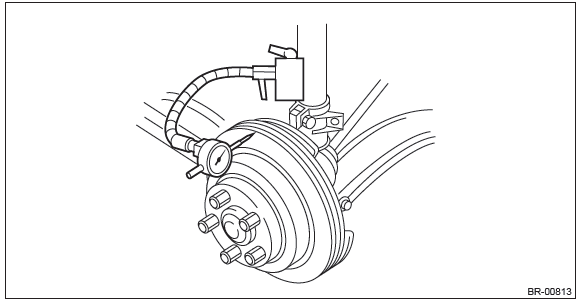
4) If the runout limit is exceeded in the inspection, replace the disc rotor.
2. DISC ROTOR THICKNESS CHECK
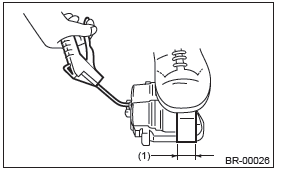
1) Set a micrometer 10 mm (0.39 in) inward from the disc rotor outer perimeter, and then measure the disc rotor thickness (A).

2) If the wear limit is exceeded in the inspection, replace the disc rotor.
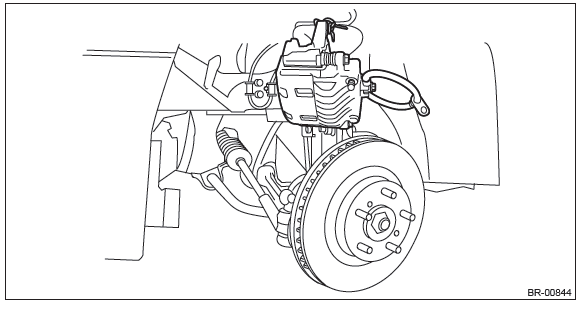
Front Disc Brake Assembly
A: REMOVAL
CAUTION: Do not allow brake fluid to come in contact with the painted surface of the vehicle body. If it does, wash off with water and wipe away completely.
1) Lift up the vehicle, and then remove the front wheels.
2) Remove the caliper body.
- Remove the union bolt and caliper bolt, and remove the caliper body from the support.
3) Remove the support.
NOTE: Remove the support only when replacing the disc rotor or support. It is not necessary to remove it when servicing the caliper body.
- Remove the brake pad from support.
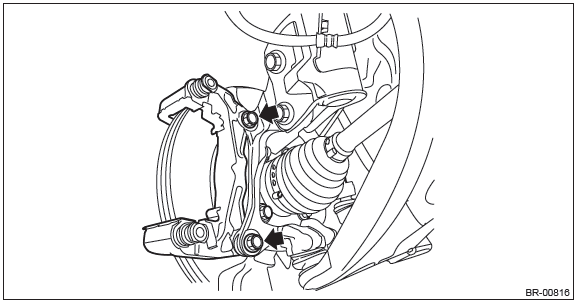
- Remove the mounting bolts, and then remove the support from the front axle housing.
B: INSTALLATION
1. 16-INCH TYPE
NOTE: Before installation, remove mud and foreign matter from the caliper body and support.
1) Before installation, check each part. <Ref. to BR-28, INSPECTION, Front Disc Brake Assembly.>
2) Apply a thin coat of Molykote M7439 (Part No. 003602001) to the support.
3) Install the support to the front axle housing.
Tightening torque: Mounting bolt: 120 N*m (12.24 kgf-m, 88.5 ft-lb)
4) Apply a thin coat of Molykote M7439 (Part No. 003602001) or grease contained in the pad kit to the pad clip.
5) Apply a thin coat of Molykote AS880N (Part No. K0777YA010) or grease contained in the pad kit to both surfaces of the pad and inner shim.
6) Install the brake pad to the support.
7) Install the caliper body to the support.
Tightening torque: Caliper bolt: 27 N*m (2.75 kgf-m, 19.9 ft-lb)
8) Connect the brake hose using a new brake hose gasket.
Tightening torque: Union bolt: 18 N*m (1.84 kgf-m, 13.3 ft-lb)
9) Bleed air from the brake system. <Ref. to BR-54, BRAKE LINE, PROCEDURE, Air Bleeding.>
10) Install the front wheels.
2. 17-INCH TYPE
NOTE: Before installation, remove mud and foreign matter from the caliper body and support.
1) Before installation, check each part. <Ref. to BR-28, INSPECTION, Front Disc Brake Assembly.>
2) Apply a thin coat of Molykote M7439 (Part No. 003602001) to the support.
3) Install the support to the front axle housing.
Tightening torque: Mounting bolt: 120 N*m (12.24 kgf-m, 88.5 ft-lb)
4) Apply a thin coat of Molykote M7439 (Part No. 003602001) or grease contained in the pad kit to the pad clip.
5) Apply a thin coat of Molykote AS880N (Part No. K0777YA010) or grease contained in the pad kit to both surfaces of the pad and inner shim.
6) Install the brake pad to the support.
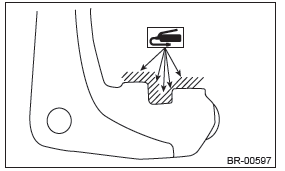
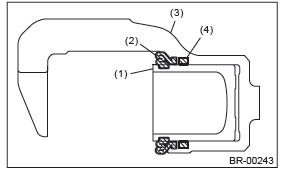
CAUTION:
- Be sure to install so that the pad return spring faces the input side of the direction of brake rotor rotation, as shown in the figure.
- Correctly install the pad return spring to the supporting surface of the pad clip as shown in the figure.
- If the pad return spring is deformed or damaged, replace the brake pad.
- Pad return spring
- Supporting surface of pad clip
- Direction of brake rotor rotation
NOTE: Install the brake pad indicator in proper direction.
- LH - IN
- LH - OUT
- RH - IN
- RH - OUT
- Pad indicator
- Pad return spring
7) Install the caliper body to the support.
Tightening torque: Caliper bolt: 27 N*m (2.75 kgf-m, 19.9 ft-lb)
8) Connect the brake hose using a new brake hose gasket.
Tightening torque: Union bolt: 18 N*m (1.84 kgf-m, 13.3 ft-lb)
9) Bleed air from the brake system. <Ref. to BR-54, BRAKE LINE, PROCEDURE, Air Bleeding.>
10) Install the front wheels.
C: DISASSEMBLY
CAUTION: Be careful not to allow foreign matter to enter the brake hose connector.
1) Remove mud and foreign matter from the caliper body.
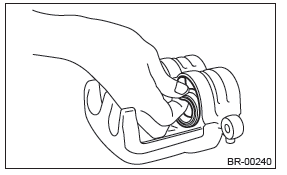
2) Remove the piston.
- Place a wooden block in the caliper body as shown in the figure to prevent the piston from jumping out and being damaged.
- Using an air gun, gradually apply compressed air via the brake hose installation hole to push the piston out.
- Place a wooden block of 30 mm (1.18 in) width.
3) Remove the piston boot from caliper body cylinder.
4) Remove the piston seal from caliper body cylinder.
CAUTION: Do not damage the cylinder and piston seal groove.
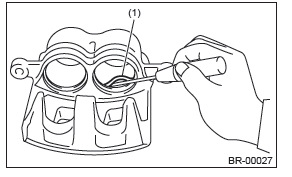
- Piston seal
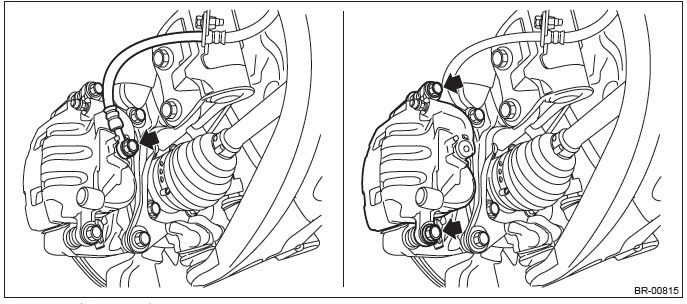
5) Remove the guide pin, lock pin, bushing pin, and pin boot from the support.
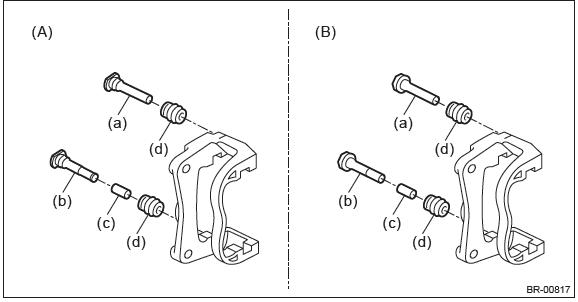
- 16-inch
- 17-inch
- Guide pin (black)
- Lock pin (silver)
- Bushing
- Pin boot
D: ASSEMBLY
1) Before assembly, check each part. <Ref. to BR-28, INSPECTION, Front Disc Brake Assembly.>
2) Clean the inside of the caliper body cylinder using brake fluid.
3) Apply a coat of brake fluid to piston seal and install the piston seal to the caliper body cylinder groove.
4) Apply a coat of brake fluid to the inner surface of caliper body cylinder and the entire outer surface of the piston.
5) Apply grease contained in the piston seal kit to the piston boot, and install it to the groove at the end of the cylinder.
6) Insert the piston into caliper body cylinder.
CAUTION: Do not force the piston into caliper body cylinder.

- Piston
- Piston boot
7) Position the piston boot in the grooves on caliper body cylinder and piston.
- Piston
- Piston boot
- Caliper body
- Piston seal
8) Apply grease contained in the piston seal kit to the lock pin, guide pin outer surface, support cylinder inner surface, and pin boot grooves.
9) Install the pin boot to the lock pin and guide pin, and insert it into the support cylinder.
CAUTION: Insert the lock pin and guide pin into specified position, and make sure that they slide and seat properly.
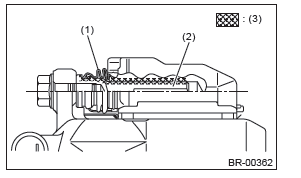
- Pin boot
- Lock pin or guide pin
- Grease applied area
E: INSPECTION
1) Check the caliper body cylinder and piston for uneven wear, damage or rust.
2) Check the rubber parts for damage or deterioration.
3) If faulty is found in the inspection, replace the relevant part.
READ NEXT:
 Rear Brake Pad
A: REMOVAL
1) Lift up the vehicle, and then remove the rear wheels.
2) Remove the rear brake pad.
Remove the bolts and remove the brake hose bracket.
Remove the caliper bolt, and raise and hold th
Brake Booster
A: REMOVAL
CAUTION:
Do not allow brake fluid to come in contact with the painted surface of the
vehicle body. If it does,
wash off with water and wipe away completely.
1) Disconnect the ground cable
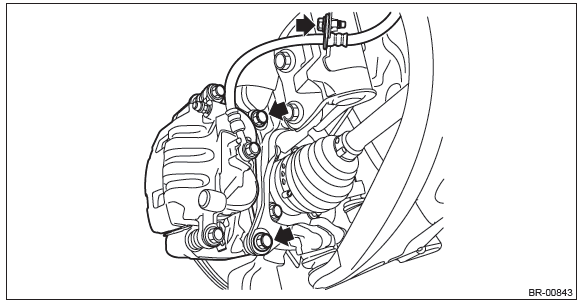
Brake Hose
A: REMOVAL
1. FRONT BRAKE HOSE
1) Separate the brake pipe (b) from brake hose (a) using a flare nut wrench.
2) Remove the clamp, strut mounting bolt and union bolt, and remove the front
brake hose.
SEE MORE:
Wiper operation when snowing
Before driving in cold weather, make sure the wiper blades are not frozen to
the windshield or rear window.
If the wiper blades are frozen to the windshield or rear window, perform the
following procedure.
● To thaw the windshield wiper blades, use the defroster with the airflow selectio
Checking the fluid level in MT models
WARNING
Never let clutch fluid contact your eyes because clutch fluid can be harmful to your eyes. If clutch fluid gets in your eyes, immediately flush them thoroughly with clean water. For safety, when performing this work, wearing eye protection is advisable.
CAUTION
● Clutch fluid absorbs
