Subaru Outback (BR): Rear Brake Pad
A: REMOVAL
1) Lift up the vehicle, and then remove the rear wheels.
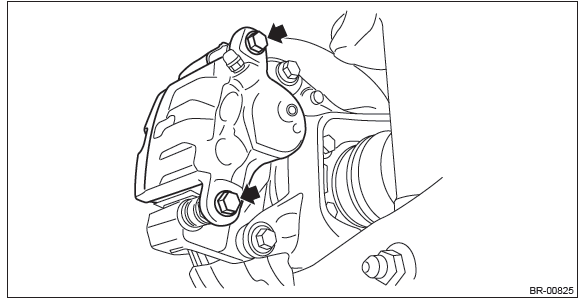
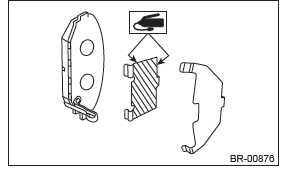
2) Remove the rear brake pad.
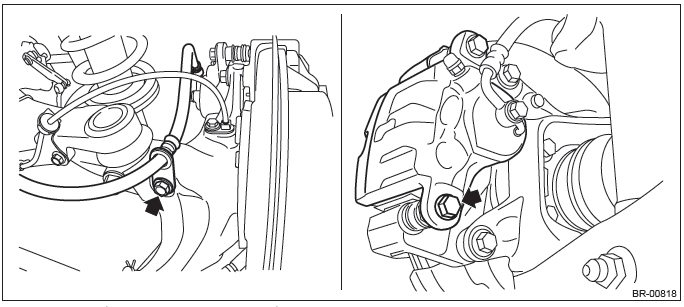
- Remove the bolts and remove the brake hose bracket.
- Remove the caliper bolt, and raise and hold the caliper body.
NOTE: Do not disconnect the brake hose from the caliper body.
- Remove the brake pad from support.
B: INSTALLATION
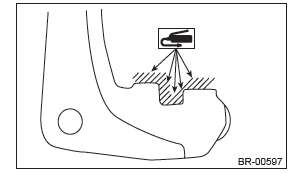
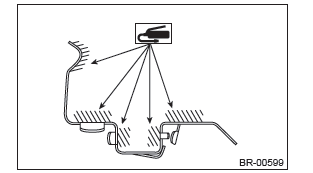
NOTE: Before installation, remove mud and foreign matter from the caliper body and support.
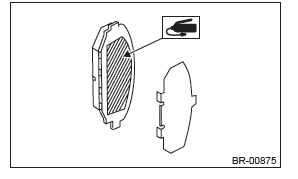
1) Before installation, check the brake pad. <Ref. to BR-31, INSPECTION, Rear Brake Pad.>
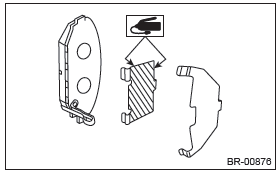
2) Apply a thin coat of Molykote M7439 (Part No. 003602001) or grease contained in the pad kit to the pad clip.
3) Apply a thin coat of Molykote AS880N (Part No. K0777YA010) or grease contained in the pad kit between the outer pad and shim.
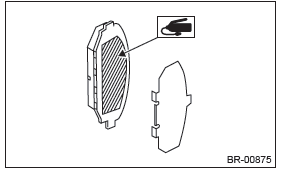
4) Apply a thin coat of Molykote AS880N (Part No. K0777YA010) or grease contained in the pad kit to both surfaces of the inner pad inner shim.
5) Install the brake pad to the support.
6) Install the caliper body to the support.
Tightening torque: Caliper bolt: 27 N*m (2.75 kgf-m, 19.9 ft-lb)
7) Install the brake hose bracket.
Tightening torque: Brake hose bracket: 33 N*m (3.36 kgf-m, 24.3 ft-lb)
8) Install the rear wheels.
C: INSPECTION
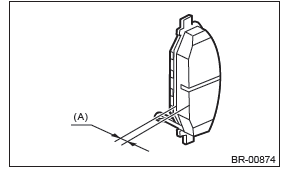
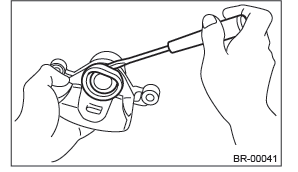
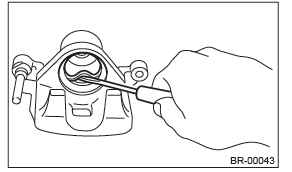
1) Check the pad thickness (A).
NOTE:
- Always replace the pads of both wheels and both sides as a set.
- Replace pad clips if they are twisted or worn.
- Replace the pad if there is oil or grease on it.
- A wear indicator is installed on the inner disc brake pad. If the pad is worn to the limit, the end of wear indicator contacts disc rotor, and a squeaking sound is heard as the wheel rotates. If the sound is heard, replace the pad.

2) If the wear limit is exceeded in the inspection, replace the brake pad.
Rear Disc Rotor
A: REMOVAL
1) Lift up the vehicle, and then remove the rear wheels.
2) Release the parking brake.
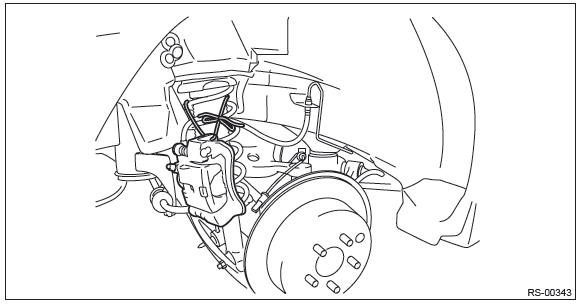
3) Remove the caliper body assembly from the rear axle housing.
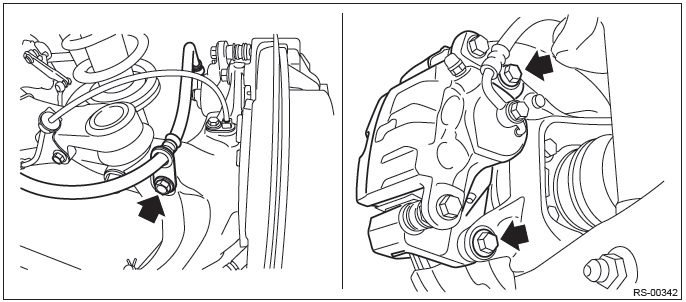
- Remove the bolt from the brake hose bracket.
- Remove the mounting bolt, and remove the caliper body assembly.
- Prepare wiring harnesses etc. to be discarded, and suspend the caliper body assembly from the shock absorber with the harnesses.
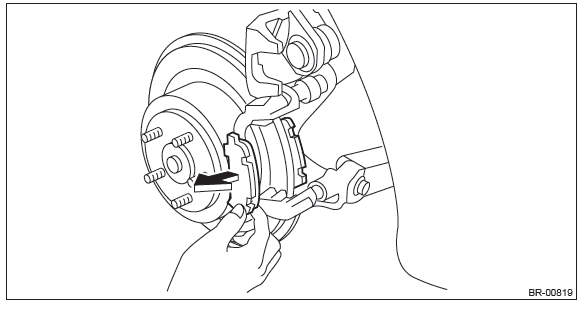
4) Remove the rear disc rotor.
NOTE: If it is difficult to remove the disc rotor, perform the following two methods in order.
1. Insert the flat tip screwdriver into the brake adjustment hole (A), and rotate the adjusting screw until the brake shoe moves far enough to remove the disc rotor.
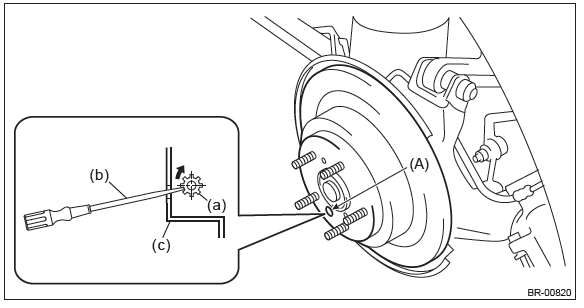
- Adjusting screw
- Flat tip screwdriver
- Disc rotor
2. When the disc rotor is difficult to be removed from the rear hub unit bearing, screw in 8 mm (0.31 in) bolt to the threaded part of the disc rotor (A), and remove the disc rotor.

B: INSTALLATION
NOTE: Before installation, remove mud and foreign matter from the caliper body assembly.
1) Before installation, check the rear disc rotor. <Ref. to BR-34, INSPECTION, Rear Disc Rotor.>
2) Install each part in the reverse order of removal.
3) Adjust the parking brake. <Ref. to PB-15, ADJUSTMENT, Parking Brake Assembly (Rear Disc Brake).>
Tightening torque:
Brake hose bracket: 33 N*m (3.36 kgf-m, 24.3 ft-lb)
Mounting bolt: 66 N*m (6.73 kgf-m, 48.7 ft-lb)
C: INSPECTION
1. DISC ROTOR RUNOUT CHECK
1) Check the rear hub unit bearing for free play and runout before the inspection of disc rotor runout limit.
<Ref. to DS-47, INSPECTION, Rear Hub Unit Bearing.>
2) Secure the disc rotor by tightening the five wheel nuts.
3) Set a dial gauge 10 mm (0.39 in) inward from the disc rotor outer circumference, and check the disc rotor runout while rotating the disc rotor.
Disc rotor runout limit: 0.05 mm (0.0020 in)
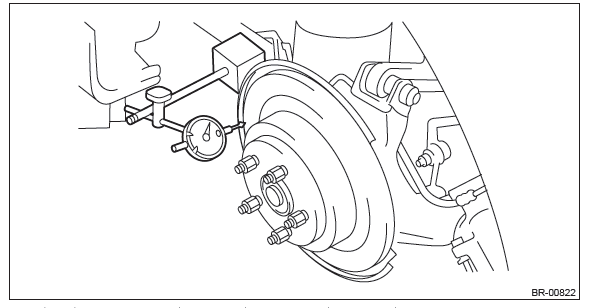
4) If the runout limit is exceeded in the inspection, replace the disc rotor.
2. DISC ROTOR THICKNESS CHECK
1) Set a micrometer 10 mm (0.39 in) inward from the disc rotor outer perimeter, and then measure the disc rotor thickness (A).
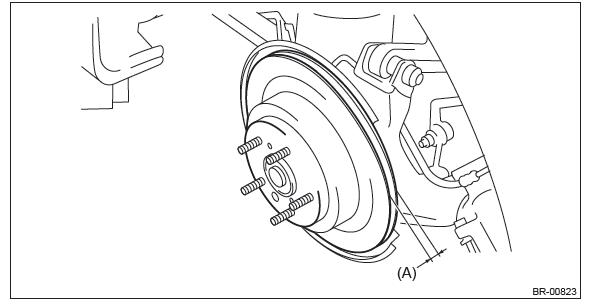

2) If the wear limit is exceeded in the inspection, replace the disc rotor.
Rear Disc Brake Assembly
A: REMOVAL
CAUTION: Do not allow brake fluid to come in contact with the painted surface of the vehicle body. If it does, wash off with water and wipe away completely.
1) Lift up the vehicle, and then remove the rear wheels.
2) Remove the caliper body from support.
- Remove the brake hose bracket and union bolt.
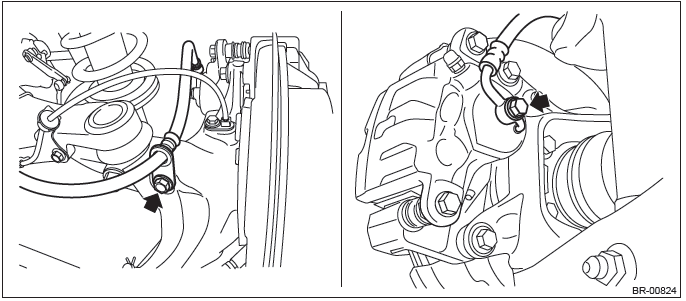
- Remove the caliper bolt, and remove the caliper body.
3) Remove the support.
NOTE: Remove the support only when replacing the disc rotor or support. It is not necessary to remove it when servicing the caliper body.
- Remove the brake pad from support.
- Remove the mounting bolts, and then remove the support from the rear axle housing.
B: INSTALLATION
NOTE: Before installation, remove mud and foreign matter from the caliper body and support.
1) Before installation, check each part. <Ref. to BR-40, INSPECTION, Rear Disc Brake Assembly.>
2) Apply a thin coat of Molykote M7439 (Part No. 003602001) or the grease included with pad kit to the support.
3) Install the support to the rear axle housing.
Tightening torque: Mounting bolt: 66 N*m (6.73 kgf-m, 48.7 ft-lb)
4) Apply a thin coat of Molykote M7439 (Part No. 003602001) or grease contained in the pad kit to the pad clip.
5) Apply a thin coat of Molykote AS880N (Part No. K0777YA010) or grease contained in the pad kit between the outer pad and shim.
6) Apply a thin coat of Molykote AS880N (Part No. K0777YA010) or grease contained in the pad kit to both surfaces of the inner pad inner shim.
7) Install the brake pad to the support.
8) Install the caliper body to the support.
Tightening torque: Caliper bolt: 27 N*m (2.75 kgf-m, 19.9 ft-lb)
9) Install the brake hose bracket.
Tightening torque: Brake hose bracket: 33 N*m (3.4 kgf-m, 14.3 ft-lb)
10) Connect the brake hose using a new brake hose gasket.
Tightening torque: Union bolt: 18 N*m (1.84 kgf-m, 13.3 ft-lb)
11) Bleed air from the brake system. <Ref. to BR-54, BRAKE LINE, PROCEDURE, Air Bleeding.>
12) Install the rear wheels.
C: DISASSEMBLY
CAUTION: Be careful not to allow foreign matter to enter the brake hose connector.
1) Remove mud and foreign matter from the caliper body.
2) Remove the piston boot from caliper body cylinder.
3) Remove the piston.
- Place a wooden block in the caliper body as shown in the figure to prevent the piston from jumping out and being damaged.
- Using an air gun, gradually apply compressed air via the brake hose installation hole to push the piston out.
- Place a wooden block of 30 mm (1.18 in) width.
4) Remove the piston seal from caliper body cylinder.
CAUTION: Do not damage the cylinder and piston seal groove.
5) Remove the guide pin, lock pin, bushing pin, and pin boot from the support.
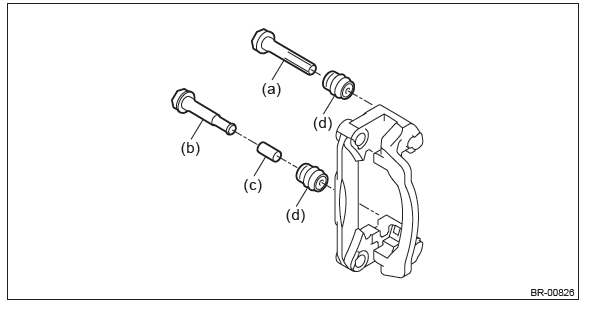
- Guide pin (black)
- Lock pin (silver)
- Bushing
- Pin boot
D: ASSEMBLY
1) Before installation, check each part. <Ref. to BR-40, INSPECTION, Rear Disc Brake Assembly.>
2) Clean the inside of the caliper body cylinder using brake fluid.
3) Apply a coat of brake fluid to piston seal and install the piston seal to the caliper body cylinder groove.
4) Apply a coat of brake fluid to the inner surface of caliper body cylinder and the entire outer surface of the piston.
5) Apply grease contained in the piston seal kit to the piston boot, and install it to the groove at the end of the cylinder.
6) Insert the piston into caliper body cylinder.
CAUTION: Do not force the piston into caliper body cylinder.
7) Position the piston boot in the grooves on caliper body cylinder and piston.
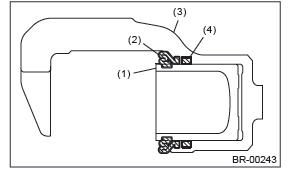
- Piston
- Piston boot
- Caliper body
- Piston seal
8) Apply grease contained in the piston seal kit to the lock pin, guide pin outer surface, support cylinder inner surface, and pin boot grooves.
9) Install the pin boot to the lock pin and guide pin, and insert it into the support cylinder.
CAUTION: Insert the lock pin and guide pin into specified position, and make sure that they slide and seat properly.

- Pin boot
- Lock pin or guide pin
- Grease applied area
E: INSPECTION
1) Check the caliper body cylinder and piston for uneven wear, damage or rust.
2) Check the rubber parts for damage or deterioration.
3) If faulty is found in the inspection, replace the relevant part.
Master Cylinder
A: REMOVAL
CAUTION: Do not allow brake fluid to come in contact with the painted surface of the vehicle body. If it does, wash off with water and wipe away completely.
1) Disconnect the ground cable from battery.
2) Drain brake fluid from the reservoir tank completely.
3) Remove the master cylinder assembly.
CAUTION: In order to prevent the contact of the bracket and check valve, be sure to loosen the master cylinder mounting nut while holding the bracket with hand. Otherwise it may deform the bracket.
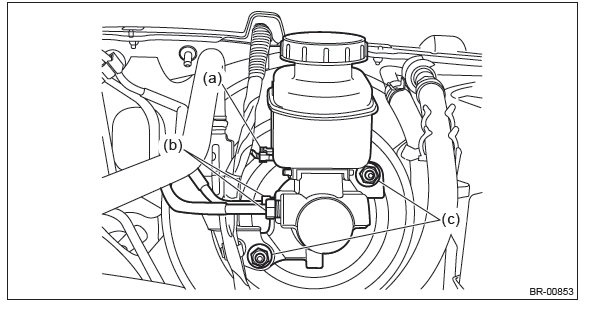
- Disconnect the fluid level gauge connector (a).
- Disconnect the brake pipe (b).
- Remove the nut (c), and slowly remove the master cylinder from the brake booster.
B: INSTALLATION
1) Replace the seal sub assembly for the master cylinder with a new part.
CAUTION: Be careful not to install the seal sub assembly in the wrong location.

- Primary piston
- Seal sub ASSY
- Install the seal sub assembly to this surface.
2) Install each part in the reverse order of removal.
CAUTION:
- Install the bracket at the position with sufficient clearance that it does not contact with the check valve.
- Be sure to loosen the master cylinder mounting nut while holding the bracket with hand. Otherwise the bracket may deform.
Tightening torque:
Master cylinder: 13 N*m (1.33 kgf-m, 9.6 ft-lb)
Brake pipe flare nut: 19 N*m (1.94 kgf-m, 14.0 ft-lb)
3) Bleed air from the brake system. <Ref. to BR-54, PROCEDURE, Air Bleeding.>
C: REPLACEMENT
CAUTION: Since the master cylinder assembly cannot be disassembled, disassembly and cleaning are prohibited.
When replacing, replace the master cylinder assembly.
READ NEXT:
 Brake Booster
A: REMOVAL
CAUTION:
Do not allow brake fluid to come in contact with the painted surface of the
vehicle body. If it does,
wash off with water and wipe away completely.
1) Disconnect the ground cable
Brake Hose
A: REMOVAL
1. FRONT BRAKE HOSE
1) Separate the brake pipe (b) from brake hose (a) using a flare nut wrench.
2) Remove the clamp, strut mounting bolt and union bolt, and remove the front
brake hose.
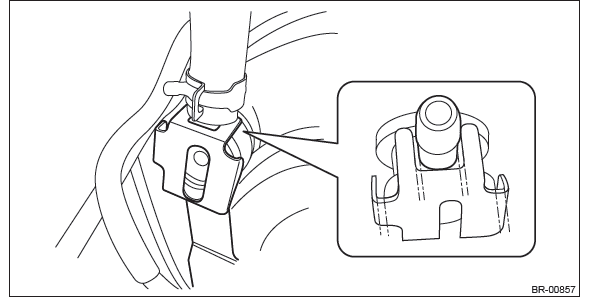
Stop Light Switch
A: REMOVAL
1) Disconnect the ground cable from battery.
2) Remove the instrument panel lower cover.
Remove the clips, and remove the instrument panel side cover LH.
Remove the clips and data li
SEE MORE:
Extension Case
A: REMOVAL
1) Remove the transmission assembly. <Ref. to
5AT-37, REMOVAL, Automatic Transmission Assembly.>
2) Disconnect the rear vehicle speed sensor connector.
3) Remove the rear vehicle speed sensor.
4) Remove the extension case.
B: INSTALLATION
1) Attach the selected reduction driven
Determining compatibility of tire and vehicle load capacities
The sum of four tires’ maximum load ratings must exceed the maximum loaded vehicle
weight (“GVWR”). In addition, sum of the maximum load ratings of two front tires
and of two rear tires must exceed each axle’s maximum loaded capacity (“GAWR”).
Original equipment tires are designed
