Subaru Outback (BR): Front Differential Assembly in Continuously Variable Transmission
A: REMOVAL
1) Remove the transmission assembly from the vehicle. <Ref. to CVT-55, REMOVAL, Automatic Transmission Assembly.>
2) Remove the air breather hose. <Ref. to CVT-132, REMOVAL, Air Breather Hose.>
3) Remove the oil pan and control valve body. <Ref. to CVT-111, REMOVAL, Control Valve Body.>
4) Remove the transmission harness. <Ref. to CVT-121, REMOVAL, Transmission Harness.>
5) Remove the extension case. <Ref. to CVT-138, REMOVAL, Extension Case.>
6) Remove the rear drive shaft. <Ref. to CVT-141, REMOVAL, Rear Drive Shaft.>
7) Remove the transfer clutch assembly. <Ref. to CVT-146, REMOVAL, Transfer Clutch.>
8) Remove the transfer reduction driven gear assembly. <Ref. to CVT-158, REMOVAL, Transfer Reduction Driven Gear.>
9) Remove the intermediate case. <Ref. to CVT-165, REMOVAL, Intermediate Case.>
10) Remove the forward clutch assembly. <Ref. to CVT-180, REMOVAL, Forward Clutch Assembly.>
11) Remove the transmission case. <Ref. to CVT-211, REMOVAL, Transmission Case.>
12) Remove the primary pulley, secondary pulley and variator chain. <Ref. to CVT-226, REMOVAL, Primary Pulley and Secondary Pulley.>
13) Remove the drive pinion shaft assembly. <Ref. to CVT-242, REMOVAL, Drive Pinion Shaft Assembly.>
14) Remove the lock plates on both sides.
- Lock plate
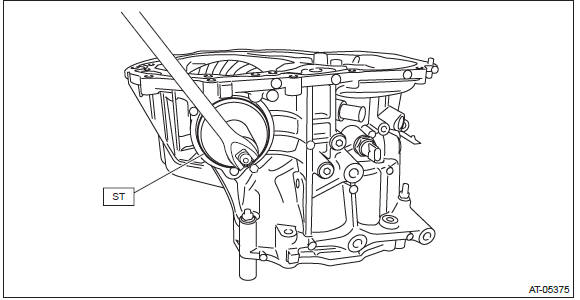
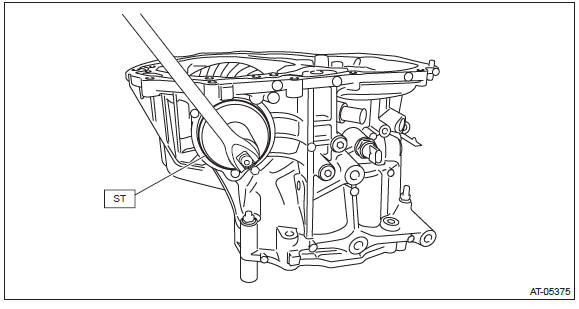
15) Remove the differential side retainers using ST.
ST 18658AA020 WRENCH COMPL RETAINER
NOTE:
- Support the differential case assembly by hand to avoid damaging the retainer mounting hole of the converter case.
- When keeping the retainers aside, use labels etc. to avoid confusing the left and right.
16) Remove the front differential assembly while being careful not to damage the attachment part of the retainer.
17) Remove the oil seals and O-rings from both differential side retainers. <Ref. to CVT-269, SIDE RETAINER, DISASSEMBLY, Front Differential Assembly.>
B: INSTALLATION
1) Install the front differential assembly to the converter case.
NOTE: Be careful not to damage the inside of the case (especially the mating surface of the differential side retainers).
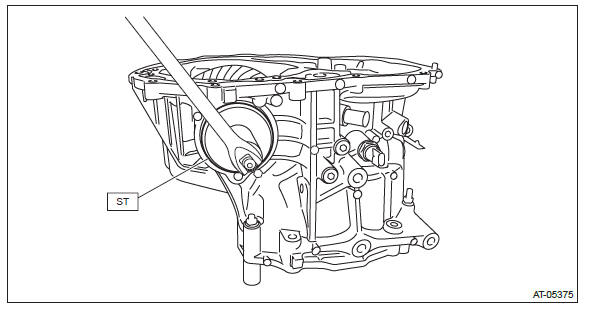
2) Temporarily install the differential side retainers using ST.
ST 18658AA020 WRENCH COMPL RETAINER
3) Adjust the backlash of the front differential. <Ref. to CVT-277, ADJUSTMENT, Front Differential Assembly.>
4) Inspect and adjust the tooth contact. <Ref. to CVT-256, ADJUSTMENT, Drive Pinion Shaft Assembly.>
5) Remove the differential side retainers and install the O-rings and oil seals. <Ref. to CVT-276, SIDE RETAINER, ASSEMBLY, Front Differential Assembly.>
NOTE:
- Record how many turns were needed to remove.
- Use new O-rings and oil seals.
6) Install the differential side retainers using ST.
NOTE: When attaching, turn the differential side retainer by the same number of turns it took to remove, and align the marks.
ST 18658AA020 WRENCH COMPL RETAINER
7) Install the lock plate.
Tightening torque: 25 N*m (2.5 kgf-m, 18.4 ft-lb)
- Lock plate
8) Install the drive pinion shaft assembly. <Ref. to CVT-244, INSTALLATION, Drive Pinion Shaft Assembly.>
9) Install the primary pulley, secondary pulley and variator chain. <Ref. to CVT-230, INSTALLATION, Primary Pulley and Secondary Pulley.>
10) Install the transmission case. <Ref. to CVT-213, INSTALLATION, Transmission Case.>
11) Install the forward clutch assembly. <Ref. to CVT-181, INSTALLATION, Forward Clutch Assembly.>
12) Install the intermediate case. <Ref. to CVT-166, INSTALLATION, Intermediate Case.>
13) Install the transfer reduction driven gear assembly. <Ref. to CVT-158, INSTALLATION, Transfer Reduction Driven Gear.>
14) Install the transfer clutch assembly. <Ref. to CVT-147, INSTALLATION, Transfer Clutch.>
15) Install the rear drive shaft. <Ref. to CVT-141, INSTALLATION, Rear Drive Shaft.>
16) Install the extension case. <Ref. to CVT-138, INSTALLATION, Extension Case.>
17) Install the transmission harness. <Ref. to CVT-123, INSTALLATION, Transmission Harness.>
18) Install the control valve body and oil pan. <Ref. to CVT-115, INSTALLATION, Control Valve Body.>
19) Install the air breather hose. <Ref. to CVT-132, INSTALLATION, Air Breather Hose.>
20) Install the transmission assembly to the vehicle. <Ref. to CVT-70, INSTALLATION, Automatic Transmission Assembly.>
C: DISASSEMBLY
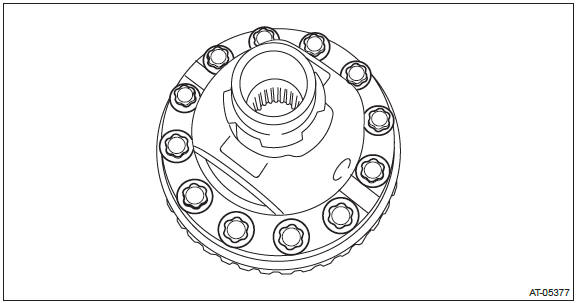
1. DIFFERENTIAL CASE ASSEMBLY
1) Remove the taper roller bearing using the ST.
ST 498077000 REMOVER
2) Remove the hypoid driven gear mounting bolt using the ST.
ST 18270KA020 SOCKET (E20)
3) Remove the differential case (LH).
4) Remove the differential bevel gear and washer from differential case.
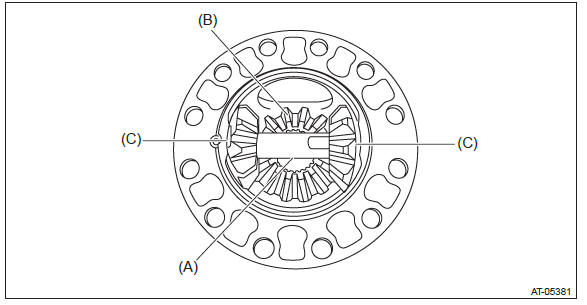
5) Remove the straight pin.
6) Remove the pinion shaft, then remove the differential bevel gear, washer and differential bevel pinion.
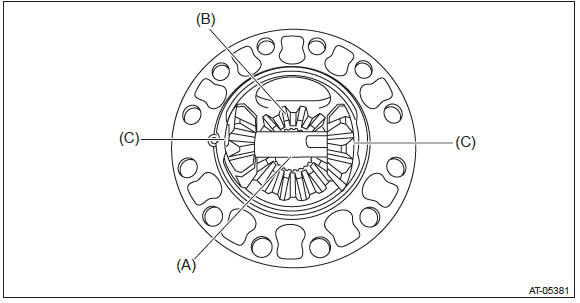
- Pinion shaft
- Differential bevel gear
- Differential bevel pinion
2. SIDE RETAINER
NOTE: After adjusting the drive pinion backlash and tooth contact, replace the oil seal and O-ring with new parts.
1) Remove the O-ring.
2) Remove the oil seal.
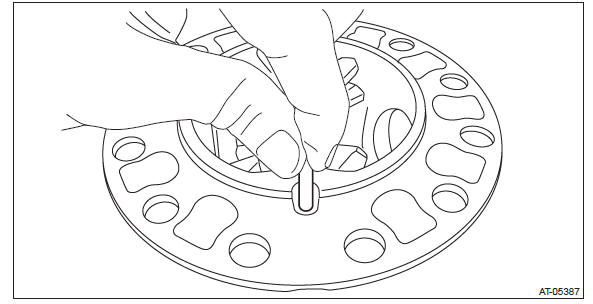
3) Remove the split pin (ST), and then remove the claw.
ST 398527700 PULLER ASSY

- Claw
- Split pin
- Pin
4) Attach two claws to the outer race, and set the ST to side retainer.
ST 398527700 PULLER ASSY
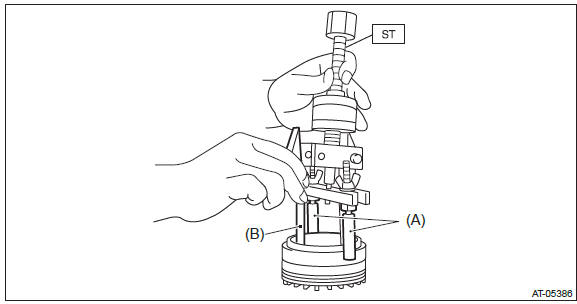
- Shaft
- Claw
5) Restore the removed claws to original position, and install the pin and split pin.
6) Hold the shaft of ST to avoid removing from side retainer, and then remove the bearing outer race.
ST 398527700 PULLER ASSY
NOTE: Replace the bearing inner and outer races as a single unit.

- Shaft
- Side retainer
D: ASSEMBLY
1. DIFFERENTIAL CASE ASSY
1) Install the washer and differential bevel gear into differential case (LH).
2) Install the differential bevel gear pinions into differential case (LH) and install the pinion shaft.
- Pinion shaft
- Differential bevel gear
- Differential bevel pinion
3) Install the straight pin.
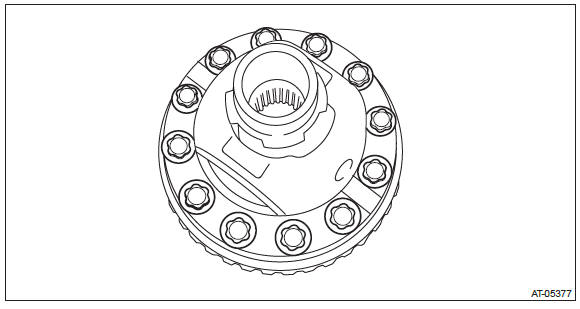
4) Install the differential case (RH) to hypoid driven gear and secure with vise.
5) Install the washer and differential bevel gear to the differential case (RH).
6) Using the ST, install the hypoid driven gear by tightening the installation bolt.
ST 18270KA020 SOCKET (E20)
Tightening torque: 20 N*m (2.0 kgf-m, 14.8 ft-lb)
7) While checking the tightening angle with the ST, further tighten the hypoid driven gear mounting bolts.
Tightening angle: 28º+-2º
ST 18554AA000 ANGLE GAUGE
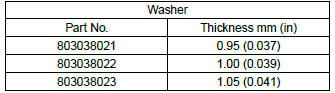
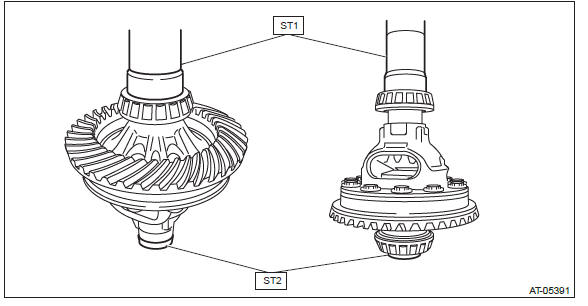
8) Measurement of backlash (Selection of washer)
- Install the SUBARU genuine axle shaft to differential case.
Part No. 38415AA070 Axle shaft
- Measure the gear backlash using ST1 and ST2, and then insert the ST2 through the window of differential case.
ST1 498247001 MAGNET BASE
ST2 498247100 DIAL GAUGE
NOTE:
- Measure the backlash by applying a differential bevel pinion tooth between two differential bevel gear teeth.
- When measuring, fix the differential bevel pinion gear in place with a screwdriver covered with cloth, or a similar tool.
Specification: 0.13 - 0.18 mm (0.0051 - 0.0071 in)

- If the backlash is not within specification, select a washer from the table below and replace.
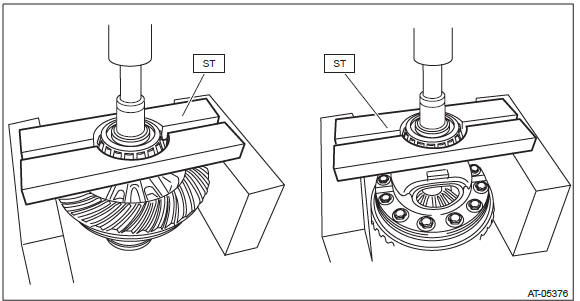
9) Using the ST, install the left and right taper roller bearings.
ST1 499277100 BUSHING 1-2 INSTALLER
ST2 398497701 SEAT
2. SIDE RETAINER
NOTE: After adjusting the backlash and tooth contact, replace the oil seal and O-ring of side retainer with new parts.
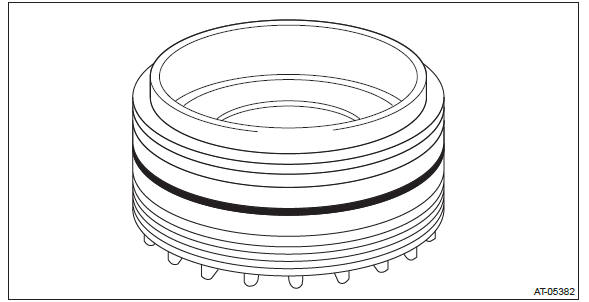
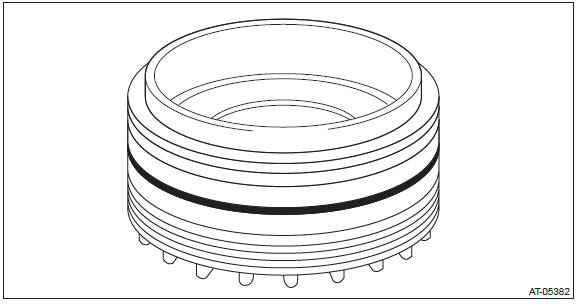
1) Press-fit the bearing outer race to side retainer.
2) Using the ST, install the oil seal.
NOTE:
- Use a new oil seal.
- Apply differential oil to the oil seal lip.
- Oil seal has an identification mark (R, L). When installing oil seals, do not confuse the left and right.
ST 18675AA000 DIFFERENTIAL SIDE OIL SEAL INSTALLER
3) Install the O-ring.
NOTE:
- Use new O-rings.
- Apply CVTF to the O-ring.
E: INSPECTION
- Check each component for scratches, damage or other faults.
- Inspect the backlash of the pinion gear.
Specification: 0.13 - 0.18 mm (0.0051 - 0.0071 in)
- Measure the hypoid gear backlash, and then adjust it to be within specification. <Ref. to CVT-277, ADJUSTMENT, Front Differential Assembly.>
F: ADJUSTMENT
1) Using the ST, screw-in the retainer until resistance is felt.
NOTE: RH side should be screwed-in more than LH side.
ST 18658AA020 WRENCH COMPL RETAINER
2) Remove the remaining liquid gasket from the mating surface completely.
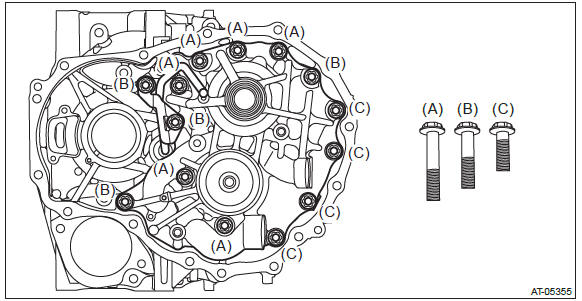
3) Using the ST, install the drive pinion assembly to converter case.
ST1 18270KA020 SOCKET (E20)
NOTE: Do not confuse the three different-length bolts when installing.
Tightening torque: 43 N*m (4.4 kgf-m, 31.7 ft-lb)
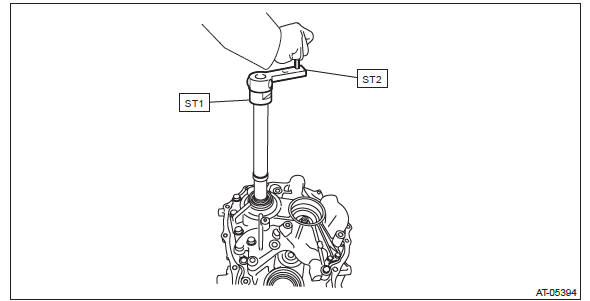
4) Rotate the drive pinion shaft more than ten times using ST1 and ST2.
ST1 18667AA010 HOLDER
ST2 499787700 WRENCH
5) While rotating the pinion shaft, keep tightening the retainer LH, and loosening the retainer RH until the pinion shaft no longer be turned. When pinion shaft no longer turns, backlash is "zero".
6) After the "zero" state is established, loosen the retainer LH by 3 notches and secure it with the lock plate.
Loosen the retainer RH and retighten until it stops. Rotate the drive pinion 2 or 3 times. Tighten the retainer RH further 1-3/4 notches. This sets the preload. Finally, secure the retainer with its lock plate.
- Lock plate
NOTE: Turning the retainer by every one tooth changes the backlash approx. 0.05 mm (0.0020 in).
- 1 tooth
7) Insert the two SUBARU genuine axle shafts into differential case.
Part No. 38415AA070 Axle shaft
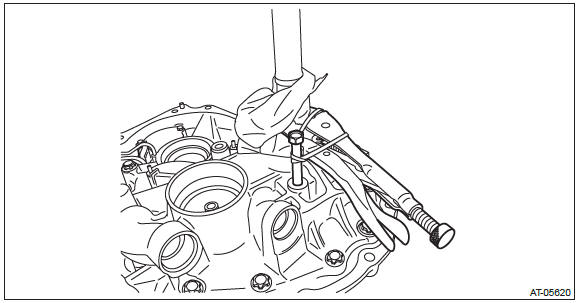
8) Wrap the drive shaft pinion shaft with cloth and pinch with vise pliers. Install the installation bolt into the bolt hole of secondary pulley and secure the bolt and vise pliers using a band or wire.
Make sure the drive pinion shaft does not move.
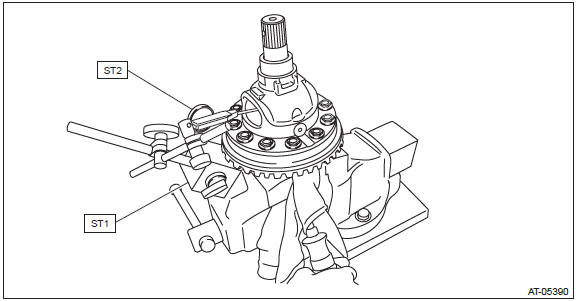
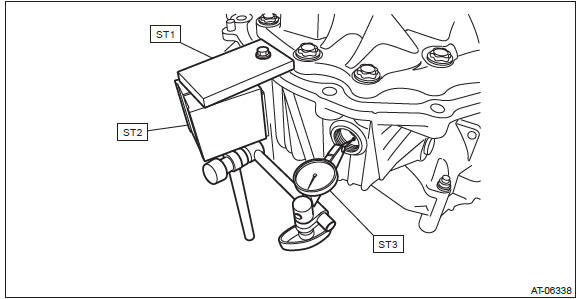
9) Check the backlash is within specification using ST1, ST2 and ST3.
ST1 498255400 PLATE
ST2 498247001 MAGNET BASE
ST3 498247100 DIAL GAUGE
Backlash: 0.13 - 0.18 mm (0.005 - 0.007 in)
10) Adjust the teeth contact of the front differential and drive shaft. <Ref. to CVT-256, ADJUSTMENT, Drive Pinion Shaft Assembly.>
READ NEXT:
 Oil Pump
A: REMOVAL
NOTE:
Refer to "Drive Pinion Shaft" for removal procedures. <Ref. to CVT-242, REMOVAL,
Drive Pinion Shaft Assembly.>
B: INSTALLATION
NOTE:
Refer to "Drive Pinion Shaft" for removal p
Converter Case Cover
A: REMOVAL
1) Remove the transmission assembly from the vehicle. <Ref. to CVT-55,
REMOVAL, Automatic Transmission
Assembly.>
2) Remove the air breather hose. <Ref. to CVT-132, REMOVAL, Air
Front Reduction Drive Gear
A: REMOVAL
1) Remove the transmission assembly from the vehicle. <Ref. to CVT-55,
REMOVAL, Automatic Transmission
Assembly.>
2) Remove the air breather hose. <Ref. to CVT-132, REMOVAL, Air
SEE MORE:
Scan tuning (SCAN)
If you press the “SCAN” button, the radio will switch to the scan mode. In this
mode, the radio scans through the radio band until a station is found. The radio
will stop at the station for 5 seconds while displaying the frequency, after which
scanning will continue until the entire band
SUBARU advanced frontal airbag system
Your vehicle is equipped with a SUBARU advanced frontal airbag system that complies
with the new advanced frontal airbag requirements in the amended Federal Motor Vehicle
Safety Standard (FMVSS) No. 208.
The SUBARU advanced frontal airbag system automatically determines the deployment
force o
