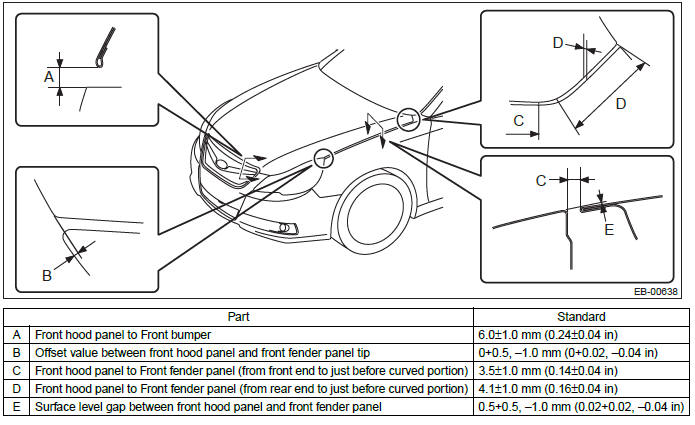
Subaru Outback (BR): Front Hood
A: REMOVAL
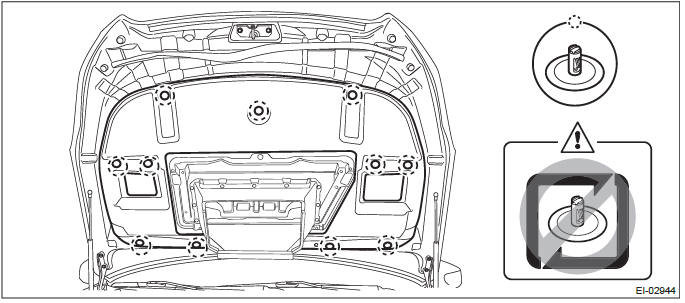
1. FRONT HOOD INSULATOR
Release the clips to remove the front hood insulator.
CAUTION: Do not reuse any clips damaged during removal. The damaged clip cannot fix the insulator securely.
Therefore, always replace with a new part.
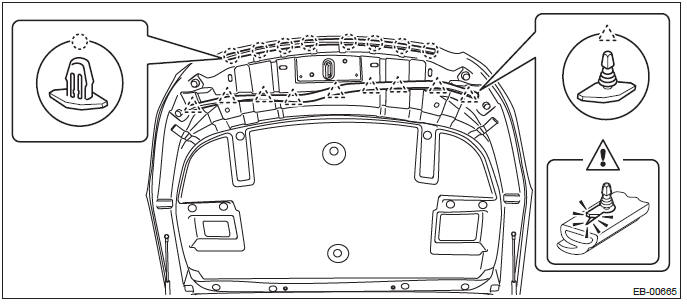
2. FRONT HOOD SEAL
Remove the clip, and remove the seal.
CAUTION: If the weather strip clip is removed with excessive force, the seal may be damaged. Be sure to use clip remover, etc. to remove.
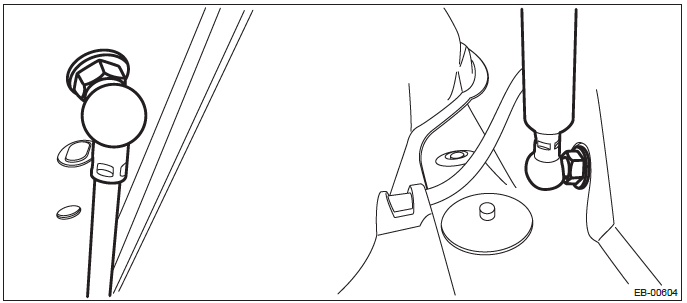
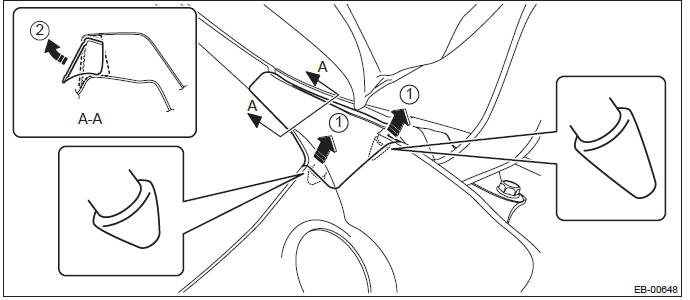
3. FRONT HOOD DAMPER
CAUTION:
- Do not damage piston rods and oil seals.
- Never disassemble cylinders: They contain gas.
- Front hood panels are heavy. When removing and installing the damper stays and hood hinges, always work in a team of two or more persons.
Remove the damper stay by removing mounting bolts.
4. FRONT HOOD HINGE
CAUTION: The front hood panel is heavy. When removing or installing the damper stay and hood hinge, be sure to work in a group of two or more.
1) Remove the fender cover assembly UPR.
- Remove the clip.
- Release the claws of the fender cover assembly UPR by pulling it forward and remove the fender cover.
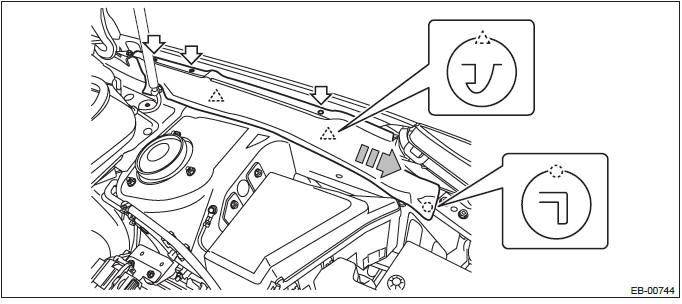
2) Remove the cowl panel side.
- Detach the pins of the cowl panel side.
- Remove the cowl panel side from inside the fender panel by pulling it.
CAUTION: Applying excessive pulling force may damage the cowl panel side. If it is difficult to remove, use a plastic remover or equivalent tool.
3) Remove the front fender panel. <Ref. to EB-16, REMOVAL, Front Fender.>
4) Remove the front hood panel.
- Remove the damper stay mounting bolt on the hood panel side.
- Remove the bolts on the hood panel, and remove the front hood panel.
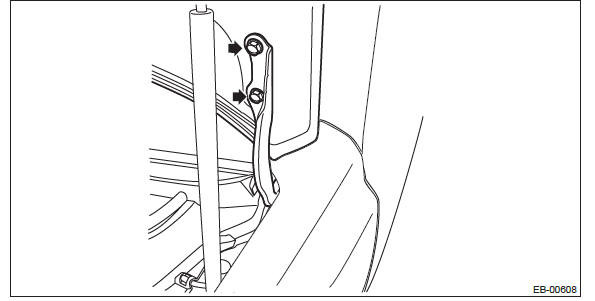
5) Remove the bolts, and remove the front hood hinge.
5. FRONT HOOD PANEL
CAUTION: Front hood panels are heavy. When removing and installing the damper stays and hood hinges, always work in a team of two or more persons.
1) Remove the damper stay mounting bolt on the hood panel side.
2) Remove the bolts on the hood panel, and remove the front hood panel.
B: INSTALLATION
CAUTION: The front hood panel is heavy. When removing or installing the damper stay and hood hinge, be sure to work in a group of two or more.
To install the front hood insulator, front hood seal, and front hood damper, follow the reverse order of removal.
To install the front hood hinges and front hood panel, follow the procedure below.
1) Install the front hood hinges to the vehicle body. (When front hood hinges are removed) 2) Temporarily install the front hood panel to the front hood hinges.
NOTE: When installing the front hood panel, make sure that a uniform clearance is created around the panel.
3) Adjust the clearance around the front hood panel. <Ref. to EB-13, ADJUSTMENT, Front Hood.>
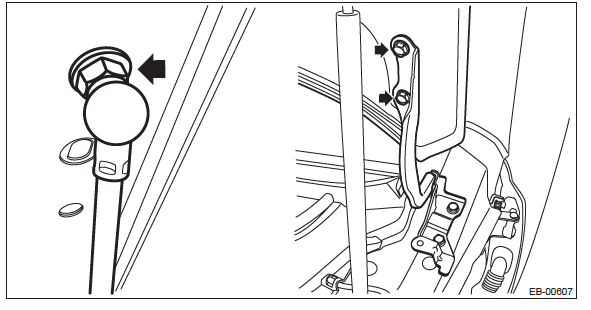
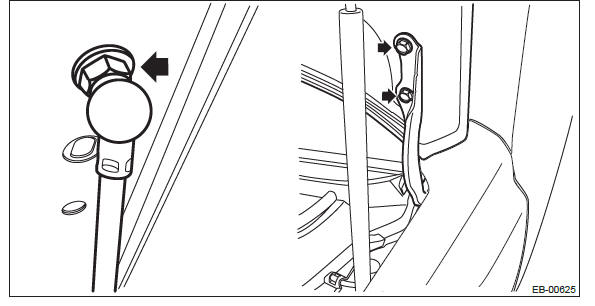
4) Tighten the front hood hinge bolts.
Tightening torque: 25 N*m (2.55 kgf-m, 18.4 ft-lb)
5) Install each part of the front hood in the reverse order of removal.
Tightening torque:
Front hood damper: 20 N*m (2.04 kgf-m, 14.8 ft-lb)
Front hood duct: 4.5 N*m (0.46 kgf-m, 3.3 ft-lb)
C: ADJUSTMENT
Adjust the clearance around the front hood panel as follows.
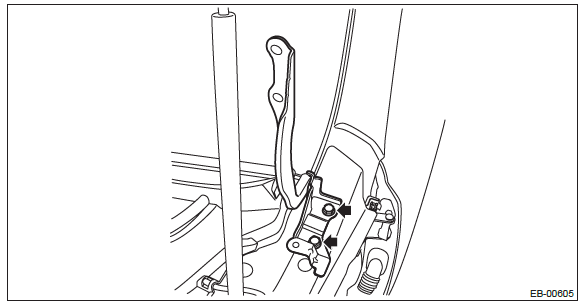
1) Adjust the horizontal position of front hood.
- Loosen the left and right hinge attaching bolts.
- Adjust the horizontal panel gap of the front hood and tighten the hinge attaching bolts.
Tightening torque: 25 N*m (2.55 kgf-m, 18.4 ft-lb)
2) Adjust the height at the front end of hood.
- Loosen the bolts of the front hood lock assembly.
- Adjust the front hood lock assembly by moving it up and down.
Tightening torque: 33 N*m (3.36 kgf-m, 24.3 ft-lb)
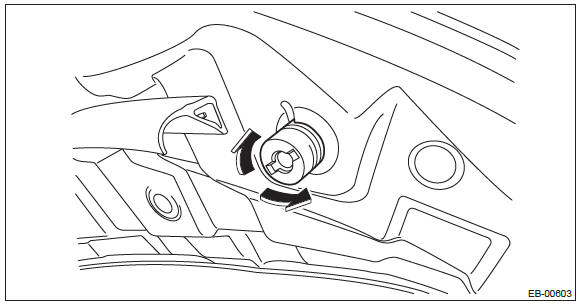
3) Rotate the front hood buffer to adjust lateral height.
D: DISPOSAL
For the disposal procedures of front hood damper stay, refer to Disposal Procedures of "Rear Gate Damper Stay". <Ref. to EB-53, REAR GATE DAMPER STAY, DISPOSAL, Rear Gate.>
READ NEXT:
 Front Fender
A: REMOVAL
1) Disconnect the ground cable from battery.
2) Remove the bumper face assembly.
Remove the clips, turn over the front mud guard, and disconnect the fog
light connector. (Model with
f
Front Door
A: REMOVAL
1) Disconnect the ground cable from battery.
2) Remove the front door trim. <Ref. to EI-60, FRONT DOOR, REMOVAL, Door Trim.>
3) Remove the outer mirror assembly. <Ref. to GW-28,
Rear Door
A: REMOVAL
1) Disconnect the ground cable from battery.
2) Remove the rear door trim. <Ref. to EI-61, REAR DOOR, REMOVAL, Door Trim.>
3) Remove the rear door speaker assembly.
Remove the scr
SEE MORE:
Immobilizer (Diagnostics)
Basic Diagnostic Procedure
A: PROCEDURE
General Description
A: CAUTION
CAUTION:
Do not use electrical test devices on any airbag
system wiring harnesses and connector
circuits.
Be careful not to damage the airbag system
wiring harness.
While diagnostic items are being checked, do
not opera
Fuel economy hints
The following suggestions will help to save your fuel.
● Select the proper gear position for the speed and road conditions.
● Avoid sudden acceleration or deceleration. Always accelerate gently until you
reach the desired speed. Then try to maintain that speed for as long as possible
