Subaru Outback (BR): Instrument Panel Lower Cover
Subaru Outback (BR) 2010-2015 Service Manual / Body / Exterior/Interior Trim / Instrument Panel Lower Cover
A: REMOVAL
1) Disconnect the ground cable from battery.
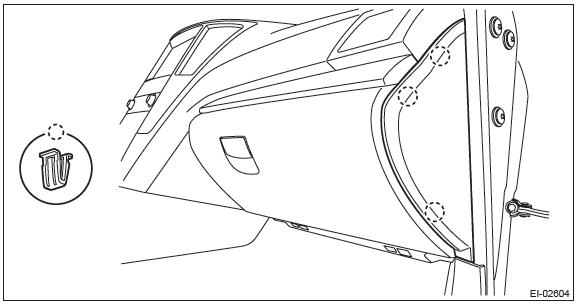
2) Remove the clips, and remove the instrument panel side cover LH.
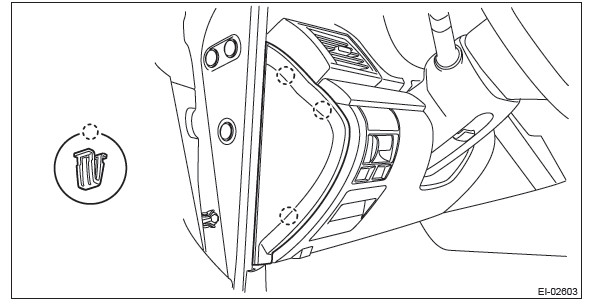
3) Remove the instrument panel lower cover.
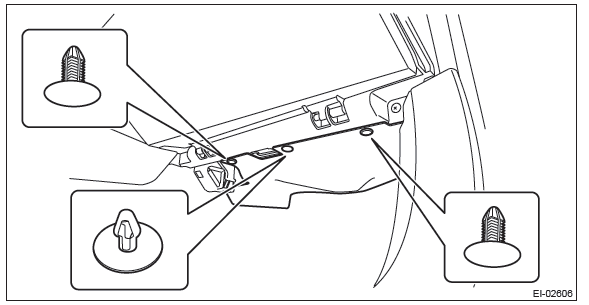
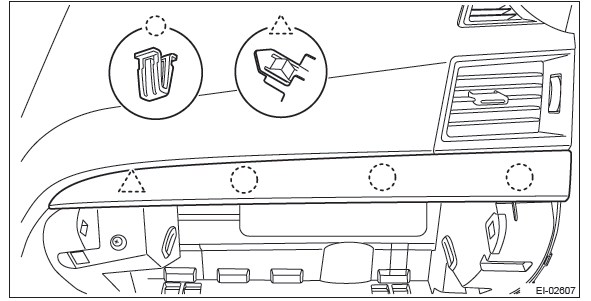
- Remove the clips and data link connector, and remove the instrument panel lower cover under.
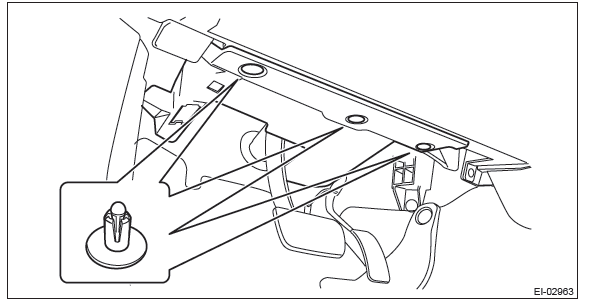
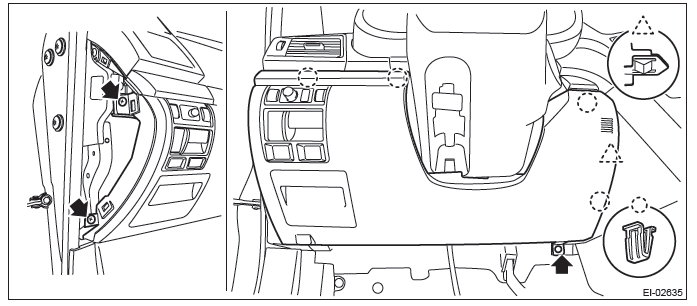
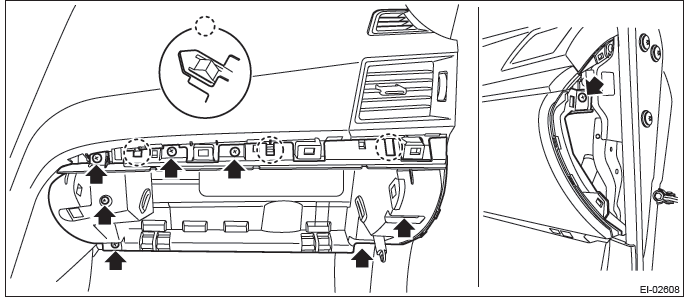
- Remove the screws and clips and release the claws, and remove the instrument panel lower cover while disconnecting the harness connectors.
B: INSTALLATION
Install each part in the reverse order of removal.
Glove Box
A: REMOVAL
NOTE: Refer to "Security and Locks" section for key cylinder replacement. <Ref. to SL-63, GLOVE BOX LID, REPLACEMENT, Key Lock Cylinders.>
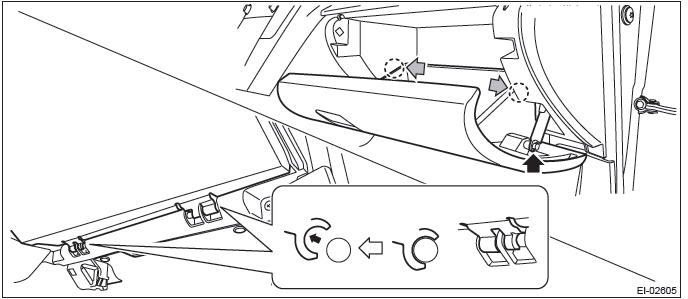
1) Remove the glove box lid assembly.
- Remove the glove box damper.
- Release the stoppers and remove the glove box lid assembly by pulling it toward you.
2) Release the clips, and remove the instrument panel side cover RH.
3) Remove the glove box back panel.
- Release the clips, and remove the glove box under cover.
- Release the clips and claws, and remove the ornament panel assembly P.
- Remove the screws and release the claws, then detach the glove box back panel.
- Disconnect the glove box light LED connector.
B: INSTALLATION
Install each part in the reverse order of removal.
READ NEXT:
 Center Console
A: REMOVAL
1. CENTER PANEL ASSY
1) Attach the protective tape (a) to the meter visor.
2) Remove the center panel assembly.
CAUTION:
Do not put your finger on the fin of the air vent grille. Doing so
Instrument Panel Assembly
A: REMOVAL
CAUTION:
Be careful not to damage the airbag system harness when servicing the instrument
panel. Damage
may cause the system to malfunction.
1) Disconnect the ground cable from battery.
2
Lower Inner Trim
A: REMOVAL
1) Release the claws, and then remove the side sill cover-front INN.
CAUTION:
Do not pull with excessive force. Doing so may damage the claws of the side sill
cover INN.
NOTE:
To release
SEE MORE:
Head restraint adjustment
1) Head restraint
2) Release button
Both the driver’s seat and the front passenger’s seat are equipped with head
restraints.
The head restraint should be adjusted so that the center of the head restraint
is closest to the top of the occupant’s ears.
To raise:
Pull the head restraint
SRS side airbag and SRS curtain airbag
The SRS side airbag is stored in the door side of each front seat seatback, which
bears an “SRS AIRBAG” label.
In a moderate to severe side impact collision, the SRS side airbag on the impacted
side of the vehicle deploys between the occupant and the door panel and supplements
the seatbel
© 2010-2026 Copyright www.suoutback.com
