Subaru Outback (BR): Passenger compartment area
Subaru Outback (BR) 2010-2015 Owners Manual / About vehicle / Illustrated index / Interior / Passenger compartment area
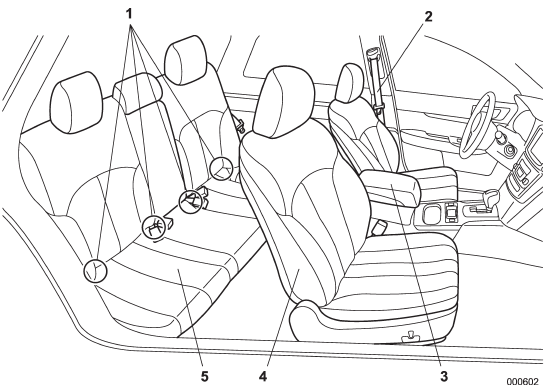
1) Lower anchorages for child restraint system (page 1-33)
2) Seatbelt (page 1-12)
3) Center console (page 6-6)
4) Front seat (page 1-2)
5) Rear seat (page 1-7)
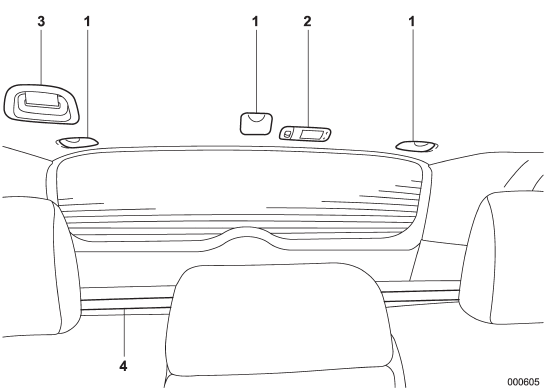
1) Top tether anchorages (page 1-36) 2) Cargo area light (page 6-3) 3) Rear center seatbelt (page 1-18) 4) Cargo area cover (page 6-15)
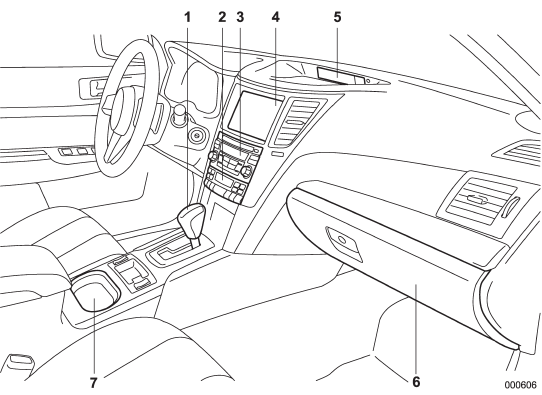
1) Shift lever (MT) (page 7-16)/Select lever (AT and CVT) (page 7-19)
2) Climate control (page 4-1)
3) Audio (page 5-1)
4) Navigation system (Refer to the Owner’s Manual supplement for the navigation
system)
5) Multi function display (page 3-25)
6) Glove box (page 6-6)
7) Cup holder (page 6-8)
READ NEXT:
 Instrument panel
1) Door locks (page 2-4)
2) Electronic parking brake switch (page 7-34)
3) Hill Holder switch (page 7-36)
4) Trunk lid opener switch (page 2-24)
5) Vehicle Dynamics Control OFF switch (page 7-31
Light control and wiper control levers/switches
1) Windshield wiper (page 3-31)
2) Mist (page 3-32)
3) Windshield washer (page 3-33)
4) Rear window wiper and washer switch (page 3-34)
5) Wiper intermittent time control switch (page 3-33)
6)
SEE MORE:
Steps to take if EBD system malfunctions
If a malfunction occurs in the EBD system, the system stops working and the brake
system warning light and ABS warning light illuminate simultaneously.
The EBD system may be malfunctioning if the brake system warning light and ABS
warning light illuminate simultaneously during driving.
Even
Engine oil
NOTE
● When the engine low oil level warning light illuminates, have your vehicle
inspected by your SUBARU dealer as soon as possible.
● The engine oil consumption rate is not stabilized, and therefore cannot be
determined until the vehicle has traveled at least several thousand
© 2010-2026 Copyright www.suoutback.com
