Subaru Outback (BR): Rear Bumper
A: REMOVAL
1) Remove the rear combination light assembly.
- Sedan model
1. Remove the trunk room trim. <Ref. to EI-127, REMOVAL, Trunk Room Trim.>
2. Disconnect the connector.
3. Release the nuts and clips, then remove the rear combination light assembly.
CAUTION: Be careful not to damage the clips.
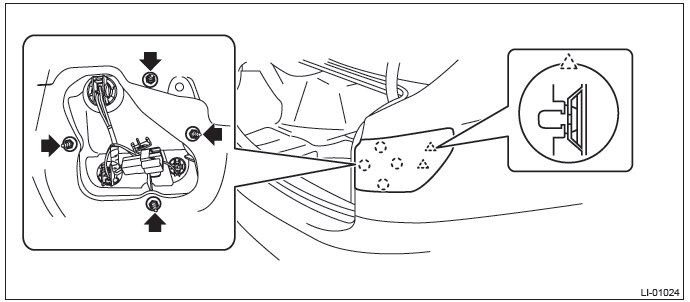
- OUTBACK model
1. Remove the clips and detach the rear combination light covers.

2. Release the bolts and clips, then pull out the rear combination light assembly to the vehicle rear.
3. Disconnect the connector and remove the rear combination light assembly.
CAUTION: Be careful not to damage the clips.
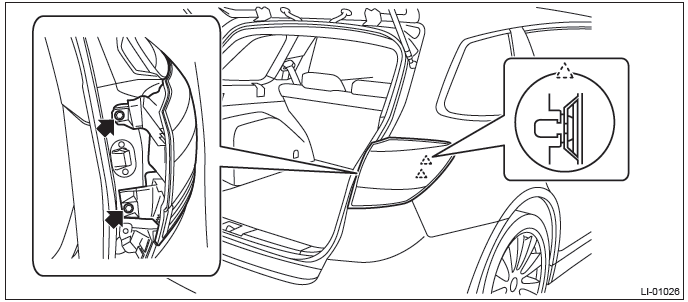
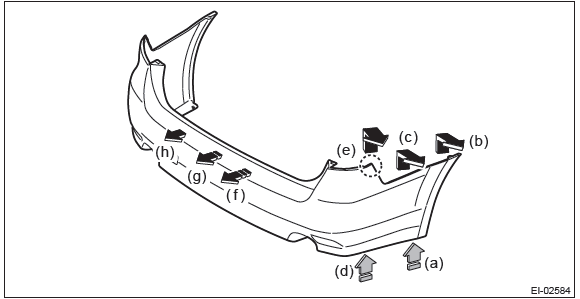
2) Remove the rear bumper face assembly.
- Remove the clips inside the wheel housing.
- Remove the clips at the lower side of rear bumper.
- Detach the (b) and (c) while pulling up (a) of the bumper.
- Detach (e) while pulling up the bumper (d).
- Detach the opposite side in the same manner.
- Detach in order from (f) to (h) while pulling up center part of the bumper face.
CAUTION: Do not pull with a excessive force. Otherwise the bracket installation area may be damaged.
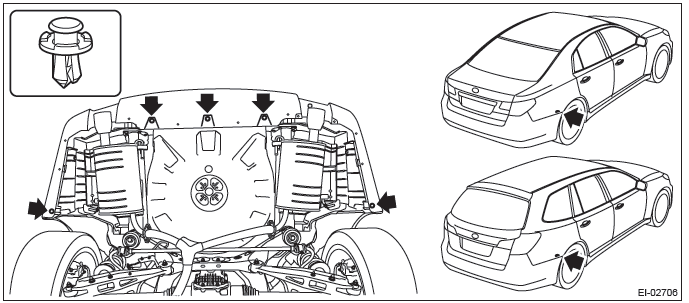
3) Remove the rear bumper beam assembly.
- Remove the energy absorber foam.
- Remove the nuts, and remove the rear bumper beam assembly from vehicle body.
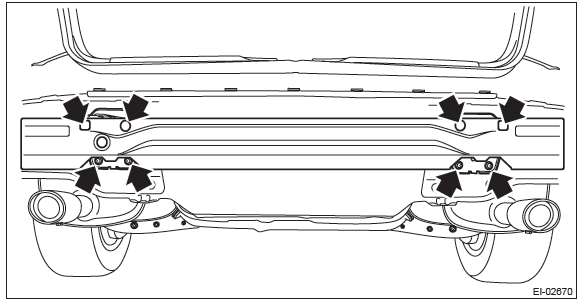
NOTE: After all nuts are removed, raise the rear bumper beam assembly a little to remove it from vehicle body.
4) Remove bumper brackets.
- Sedan model
- OUTBACK model
5) Remove the reflex reflector. (OUTBACK model)
- Press the claws of reflex reflector from the back of the bumper face.
- Remove the reflex reflector.
B: INSTALLATION
Install each part in the reverse order of removal.
NOTE: If the bumper face comes off too easily, adjust the hook of the bracket side.
Tightening torque: Refer to "COMPONENT" of "General Description". <Ref. to EI-6, REAR BUMPER, COMPONENT, General Description.>
C: REPAIR
Refer to the front bumper repair. <Ref. to EI-45, REPAIR, Front Bumper.>
Side Sill Spoiler
A: REMOVAL
Remove the clips and detach the side spoiler.
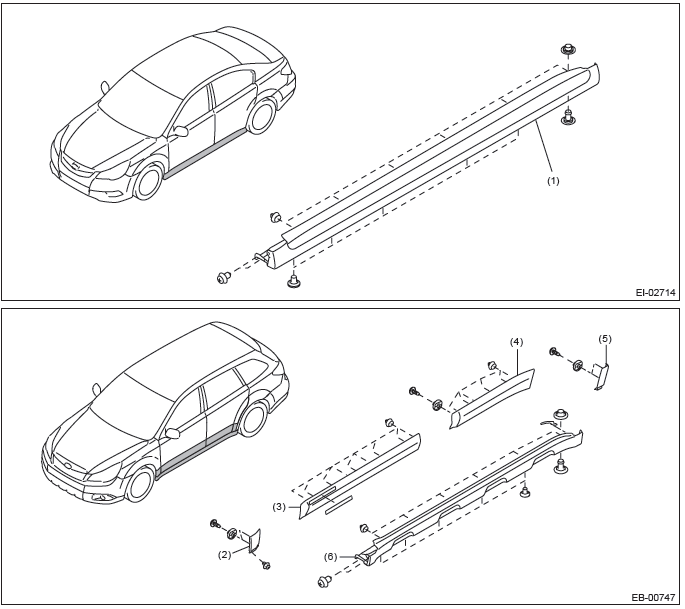
- Side sill garnish ASSY (sedan model)
- Garnish ASSY front fender (OUTBACK model)
- Garnish ASSY front door (OUTBACK model)
- Garnish ASSY rear door (OUTBACK model)
- Garnish ASSY rear quarter (OUTBACK model)
- Side sill garnish ASSY (OUTBACK model)
B: INSTALLATION
Install each part in the reverse order of removal.
READ NEXT:
 Roof Molding
A: REMOVAL
CAUTION:
Be careful not to damage the body.
1) Remove the roof rail assembly. (OUTBACK model) <Ref. to EI-59, REMOVAL,
Roof Rail.>
2) Turn over the front end of roof molding.
3) Us
Door Trim
A: REMOVAL
1. FRONT DOOR
1) Disconnect the ground cable from battery.
2) Remove the gusset cover.
Attach the protective tape (a) to the door trim.
Release the clips and claws, then detach the guss
Instrument Panel Lower Cover
A: REMOVAL
1) Disconnect the ground cable from battery.
2) Remove the clips, and remove the instrument panel side cover LH.
3) Remove the instrument panel lower cover.
Remove the clips and data li
SEE MORE:
CVTF
A: INSPECTION
Check for leakage of CVTF from transmission.
B: ADJUSTMENT
CAUTION:
CVTF level changes along with CVTF temperature. When inspecting CVTF
level, observe the specified
CVTF temperature.
Always use specified CVTF or equivalent. Using other fluid than
specified or equivalent will c
Throttle Body
A: REMOVAL
1) Disconnect the ground cable from battery.
2) Remove the cover (A) and clip (B) from air intake
boot assembly.
3) Loosen the clamp (A) which connects the air intake
boot assembly and air cleaner case.
4) Loosen the clamp (B) which connects the air intake
boot assembly and throttle bo
