Subaru Outback (BR): Remote Openers
A: REMOVAL
1. FRONT HOOD OPENER
1) Remove the opener lever.
- Remove the cable.
- Remove the nut, and detach the opener lever.
2) Remove the following parts and remove the cable clip and cable.
- Front hood lock ASSY: <Ref. to SL-51, REMOVAL, Front Hood Lock Assembly.>
- Instrument panel lower cover: <Ref. to EI-64, REMOVAL, Instrument Panel Lower Cover.>
2. FUEL FLAP OPENER
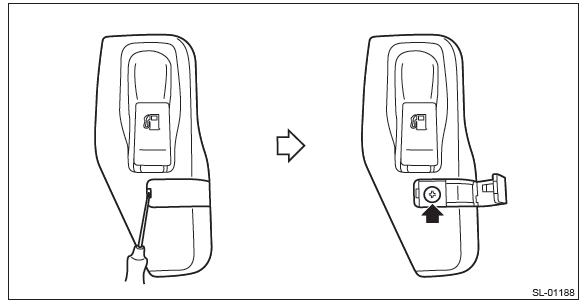
1) Remove the pull handle cover.
- Open the cover by using a flat tip screwdriver.
- Remove the screw and remove the pull handle cover.
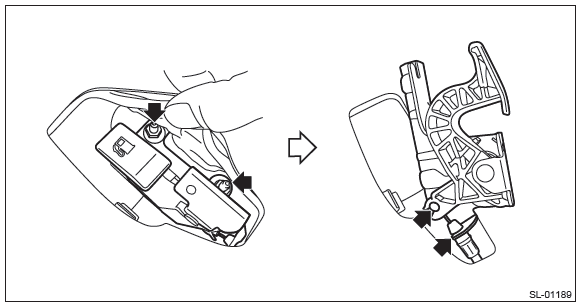
2) Remove the opener handle.
- Remove the nut.
- Remove the cable from opener pull handle.
3) Remove the rear quarter trim RH. (OUTBACK model) <Ref. to EI-114, OUTBACK MODEL, REMOVAL, Rear Quarter Trim.>
4) Remove the trunk room trim (RH). (Sedan model) <Ref. to EI-127, TRUNK ROOM TRIM, REMOVAL, Trunk Room Trim.>
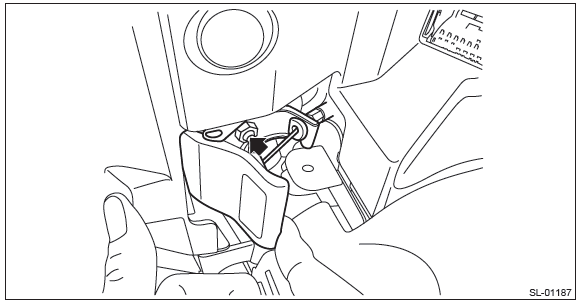
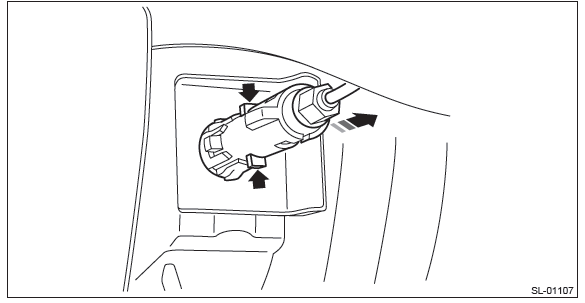
5) Remove the fuel lock inside the quarter panel.
- Press the claws of the fuel lock.
- While keeping the condition in step (1), pull the fuel lock to the rearward of the vehicle.
6) Remove the lower inner trim. <Ref. to EI-96, REMOVAL, Lower Inner Trim.>
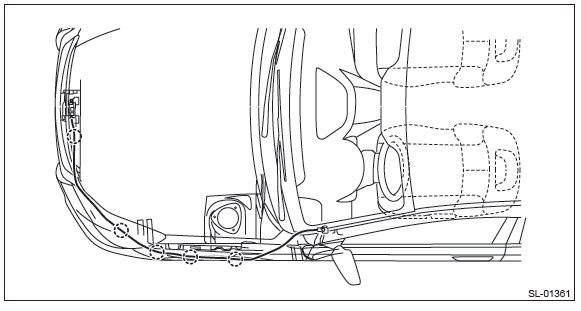
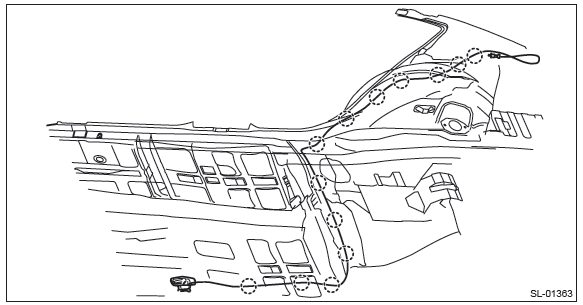
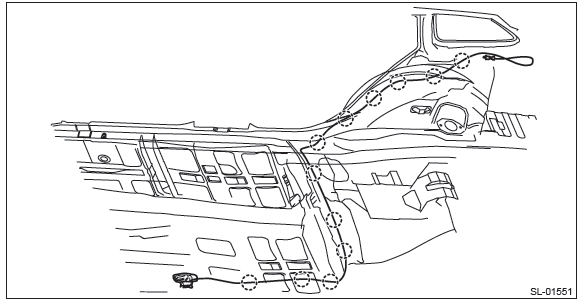
7) Remove the cable from the clip.
- Sedan model
- OUTBACK model
B: INSTALLATION
1) Before installation, check the following items.
- Cable is free from deformation such as fray.
2) Install each part in the reverse order of removal.
Tightening torque: Refer to "COMPONENT" of "General Description". <Ref. to SL-4, FRONT HOOD LOCK AND REMOTE OPENERS, COMPONENT, General Description.>
C: INSPECTION
Check if the front hood and fuel flap operate normally.
Ignition Key Lock
A: REPLACEMENT
1) Disconnect the ground cable from battery.
2) Remove the steering column. <Ref. to PS-26, REMOVAL, Steering Column.>
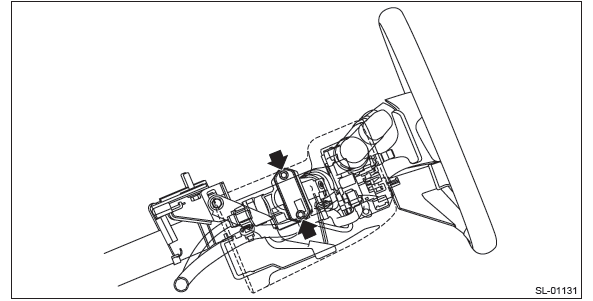
3) Remove the ignition key lock.
- Secure the steering column in a vise.
- Drill out the bolts and remove the ignition key lock.
4) Install the ignition key lock.
- Secure the ignition key lock to the steering column.
- Use new bolts. Tighten the bolt until the bolt head is broken (bolt head wrenched off).
B: INSPECTION
1) Disconnect the ignition switch connector.
2) Measure the resistance between ignition switch terminals.
Preparation tool: Circuit tester
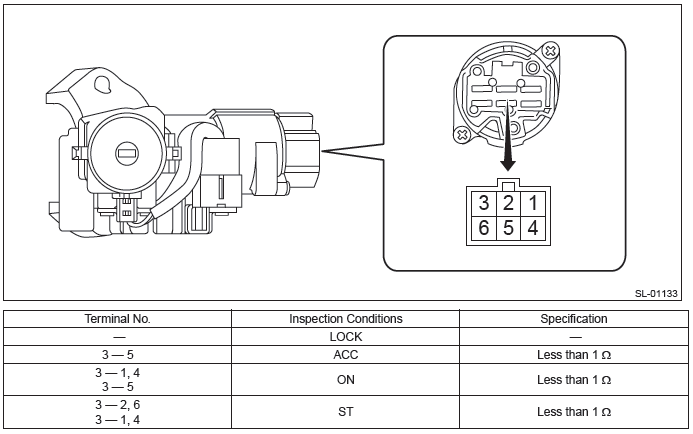
3) Replace the ignition switch if the inspection result is not within the standard value.
READ NEXT:
 Key Lock Cylinders
A: REPLACEMENT
1. FRONT DOOR
1) Raise the front door glass to the top position.
2) Remove the door trim. <Ref. to EI-60, FRONT DOOR, REMOVAL, Door Trim.>
3) Remove the sealing cover.
CAUTION:
Keyless Entry Control Module
A: REMOVAL
1. SEDAN MODEL
1) Disconnect the ground cable from battery.
2) Remove the rear shelf trim. <Ref. to EI-120, REMOVAL, Rear Shelf Trim.>
3) Remove the keyless entry control module.
Keyless Transmitter
A: REMOVAL
NOTE:
For C6 model, refer to Transmitter. <Ref. to SL-75, REMOVAL, Transmitter.>
1. KEYLESS TRANSMITTER BATTERY
CAUTION:
To prevent static electricity damage to the keyless transmitte
SEE MORE:
Instrument panel
1) Door locks (page 2-4)
2) Electronic parking brake switch (page 7-34)
3) Hill Holder switch (page 7-36)
4) Trunk lid opener switch (page 2-24)
5) Vehicle Dynamics Control OFF switch (page 7-31)
6) Remote control mirror switch (page 3-51)
7) Illumination brightness control (page 3-30)
8) L
Cooling system
WARNING
Never attempt to remove the radiator cap until the engine has been shut off and
has cooled down completely. Since the coolant is under pressure, you may suffer
serious burns from a spray of boiling hot coolant when the cap is removed.
CAUTION
● Vehicles are filled at the factory
