Subaru Outback (BR): Keyless Transmitter
A: REMOVAL
NOTE: For C6 model, refer to Transmitter. <Ref. to SL-75, REMOVAL, Transmitter.>
1. KEYLESS TRANSMITTER BATTERY
CAUTION: To prevent static electricity damage to the keyless transmitter printed circuit board, touch the steel area of building with hand to discharge static electricity carried on body or clothes before disassembling the keyless transmitter.
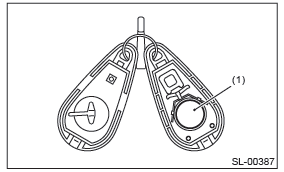
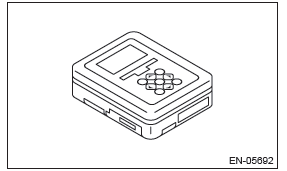
1) Disassemble the keyless transmitter, and take out the transmitter case (1).
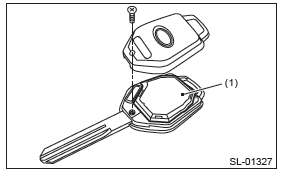
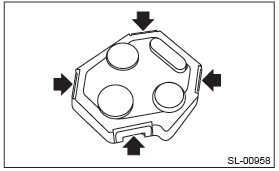
2) Release the claws, and open the transmitter case.
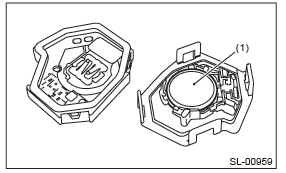
3) Remove the battery (1) from the transmitter.
B: INSTALLATION
1. KEYLESS TRANSMITTER BATTERY
Install each part in the reverse order of removal.
C: INSPECTION
1. KEYLESS TRANSMITTER BATTERY
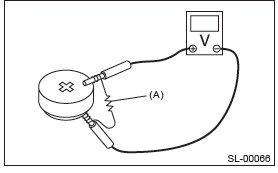
1) Check the keyless transmitter battery voltage.
Preparation tool: Circuit tester
NOTE: Complete the measurement within 5 seconds because the battery discharges during measurement.
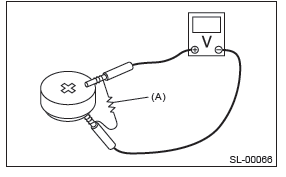

2) Replace the battery if the inspection result is not within the standard value. (Use CR1620 or equivalent.)
D: REPLACEMENT
1. REGISTRATION OF KEYLESS TRANSMITTER WITH SUBARU SELECT MONITOR
NOTE:
- A maximum of four keyless transmitter can be registered for each individual vehicle.
- When replacing or adding the keyless transmitter, new registration of transmitter is necessary.
1) Prepare the Subaru Select Monitor kit. <Ref. to SL-7, SPECIAL TOOL, PREPARATION TOOL, General Description.>
2) Prepare PC with Subaru Select Monitor installed.
3) Connect the USB cable to SDI (Subaru Diagnosis Interface) and USB port on the personal computer (dedicated port for the Subaru Select Monitor).
NOTE: The dedicated port for the Subaru Select Monitor means the USB port which was used to install the Subaru Select Monitor.
4) Connect the diagnosis cable to SDI.
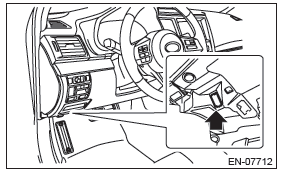
5) Connect SDI to data link connector located in the lower portion of the instrument panel (on the driver's side).
CAUTION: Do not connect scan tools other than the Subaru Select Monitor.
6) Start the PC.
7) Turn the ignition switch to ON (engine OFF) and run the "PC application for Subaru Select Monitor".
8) On the "Main Menu" of the Subaru Select Monitor, select the {Each System Check} → {Integ. unit mode} → {Keyless ID registration}.
9) Input the 8-digit ID number attached to the tag plate of the transmitter or inside the transmitter, from left to right. Press the [OK] key.
10) The ID number you have entered will be shown. Make sure that the ID number shown is the same as that of plastic bag or inside of transmitter.
11) Press the [OK] key if the ID number is correct. Press the [EXIT] key if incorrect, to return to the step 3) and enter the ID number again.
12) "ID is being registered..." is displayed and registration starts.
13) "ID registration completed " will be displayed when the registration process is done.
14) To exit, select "Quit: NO" to return to {Keyless ID registration}. If there are additional keyless transmitters to be registered, select "The following are registered: OK" to return to the step 4).
NOTE:
- If the registration fails, "ID cannot register Please try again" will be shown. Select the [OK] key to return to the {Keyless ID registration}. Retry starting from the step 3).
- "Quit: NO" is shown on the Subaru Select Monitor when fourth keyless
transmitter has been registered.
Select the [NO] key to return to {Keyless ID registration}.
Transmitter
A: REMOVAL
NOTE: For models except for C6, refer to Keyless Transmitter. <Ref. to SL-72, REMOVAL, Keyless Transmitter.>
1. TRANSMITTER BATTERY
NOTE: To prevent static electricity damage to the transmitter printed circuit board, touch the steel area of building with hand to discharge static electricity carried on body or clothes before disassembling the transmitter.
Remove the battery (1) from the transmitter.
B: INSTALLATION
1. TRANSMITTER BATTERY
Install each part in the reverse order of removal.
C: INSPECTION
1. TRANSMITTER BATTERY
1) Check the transmitter battery voltage.
Preparation tool: Circuit tester
NOTE: Complete the measurement within 5 seconds because the battery discharges during measurement.

2) Replace the battery if the inspection result is not within the standard value. (Use CR1620 or equivalent.)
D: REPLACEMENT
1. REGISTRATION OF KEYLESS TRANSMITTER WITH SUBARU SELECT MONITOR
NOTE:
- A maximum of four keyless transmitter can be registered for each individual vehicle.
- When replacing or adding the keyless transmitter, new registration of transmitter is necessary.
1) Prepare the Subaru Select Monitor kit. <Ref. to SL-7, SPECIAL TOOL, PREPARATION TOOL, General Description.>
2) Prepare PC with Subaru Select Monitor installed.
3) Connect the USB cable to SDI (Subaru Diagnosis Interface) and USB port on the personal computer (dedicated port for the Subaru Select Monitor).
NOTE: The dedicated port for the Subaru Select Monitor means the USB port which was used to install the Subaru Select Monitor.
4) Connect the diagnosis cable to SDI.
5) Connect SDI to data link connector located in the lower portion of the instrument panel (on the driver's side).
CAUTION: Do not connect scan tools other than the Subaru Select Monitor.
6) Start the PC.
7) Turn the ignition switch to ON (engine OFF) and run the "PC application for Subaru Select Monitor".
8) On the "Main Menu" of the Subaru Select Monitor, select the {Each System Check} → {Integ. unit mode} → {Keyless ID registration}.
9) Input the 8-digit ID number attached to the tag plate of the transmitter or inside the transmitter, from left to right. Press the [OK] key.
10) The ID number you have entered will be shown. Make sure that the ID number shown is the same as that of plastic bag or inside of transmitter.
11) Press the [OK] key if the ID number is correct. Press the [EXIT] key if incorrect, to return to the step 3) and enter the ID number again.
12) "ID is being registered..." is displayed and registration starts.
13) "ID registration completed " will be displayed when the registration process is done.
14) To exit, select "Quit: NO" to return to {Keyless ID registration}. If there are additional keyless transmitters to be registered, select "The following are registered: OK" to return to the step 4).
NOTE:
- If the registration fails, "ID cannot register Please try again" will be shown. Select the [OK] key to return to the {Keyless ID registration}. Retry starting from the step 3).
- "Quit: NO" is shown on the Subaru Select Monitor when fourth keyless
transmitter has been registered.
Select the [NO] key to return to {Keyless ID registration}.
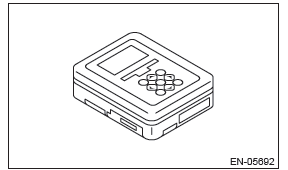
Immobilizer Control Module
A: NOTE
The control of immobilizer system is carried out in body integrated unit. For operation procedures, refer to "Body Integrated Unit".
- Removal: <Ref. to SL-71, REMOVAL, Body Integrated Unit.>
- Installation: <Ref. to SL-71, INSTALLATION, Body Integrated Unit.>
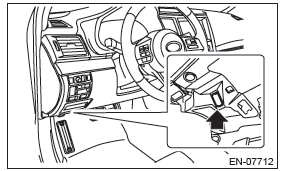
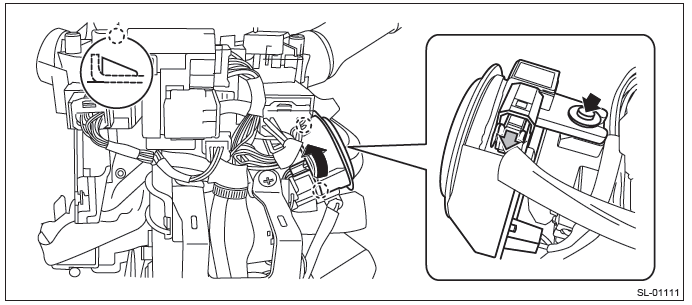
Immobilizer Antenna
A: REMOVAL
1) Disconnect the ground cable from battery.
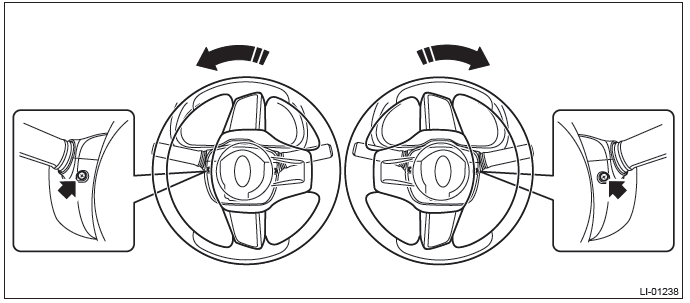
2) Remove the steering column cover.
- Remove the screws by turning the steering wheel to right and left.
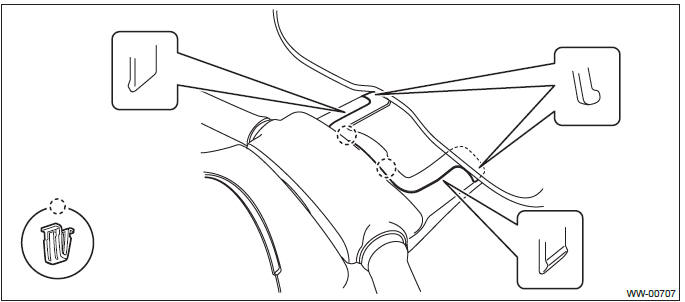
- Release the claws and remove the steering column lower cover.

- Separate the steering column upper cover and steering upper cover, and remove the steering column upper cover.
3) Remove the immobilizer antenna.
CAUTION: Do not apply excessive force to remove the immobilizer antenna and lock. Otherwise they may be broken because those parts are the products made of a plastic.
- Disconnect the connector and remove the screw.
- Remove the ignition illumination light and release the claws, then detach the immobilizer antenna.
B: INSTALLATION
Install each part in the reverse order of removal.
READ NEXT:
 Sunroof/T-Top/Convertible Top (Sunroof)
General Description
A: COMPONENT
Glass lid
Weather strip
Lid cover
Sunshade
Drain tube
Motor ASSY
Frame ASSY
Deflector
Drain plate
Stopper rubber
Link ASSY
Lid bracket
Tightening torque
General Description of Trim
A: COMPONENT
1. FRONT UNDER COVER
Small type
Medium type
Large type
Tightening torque: N*m (kgf-m, ft-lb)
T: 17.5 (1.78, 12.9)
2. FLOOR UNDER PROTECTOR
Tightening torque: N
SEE MORE:
Electronic Brake Force Distribution (EBD) system warning
The brake system warning light also illuminates if a malfunction
occurs in the EBD system. In that event, it illuminates together with the ABS warning
light. The EBD system may be malfunctioning if the brake system warning light and
ABS warning light illuminate simultaneously during driving.
Rear gate (Outback) – if the rear gate cannot be unlocked
In the event that you cannot unlock the rear gate by operating the power door
locking switches or the remote keyless entry system, you can unlock it from inside
the cargo area.
1. Remove the access cover at the bottom-center of the rear gate trim using flat-head
screwdriver.
2. Locate the
