Subaru Outback (BR): Front Bumper
A: REMOVAL
1) Disconnect the ground cable from battery.
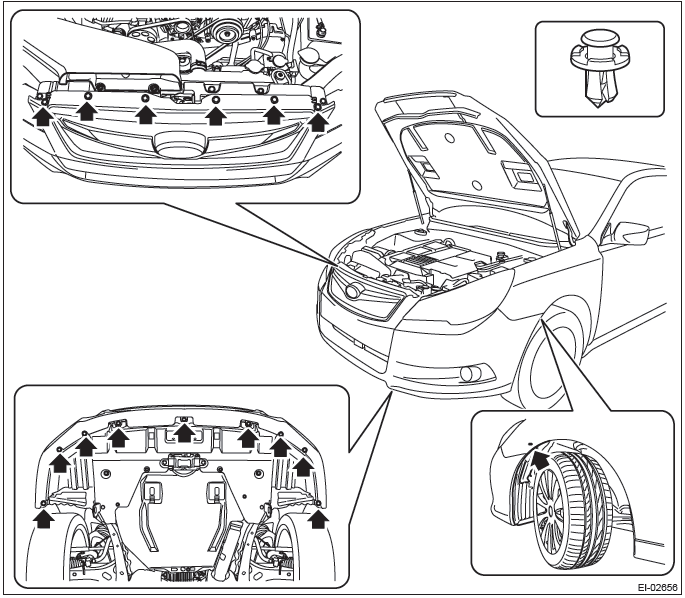
2) Remove the front bumper face assembly.
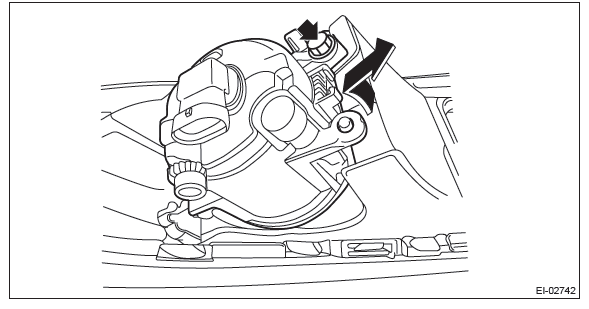
- Remove the clips, turn over the front mud guard, and disconnect the fog light connector. (Model with fog light)
- Remove the clips at the upper side of the bumper.
- Remove the clips from the fender.
- Remove the clips at the lower side of bumper.
- Detach the flange section on the bumper face side from the bracket side front UPR.
CAUTION: Do not pull forcibly. It may damage the flange sections of the bumper face.
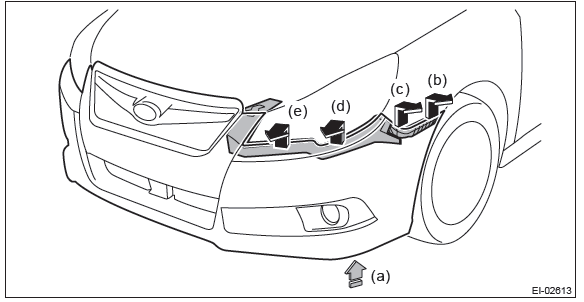
NOTE: Pushing up the lower side (a) of the fog light, remove from (b) to (e).
Detach the opposite side in the same manner.
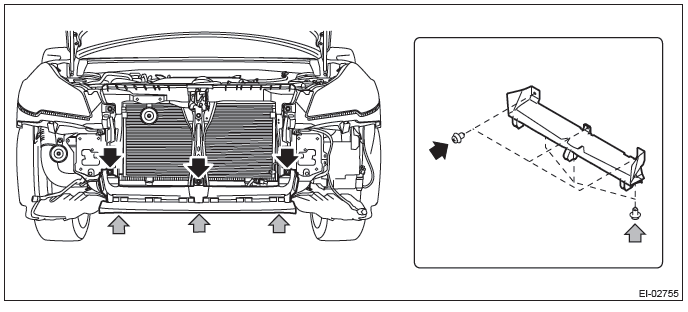
3) Remove the beam COMPL front ASSY.
- Remove the energy absorber foam.
- Remove the bolts, and remove the beam COMPL front from vehicle body.
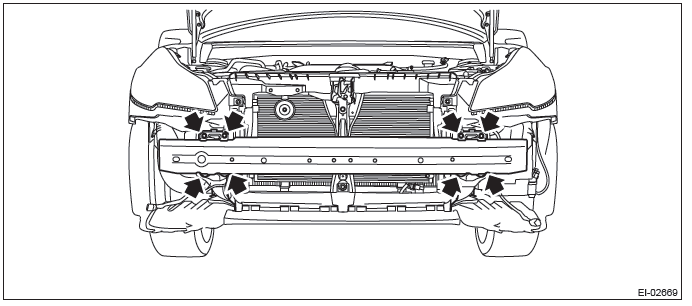
NOTE: After all bolts are removed, raise the whole beam COMPL front a little to remove it from vehicle body.
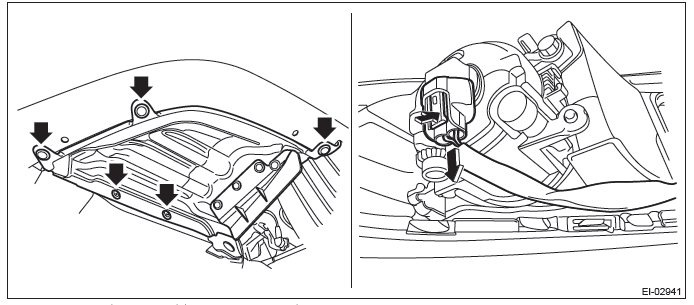
4) Remove the bracket center LWR-front.
- Release the clips to remove the front under cover.
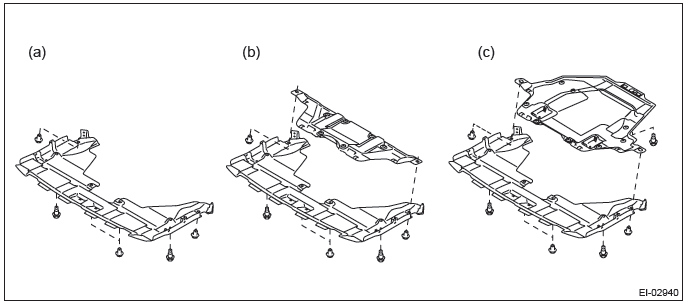
- Small type
- Medium type
- Large type
- Remove the clip, and remove the bracket center LWR-front.
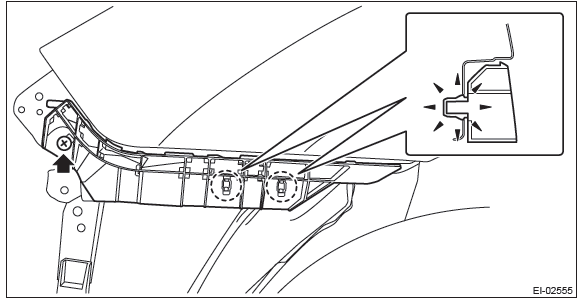
5) Remove the bracket side front UPR.
- Remove the screws.
- Release the claws and remove the bracket side front UPR.
6) Remove the bolts and pins, and remove the front fog light assembly.
B: INSTALLATION
1) Install each part in the reverse order of removal.
2) Make sure that the bumper flanges are secured to the bracket side front UPR.
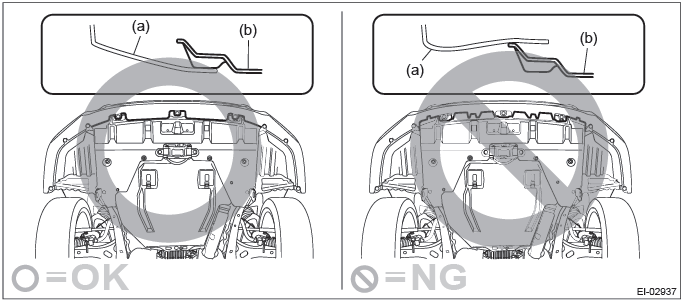
CAUTION: Install the bumper face so that the under cover front end (b) comes inside the front bumper face (a).
Tightening torque: Refer to "COMPONENT" of "General Description". <Ref. to EI-5, FRONT BUMPER, COMPONENT, General Description.>
3) Adjust the fog light beam. (Model with fog light) <Ref. to LI-41, FOG LIGHT AIMING, ADJUSTMENT, Front Fog Light Assembly.>
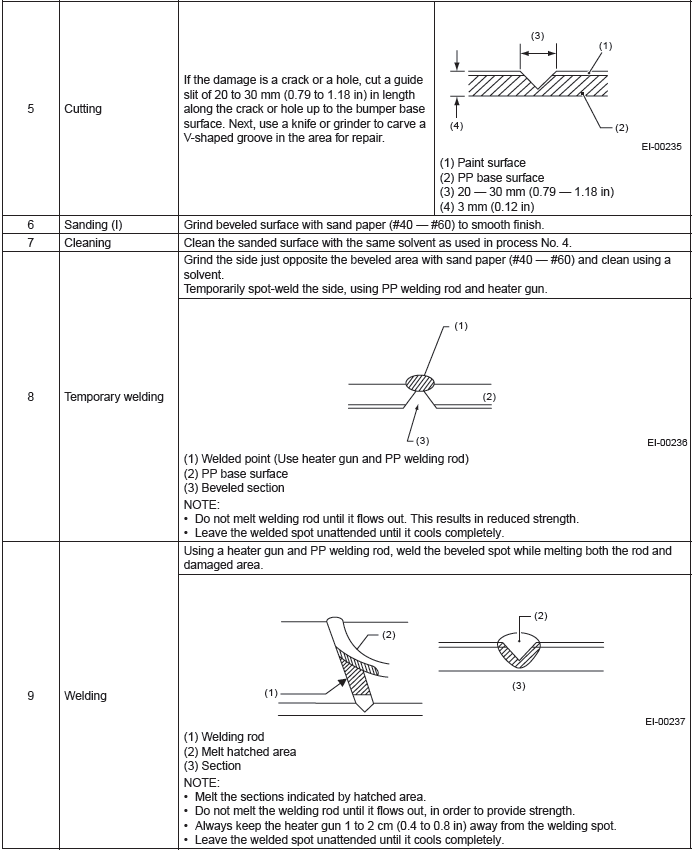
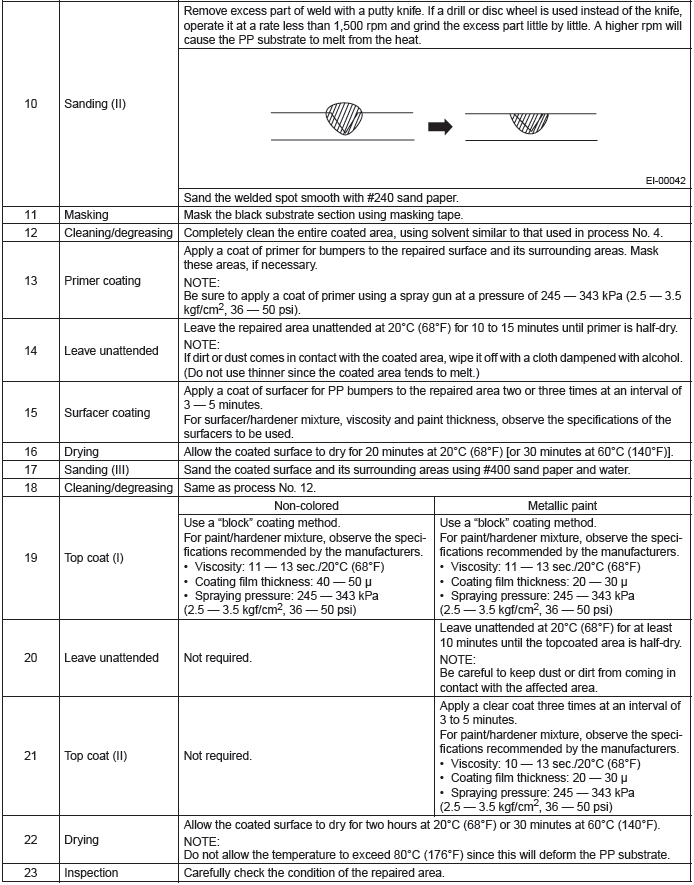
C: REPAIR
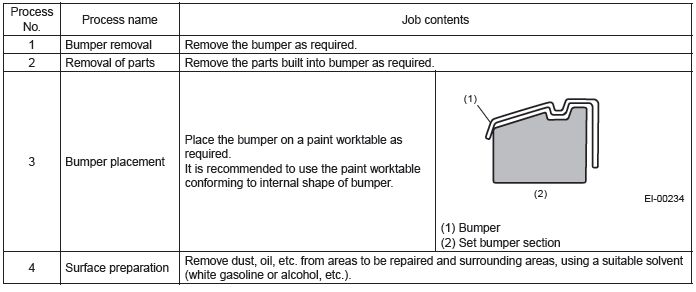
1. COATING METHOD FOR PP BUMPER

2. REPAIR INSTRUCTIONS FOR COLORED PP BUMPER
NOTE: All PP bumpers are provided with a grained surface, and if the surface is damaged, it cannot normally be restored to its former condition. Damages limited to the shallow scratches that cause only a change in the luster of the base material or coating, can be almost fully restored. Before repairing a damaged area, explain this point to the customer and obtain an understanding about the matter.
Repair methods are outlined below, based on a classification of the extent of damage.
1) Minor damage causing only a change in the luster of the bumper due to a light touch Almost restorable.
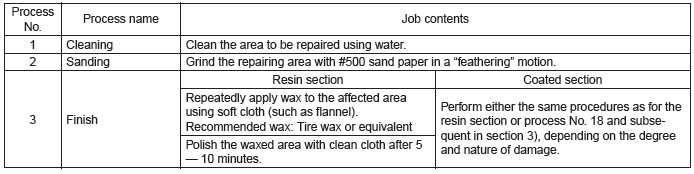
2) Deep damage caused by scratching with fences etc.
A dent cannot be repaired but a whitened or swelled part can be removed.
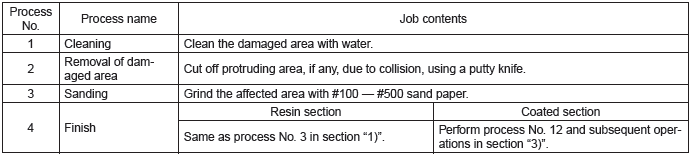
3) Deep damage such as a break or hole that requires filling Much of the peripheral grained surface must be sacrificed for repair. The degree of restoration is not really worth the expense. (The surface, however, will become almost flush with adjacent areas.)

READ NEXT:
 Rear Bumper
A: REMOVAL
1) Remove the rear combination light assembly.
Sedan model
1. Remove the trunk room trim. <Ref. to EI-127, REMOVAL, Trunk Room Trim.>
2. Disconnect the connector.
3. Release the
Roof Molding
A: REMOVAL
CAUTION:
Be careful not to damage the body.
1) Remove the roof rail assembly. (OUTBACK model) <Ref. to EI-59, REMOVAL,
Roof Rail.>
2) Turn over the front end of roof molding.
3) Us
Door Trim
A: REMOVAL
1. FRONT DOOR
1) Disconnect the ground cable from battery.
2) Remove the gusset cover.
Attach the protective tape (a) to the door trim.
Release the clips and claws, then detach the guss
SEE MORE:
Select Cable
A: REMOVAL
1) Shift the select lever to "N" range.
2) Disconnect the ground cable from battery.
3) Lift up the vehicle.
4) Remove the front exhaust pipe and rear exhaust pipe.
2.5 L model
<Ref. to EX(H4SO)-5, REMOVAL, Front Exhaust Pipe.> <Ref. to EX(H4SO)-9,
REMOVAL, Rear Exhaust
Power door locking switches
1) Lock
2) Unlock
All doors and the rear gate (Outback) can be locked and unlocked by the power
door locking switches located at the driver’s side and the front passenger’s side
doors. To lock the doors, press the front side of the switch.
To unlock the doors, press the rear side of the
