Subaru Outback (BR): Rear Quarter Trim
A: REMOVAL
1. SEDAN MODEL
1) Disconnect the ground cable from battery and wait for at least 60 seconds before starting work.
CAUTION: The airbag system is fitted with a backup power supply. After disconnecting the battery ground cable, the airbag may operate if you do not wait for 60 seconds before starting the service of airbag system.
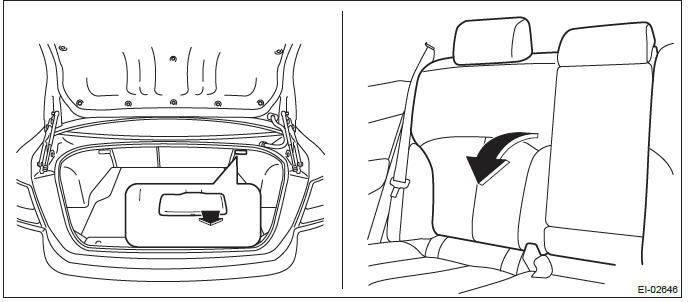
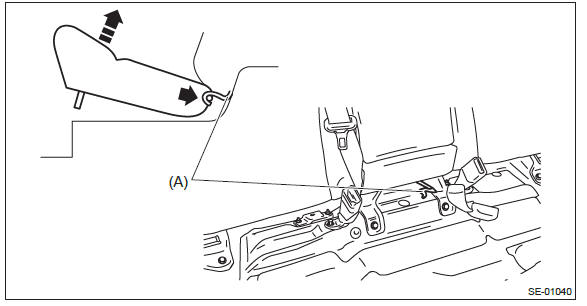
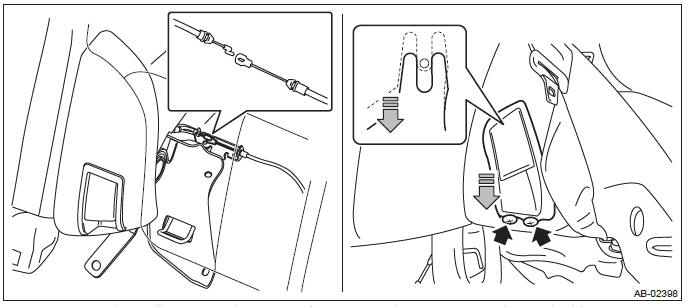
2) Remove the rear seat cushion assembly.
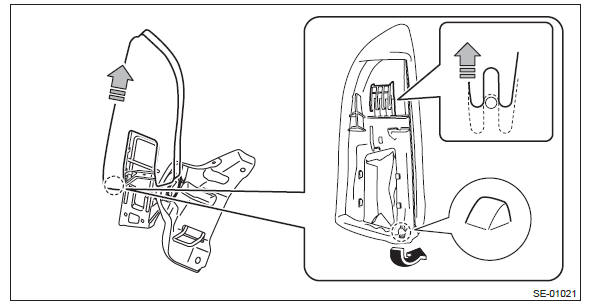
- Pull up the seat cushion and release the hook.
CAUTION: If the hook is disconnected from the vehicle body, replace the hook with the new part to prevent the decline of the fixed force of the seat.

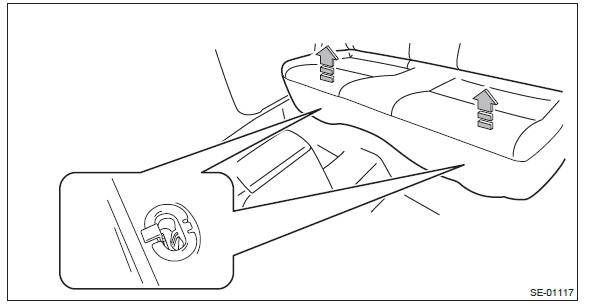
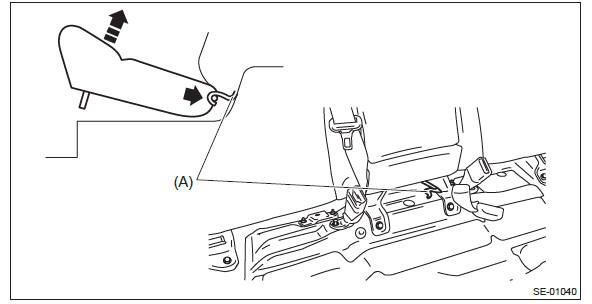
- Remove the hook (A) by pushing it back while lifting the front side of the seat cushion, and remove the seat cushion.
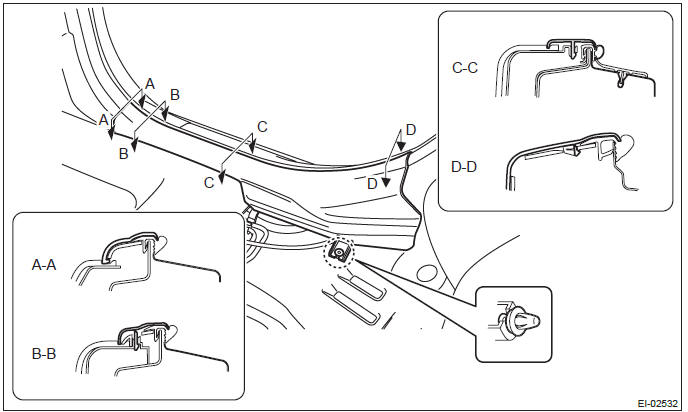
3) Release the clips and claws, and then remove the side sill cover - rear INN.
CAUTION: Do not pull with excessive force. Doing so may damage the claws of the side sill cover INN.
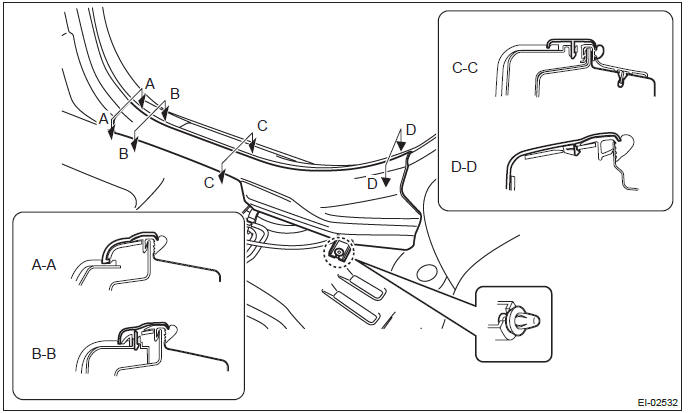
NOTE: To release the claws of the side sill cover INN, the following steps are recommended.
1. Take out the weather strip from under the side sill cover INN.
2. Turn over the floor mat and release the claw (C-C and D-D) by accessing from behind the side sill cover INN.
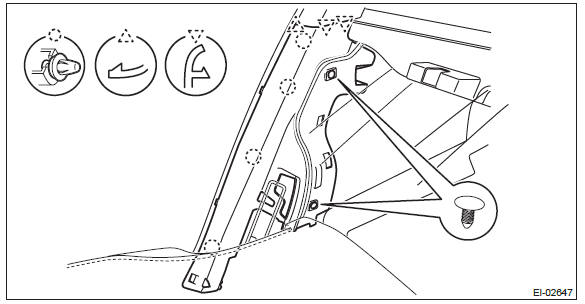
4) Remove the rear quarter trim LWR.
- Remove the backrest side pad.
- Remove the screws.
Preparation tool: Stubby screwdriver
- Turn over the bottom end of the backrest side pad in the forward direction so that the claws are released.
- Remove the backrest side pad by pulling it up.
- Pull the release lever in the trunk room, and then tilt the backrest forward.
- Release the clips of the trunk trim panel assembly-side.
- Remove the clips, and remove the rear quarter trim LWR.
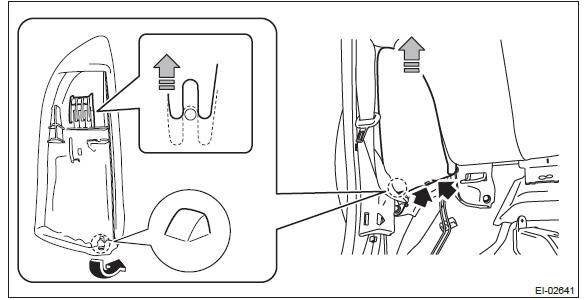
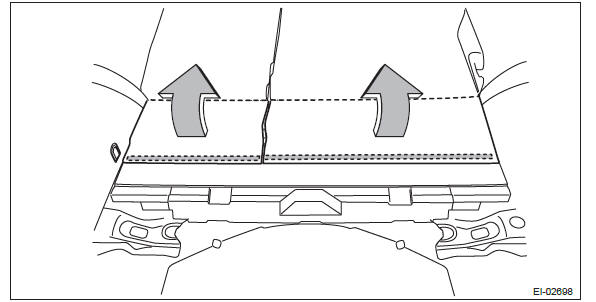
5) Remove the rear quarter trim UPR.
- Remove the lower anchor bolt of the outer belt assembly.
- Release the clips, and remove the rear quarter trim UPR.
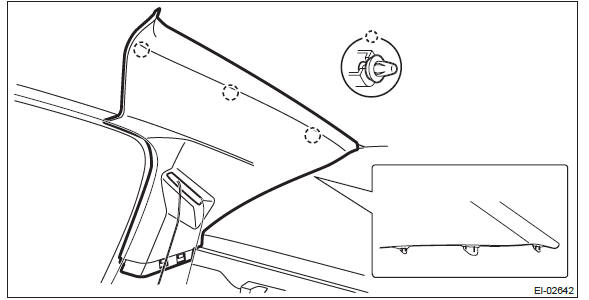
Pull out the seat belt and remove the rear quarter trim UPR.
2. OUTBACK MODEL
1) Disconnect the ground cable from battery and wait for at least 60 seconds before starting work.
CAUTION: The airbag system is fitted with a backup power supply. After disconnecting the battery ground cable, the airbag may operate if you do not wait for 60 seconds before starting the service of airbag system.
2) Remove the rear seat cushion assembly.
- Pull up the seat cushion and release the hook.
CAUTION: If the hook is disconnected from the vehicle body, replace the hook with the new part to prevent the decline of the fixed force of the seat.

- Remove the hook (A) by pushing it back while lifting the front side of the seat cushion, and remove the seat cushion.
3) Release the clips and claws, and then remove the side sill cover - rear INN.
CAUTION: Do not pull with excessive force. Doing so may damage the claws of the side sill cover INN.
NOTE: To release the claws of the side sill cover INN, the following steps are recommended.
1. Take out the weather strip from under the side sill cover INN.
2. Turn over the floor mat and release the claw (C-C and D-D) by accessing from behind the side sill cover INN.
4) Tilt the backrest forward, and then turn over the backrest backside mat.
5) Remove the backrest side pad assembly.
- Disconnect the backrest cable and reclining lever cable.
- Remove the screws and remove the reclining lever assembly by pulling it downward.
Preparation tool: Stubby screwdriver
- Turn over the bottom end of the backrest side pad in the forward direction so that the claws are released.
- Remove the backrest side pad by pulling it up.
6) Remove the clips, and remove the luggage floor box and rear floor edge cover.
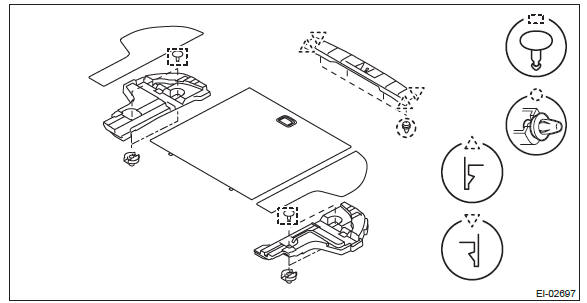
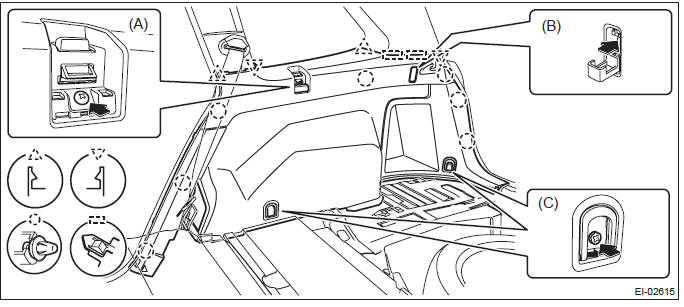
7) Remove the rear quarter trim LWR.
- Remove the caps, screws, and bolts. (A), (C)
- Take out the hook and remove the screw inside. (B)
- Remove the clips, and remove the rear quarter trim LWR.
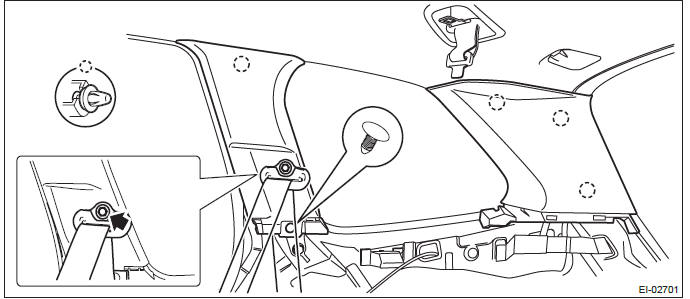
8) Remove the rear quarter trim UPR.
- Open the cap and remove the bolt to remove the seat belt anchor.
- Remove the clips, and remove the rear quarter trim UPR-front.
- Remove the clips, and remove the rear quarter trim UPR-rear.
B: INSTALLATION
CAUTION: If the hook is disconnected from the vehicle body, replace the hook with the new part to prevent the decline of the fixed force of the seat.
Install each part in the reverse order of removal.
Tightening torque:
Sedan model
Rear seat belt: <Ref. to SB-3, REAR SEAT BELT (SEDAN MODEL), COMPONENT, General
Description.>
OUTBACK model
Rear seat belt: <Ref. to SB-4, REAR SEAT BELT (OUTBACK MODEL), COMPONENT,
General Description.>
READ NEXT:
 Rear Shelf Trim
A: REMOVAL
1) Disconnect the ground cable from battery and wait for at least 60 seconds
before starting work.
CAUTION:
The airbag system is fitted with a backup power supply. After disconnecting the
Roof Trim
A: REMOVAL
1. SEDAN MODEL
1) Remove the rear seat cushion assembly.
Pull up the seat cushion and release the hook.
CAUTION:
If the hook is disconnected from the vehicle body, replace the hook with
SEE MORE:
Crankshaft Position Sensor
A: REMOVAL
1) Disconnect the ground cable from battery.
2) Remove the bolt which secures crankshaft position
sensor to oil pump.
3) Remove the crankshaft position sensor, and disconnect
the connector from the crankshaft position
sensor.
B: INSTALLATION
Install in the reverse order of removal.
Tig
General Description of Differentials
A: SPECIFICATION
1. REAR DIFFERENTIAL
When replacing a rear differential assembly, select the correct one according to the following table.
NOTE:
Using a different rear differential assembly will cause the drive train and tires to drag or emit abnormal noise.
For option code, refe
