Subaru Outback (BR): Rear Shelf Trim
A: REMOVAL
1) Disconnect the ground cable from battery and wait for at least 60 seconds before starting work.
CAUTION: The airbag system is fitted with a backup power supply. After disconnecting the battery ground cable, the airbag may operate if you do not wait for 60 seconds before starting the service of airbag system.
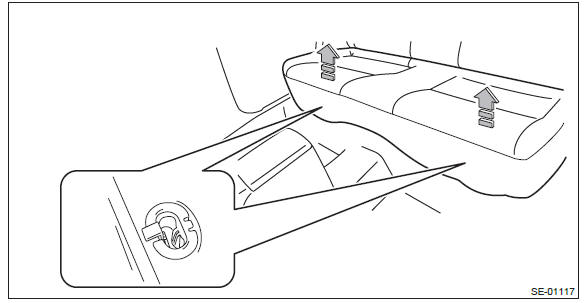
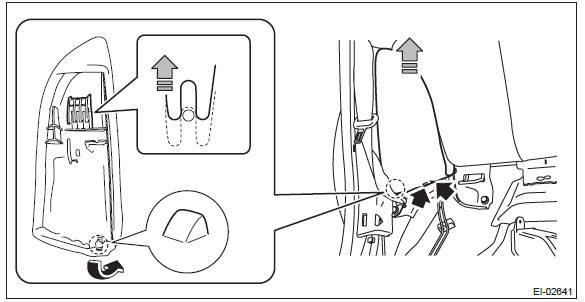
2) Remove the rear seat cushion assembly.
- Pull up the seat cushion and release the hook.
CAUTION: If the hook is disconnected from the vehicle body, replace the hook with the new part to prevent the decline of the fixed force of the seat.
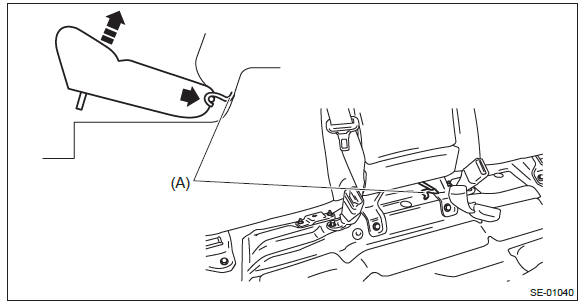
- Remove the hook (A) by pushing it back while lifting the front side of the seat cushion, and remove the seat cushion.
3) Release the clips and claws, and then remove the left and right side sill covers-rear INN.
CAUTION: Do not pull with excessive force. Doing so may damage the claws of the side sill cover INN.
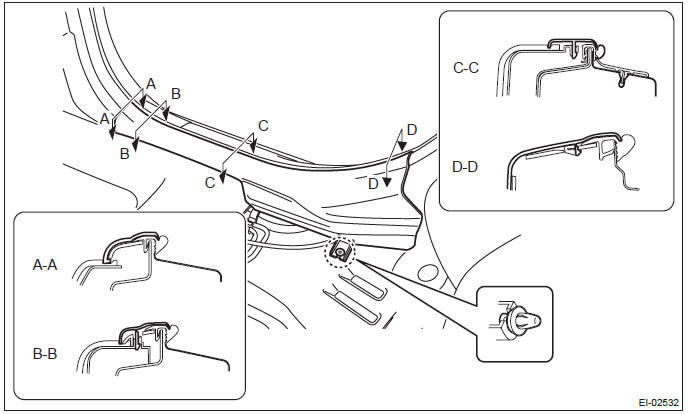
NOTE: To release the claws of the side sill cover INN, the following steps are recommended.
1. Take out the weather strip from under the side sill cover INN.
2. Turn over the floor mat and release the claw (C-C and D-D) by accessing from behind the side sill cover INN.
4) Remove the left and right rear quarter trim LWR.
- Remove the backrest side pad.
- Remove the screws.
Preparation tool: Stubby screwdriver
- Turn over the bottom end of the backrest side pad in the forward direction so that the claws are released.
- Remove the backrest side pad by pulling it up.
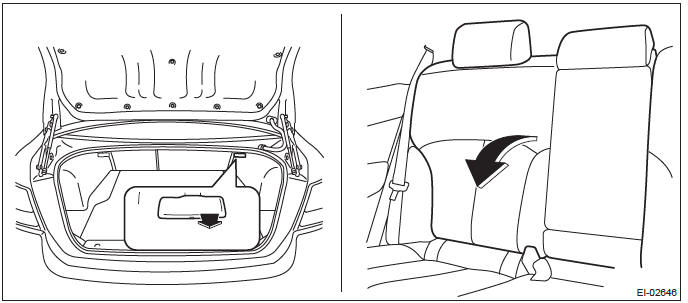
- Pull the release lever in the trunk room, and then tilt the backrest forward.
- Release the clips of the trunk trim panel assembly-side.
- Remove the clips, and remove the rear quarter trim LWR.
5) Remove the left and right rear quarter trim UPR.
- Remove the lower anchor bolt of the outer belt assembly.
- Release the clips, and remove the rear quarter trim UPR.
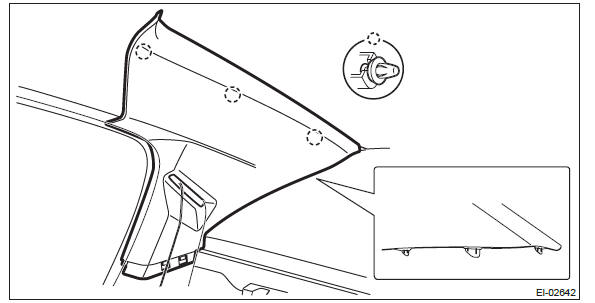
- Pull out the seat belt and remove the rear quarter trim UPR.
6) Release the clips and remove the left and right trunk trim panel assembly-front.
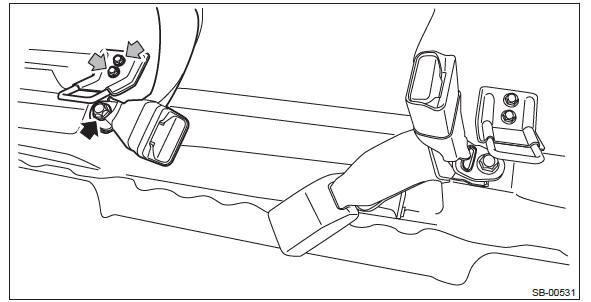
7) Remove the lower anchor of the shoulder belt assembly CTR.
- Remove the nuts and remove the ISO-FIX anchor.
- Remove the bolts, and remove the lower anchor of shoulder belt assembly CTR.
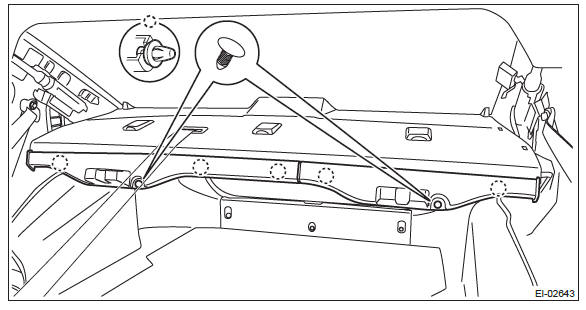
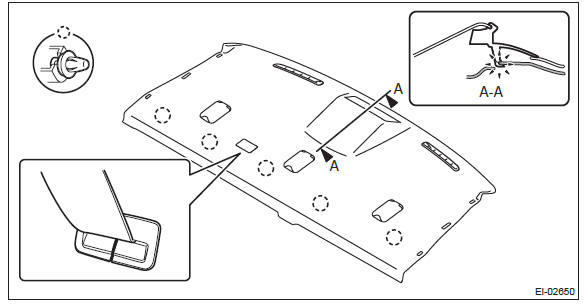
8) Remove the rear shelf panel assembly.
- Release the clips to float the rear shelf panel assembly.
- Release the belt guide and guide the anchor of rear center seat belt to behind the shelf panel.
- Disconnect the connector of high-mounted stop light.
- Remove the rear shelf panel assembly.
B: INSTALLATION
CAUTION:
- Make sure to insert the claws on the back of high-mounted stop light into the rear shelf panel.
- If the hook is disconnected from the vehicle body, replace the hook with the new part to prevent the decline of the fixed force of the seat.
- Make sure to insert the claws on the back of high-mounted stop light into the rear shelf panel.
Install each part in the reverse order of removal.
Tightening torque:
ISO-FIX anchor:25 N*m (2.55 kgf-m, 18.4 ft-lb)
Rear seat belt: <Ref. to SB-3, REAR SEAT BELT (SEDAN MODEL), COMPONENT, General
Description.>
Trunk Room Trim
A: REMOVAL
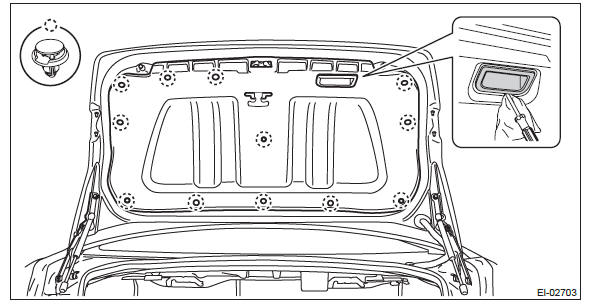
1. TRUNK LID TRIM
1) Open the trunk lid.
2) Remove the trunk handle.
3) Remove the clips and the trunk lid trim.
2. TRUNK ROOM TRIM
1) Pull the release lever in the trunk room, and then tilt the backrest forward.
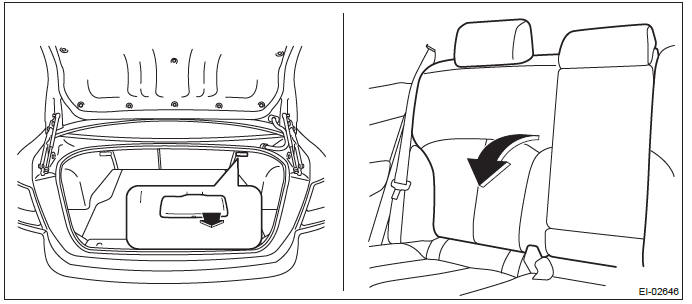
2) Remove the trunk room mat.
3) Remove the trunk trim assembly-rear.
- Remove the clip.
- Release the claws, and remove the trunk trim assembly-rear.
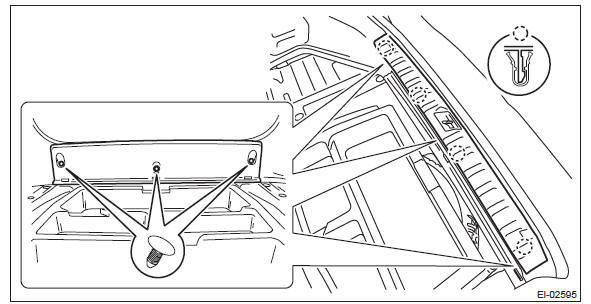
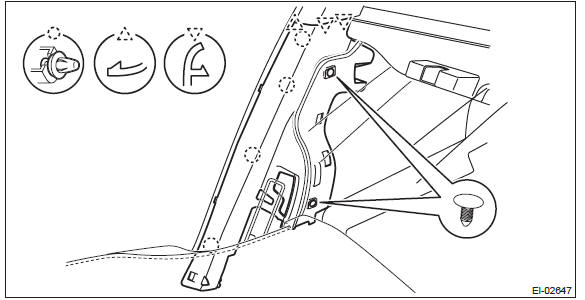
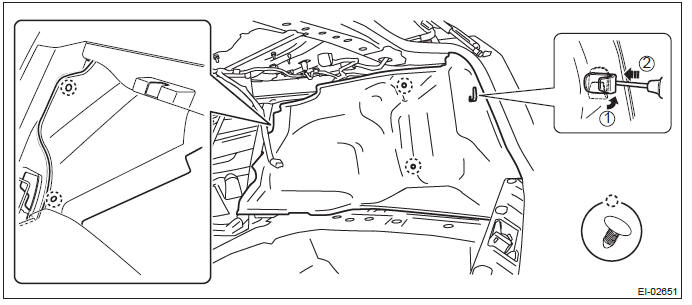
4) Remove the trunk trim panel assembly-side.
- Remove the hook.
- Turn the hook to 90º.
- Press the claw using a screwdriver to detach the hook.
- Release the clips and remove the trunk trim panel assembly-side.
B: INSTALLATION
Install each part in the reverse order of removal.
Sun Visor
A: REMOVAL
1) Remove the cover, loosen the screws, and remove the sun visor assembly.
2) Remove the sun visor hook.
- Press both sides using a flat tip screwdriver.
- Remove the sun visor hook by pulling toward you.

B: INSTALLATION Install each part in the reverse order of removal.
Assist Grip
A: REMOVAL
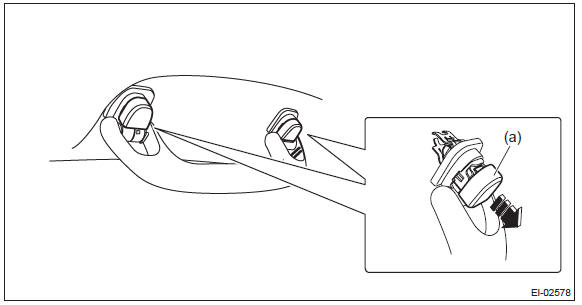
Remove the assist grip assembly.
1) Remove the cap (a).
2) Pull the assist grip toward you (to the vehicle center) and remove the metal clip from the bracket.
B: INSTALLATION
Install each part in the reverse order of removal.
READ NEXT:
 Roof Trim
A: REMOVAL
1. SEDAN MODEL
1) Remove the rear seat cushion assembly.
Pull up the seat cushion and release the hook.
CAUTION:
If the hook is disconnected from the vehicle body, replace the hook with
General Description of Exterior Body Panels
A: SPECIFICATION
Refer to Body Repair Manual for the dimensions of the body.
B: COMPONENT
1. FRONT HOOD
Insulator
Front hood panel ASSY
Front grille seal ASSY
Front hood sea
SEE MORE:
Forward direction
Turn the “TUNE/TRACK/CH” dial clockwise to skip to the beginning of the next
track/file (track). Each time the dial is turned, the indicated track/file (track)
number will increase.
NOTE
In an MP3, WMA or AAC folder, skipping past the last track/file (track) will
take you back to the f
Head restraint adjustment
1) Head restraint
2) Release button
Both the driver’s seat and the front passenger’s seat are equipped with head
restraints.
The head restraint should be adjusted so that the center of the head restraint
is closest to the top of the occupant’s ears.
To raise:
Pull the head restraint
