Subaru Outback (BR): Rear Seat
A: REMOVAL
1. SEDAN MODEL
1) Remove the rear seat cushion.
- Pull up the seat cushion and release the hook.
CAUTION: If the hook is removed from vehicle body, replace the hook with the new part to avoid the deterioration of seat securing.
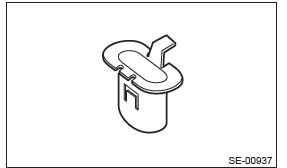
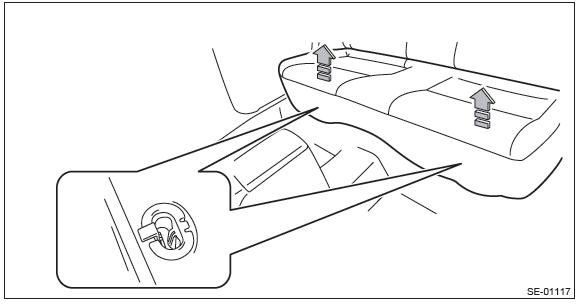
- Remove the hook (A) by pushing it back while lifting the front side of the seat cushion, and remove the seat cushion.
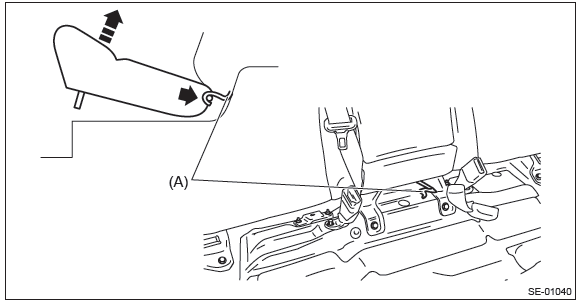
2) Remove the backrest assembly.
- Remove the bolts at the front of backrest hinge.
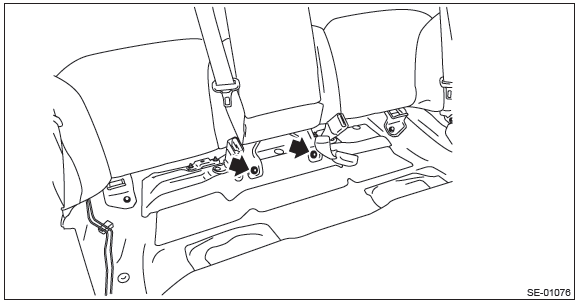
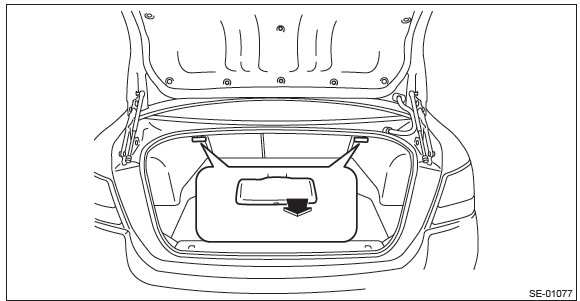
- Pull the release lever in the trunk room, and then tilt the backrest forward.
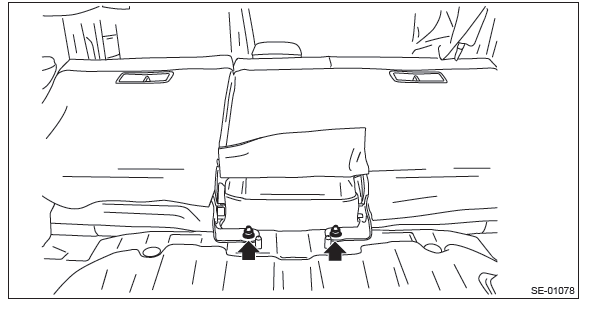
- Remove the nuts at the rear of backrest hinge.
- Remove the backrest assembly RH from the hinge assembly RH.
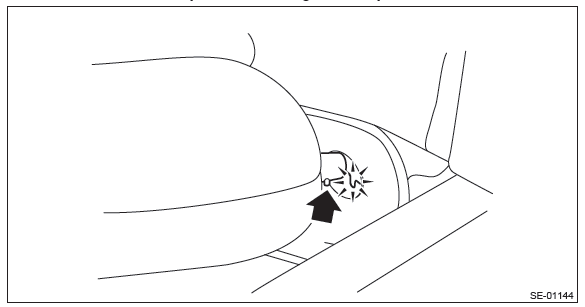
NOTE: The backrest cannot be detached unless the backrest pin is aligned to the hinge assembly.
3) Referring to the above steps, remove the backrest assembly LH.
4) Remove the backrest side pad.
- Remove the bolts, and remove the backrest side pad assembly RH.
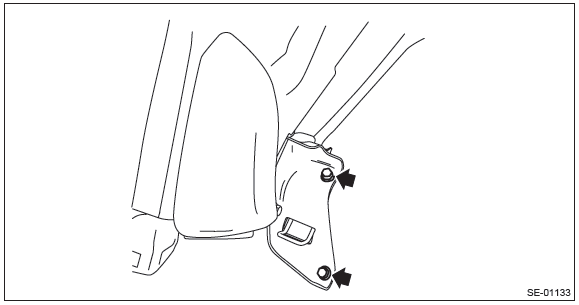
- Remove the screws.
- Turn over the bottom end of the backrest side pad in the forward direction so that the claws are released.
- Remove the backrest side pad by pulling it up.
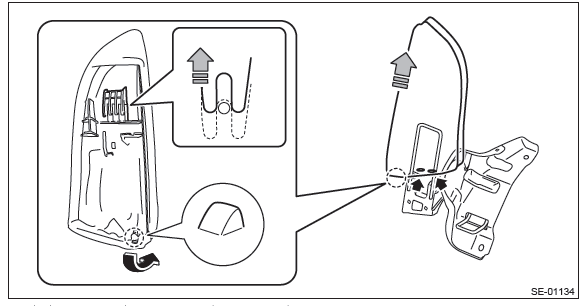
5) Referring to the above steps, remove the backrest side pad assembly LH.
2. OUTBACK MODEL
1) Disconnect the ground cable from battery.
2) Remove the rear seat cushion.
- Pull up the seat cushion and release the hook.
CAUTION: If the hook is removed from vehicle body, replace the hook with the new part to avoid the deterioration of seat securing.
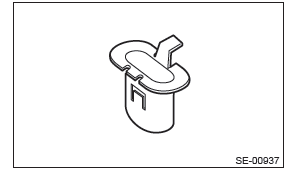
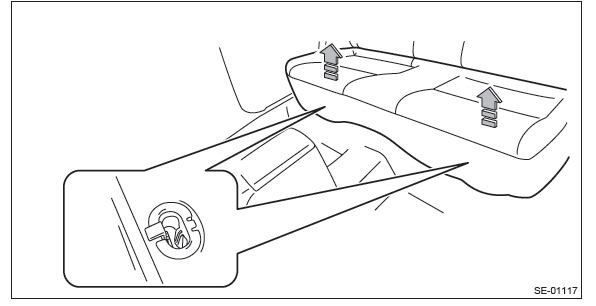
- Remove the hook (A) by pushing it back while lifting the front side of the seat cushion, and remove the seat cushion.
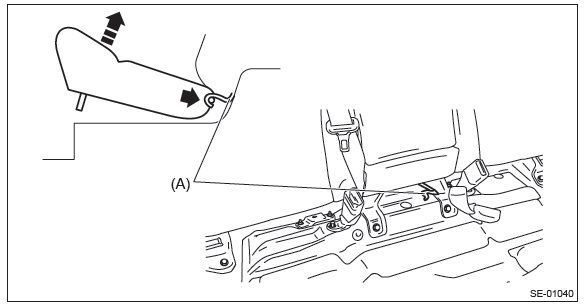
3) Remove the headrest.
4) Remove the backrest assembly RH.
- Remove the hinge bolts at the front of the backrest assembly RH.
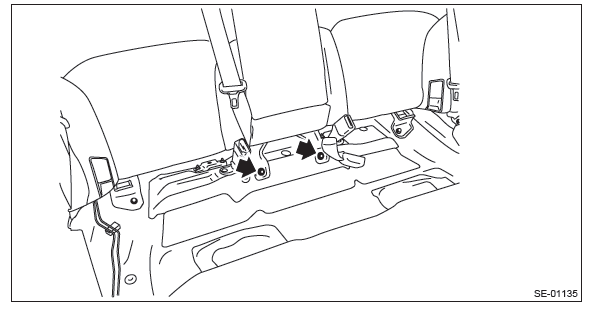
- Tilt the backrest forward, and then turn over the backrest backside mat.
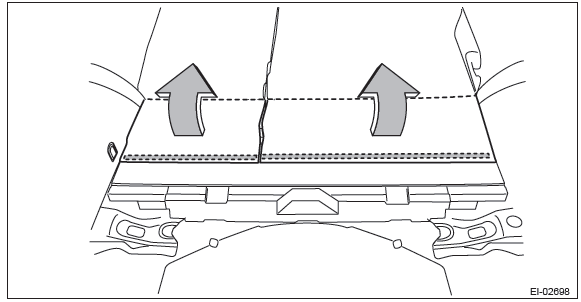
- Remove the clips, and remove the rear floor mat-front.
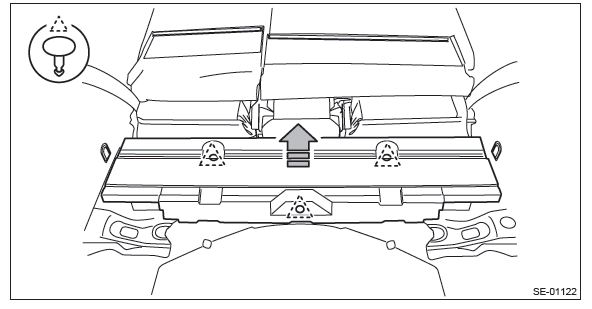
- Remove the nuts at the rear of backrest hinge.
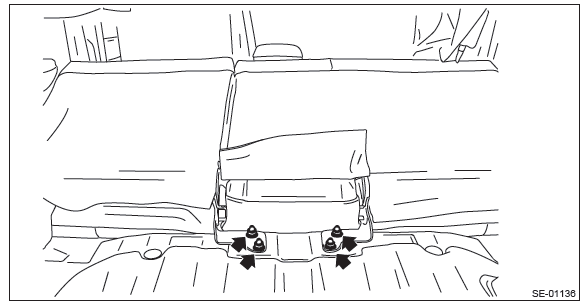
- Disconnect the backrest cable and reclining cable.
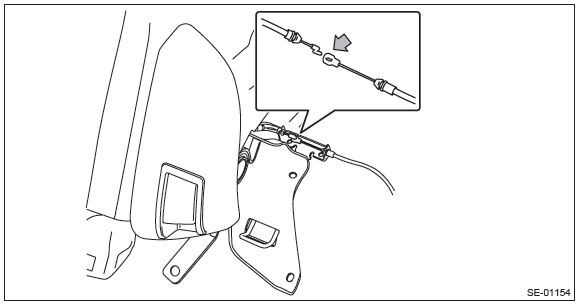
NOTE: The backrest cannot be detached unless the backrest pin is aligned to the hinge assembly.
- Remove the backrest assembly RH from the hinge assembly RH.
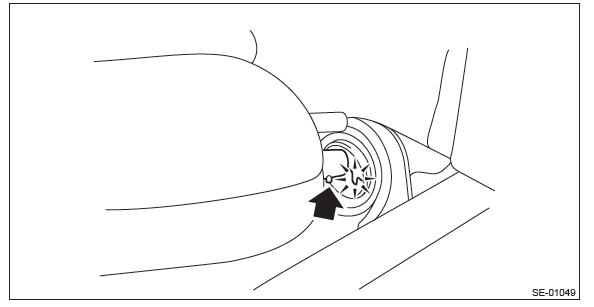
NOTE: The backrest cannot be detached unless the backrest pin is aligned to the hinge assembly.
- Take out the part outside the vehicle so that the body is not damaged by the hinges.
5) Referring to the above steps, remove the backrest assembly LH.
6) Remove the bolts, and remove the backrest side pad assembly RH.
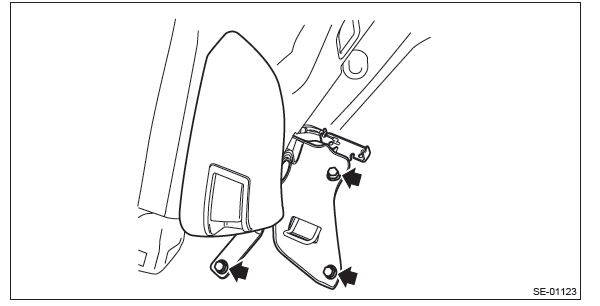
7) Remove the reclining lever assembly RH.
- Remove the screws and remove the reclining lever assembly by pulling it downward.
Preparation tool: Stubby screwdriver
- By pressing the wire cable claws, remove the relining cable from the reclining lever assembly.
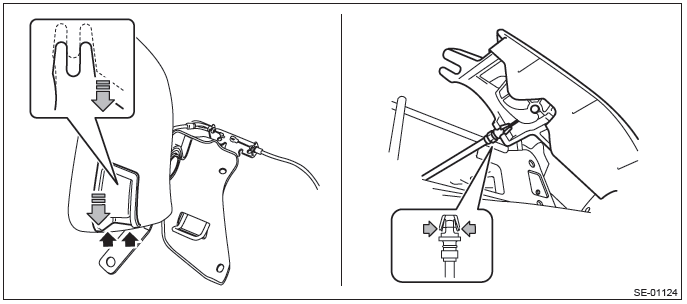
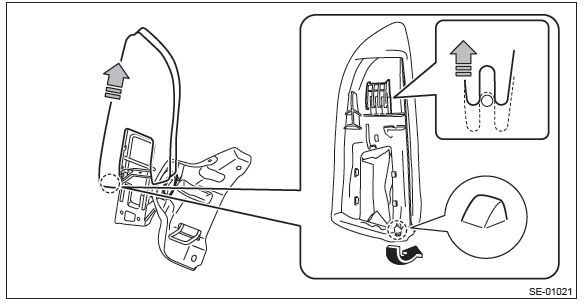
- Turn over the bottom end of the backrest side pad in the forward direction so that the claws are released.
- Remove the backrest side pad by pulling it up.
3. WIRE CABLE
Release lever cable (sedan model)
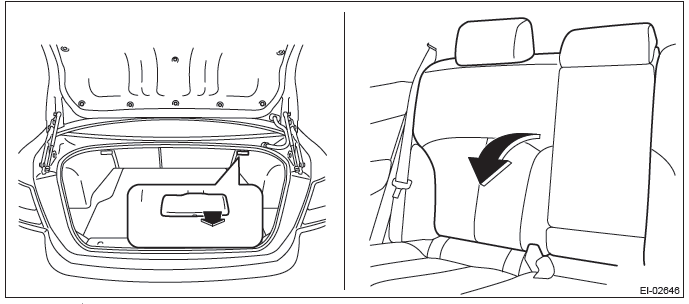
1) Pull the release lever in the trunk room, and then tilt the backrest forward.
2) Remove the release lever assembly.
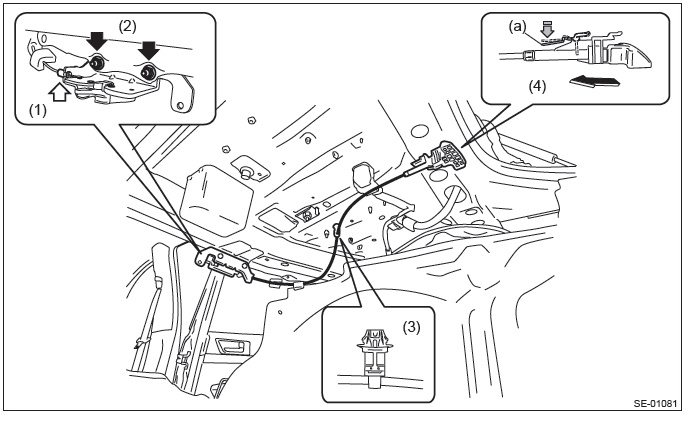
- Remove the wire cable from lock assembly.
- Remove the nuts, and then remove the lock assembly.
- Remove the wire cable holder.
- Press the stopper portion (a), and remove the release lever assembly while sliding it forward.
Reclining cable (OUTBACK model)
1) Remove the rear seat cushion.
- Pull up the seat cushion and release the hook.
CAUTION: If the hook is removed from vehicle body, replace the hook with the new part to avoid the deterioration of seat securing.
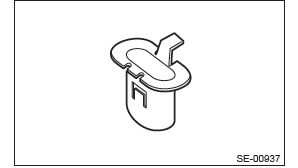
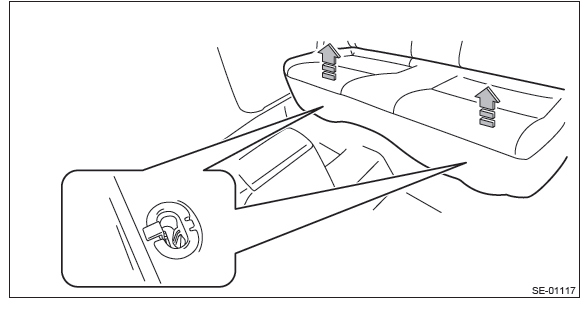
- Remove the hook (A) by pushing it back while lifting the front side of the seat cushion, and remove the seat cushion.
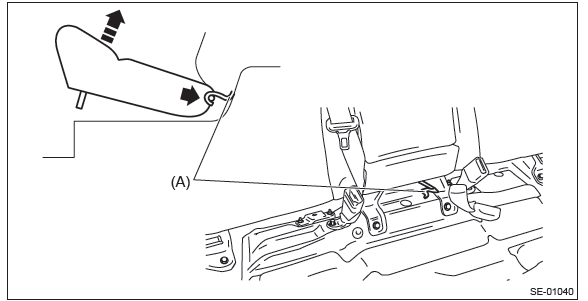
2) Tilt the backrest and turn over the seat backrest cover.
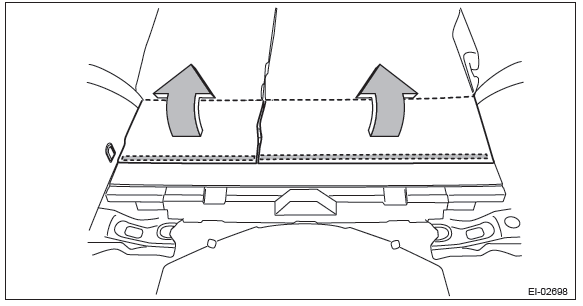
3) Remove the clips, and remove the rear floor mat-front.
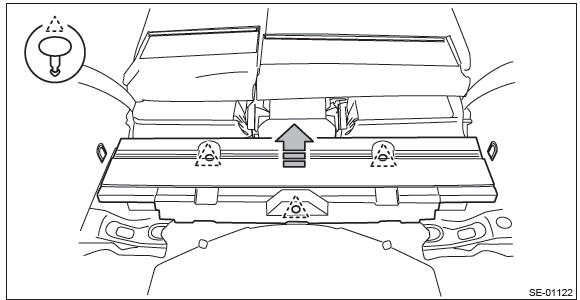
4) Remove the reclining lever assembly.
- Disconnect the backrest cable and reclining lever cable.
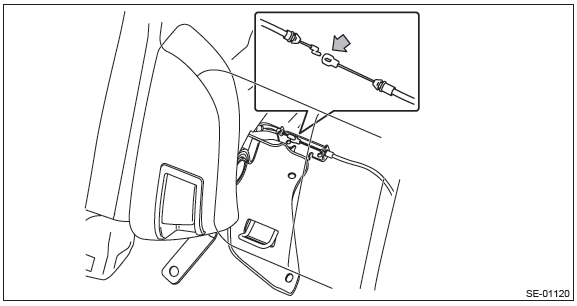
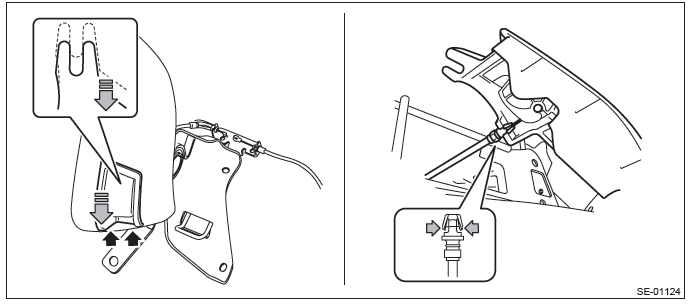
- Remove the screws and remove the reclining lever assembly by pulling it downward.
Preparation tool: Stubby screwdriver
- By pressing the wire cable claws, remove the relining cable from the reclining lever assembly.
Backrest cable (OUTBACK model)
1) Remove the rear seat backrest assembly. <Ref. to SE-39, OUTBACK MODEL, REMOVAL, Rear Seat.>
2) Disassemble the backrest assembly and remove the backrest cable. <Ref. to SE-50, DISASSEMBLY, Rear Seat.>
B: INSTALLATION
Install each part in the reverse order of removal.
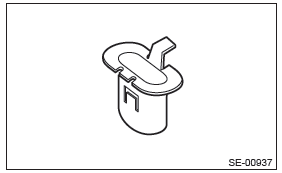
CAUTION: If the hook is removed from vehicle body, replace the hook with the new part to avoid the deterioration of seat securing.
NOTE:
- After installing the backrest, make sure that each seat belt operates normally.
- Check that the remote lever and reclining lever operate normally.
- Make sure that they are properly secured on each hook on the vehicle side.
Tightening torque:
Refer to "COMPONENT" of "General Description".
Sedan model: <Ref. to SE-7, REAR SEAT (SEDAN MODEL), COMPONENT, General Description.>
OUTBACK model <Ref. to SE-8, REAR SEAT (OUTBACK MODEL), COMPONENT, General Description.>
C: DISASSEMBLY
1) Remove the rear seat.
- Sedan model: <Ref. to SE-34, SEDAN MODEL, REMOVAL, Rear Seat.>
- OUTBACK model <Ref. to SE-39, OUTBACK MODEL, REMOVAL, Rear Seat.>
2) Remove the headrest.
3) Remove the backrest back board.
- Remove the plastic fastener at the lower part of backrest assembly, and open the fastener at both side to turn over the backrest cover.
- Remove the backrest striker cover. (Sedan model)
- Remove the screws (A) and clips (B).
- Remove the hog rings (C) and remove the backrest backboard.
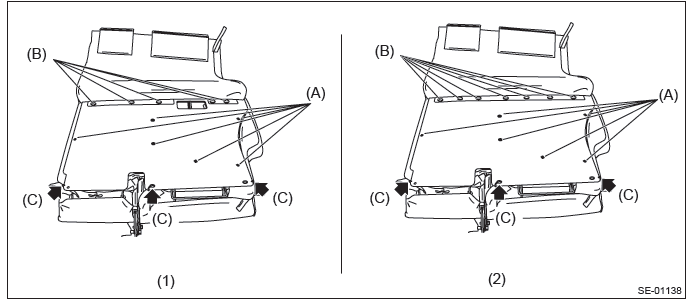
- Sedan model
- OUTBACK model
4) Remove the headrest bushing.
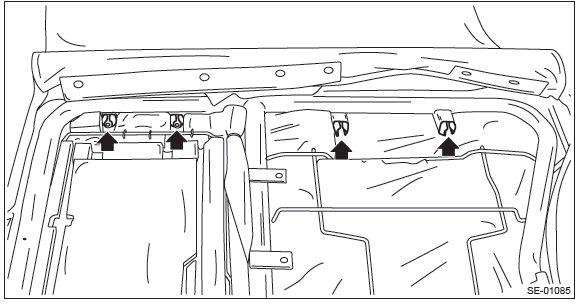
NOTE: Catch the tip of headrest bushing with pliers and push it from inside seat to outside to remove it.
5) Remove the armrest assembly.
- Remove the armrest hinge cover by pulling it in the direction of arrow (black).
- Remove the screws, and remove the armrest.
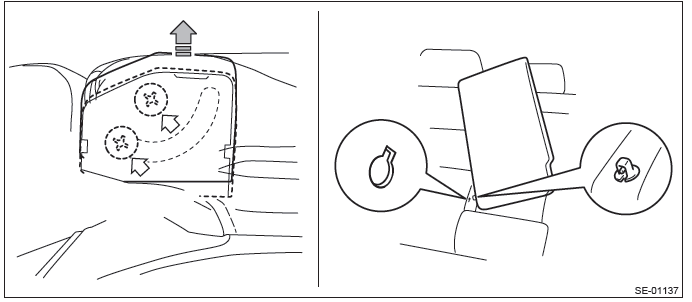
NOTE: The armrests cannot be detached while the backrest assembly RH and armrest side pin positions are not aligned.
6) Remove the plastic hooks and hog rings, and remove the pad at lower side of armrest.
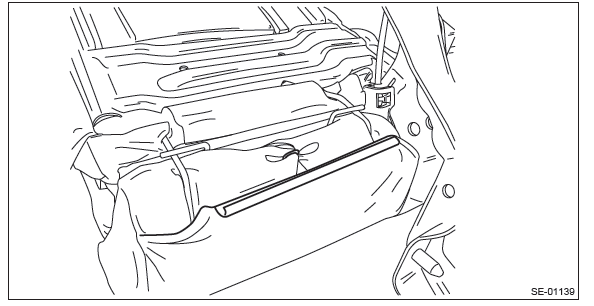
7) Remove the hog rings (A) and remove the backrest pad & frame assembly from the backrest assembly.
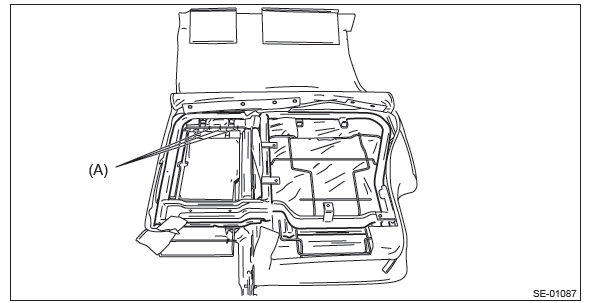
8) Remove the hog rings (A) on the front side of backrest, and then remove the backrest cover.
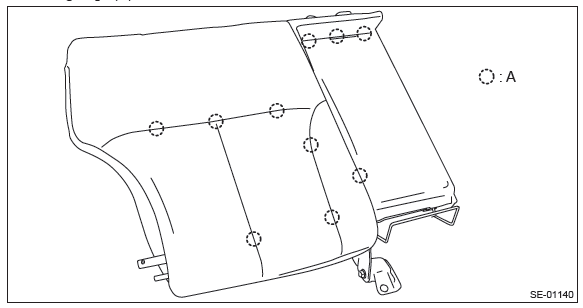
9) Referring to the step 2), disassemble the backrest assembly LH.
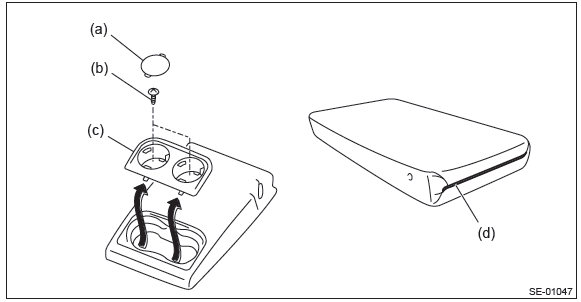
10) Remove the armrest cover.
- Take out the bottom sheets (a) from the cup holder and remove the screws (b).
- Remove the cup holder assembly (c).
- Detach the plastic fastener (d) and remove the armrest cover.
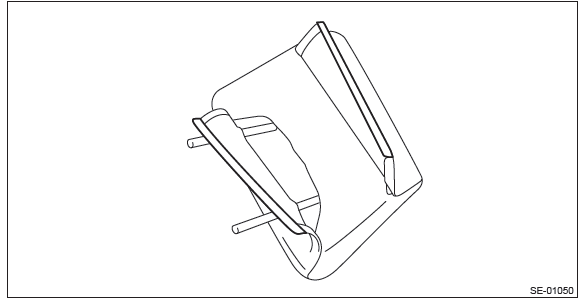
11) Detach the plastic fastener and hog ring, and then remove the headrest cover.
12) Remove the hog rings (A) on the rear side of the seat cushion.
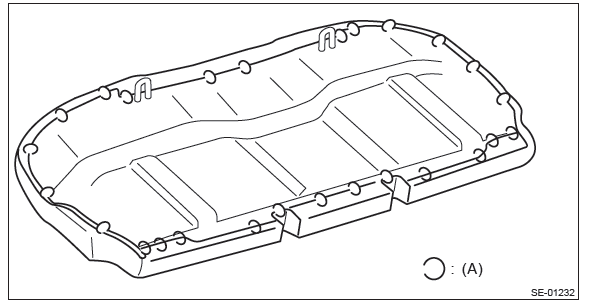
13) Remove the hog rings (A), then remove the seat cushion cover.
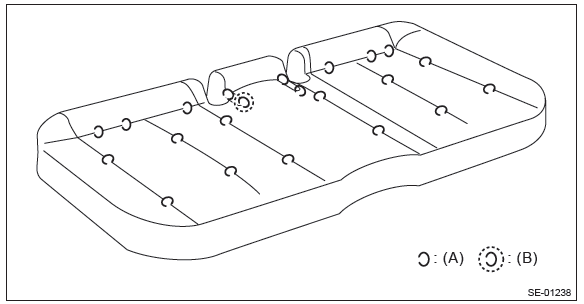
- Hog ring
- OUTBACK model only
D: ASSEMBLY
CAUTION:
- Do not reuse hog rings.
- Secure the hog ring using hog ring pliers.
- Install the hog rings to the specified points securely and make sure that there is no wrinkle or twisting on backrest cover.
1) Assemble the seat cover in the same manner as the front seat. <Ref. to SE-28, ASSEMBLY, Front Seat.>
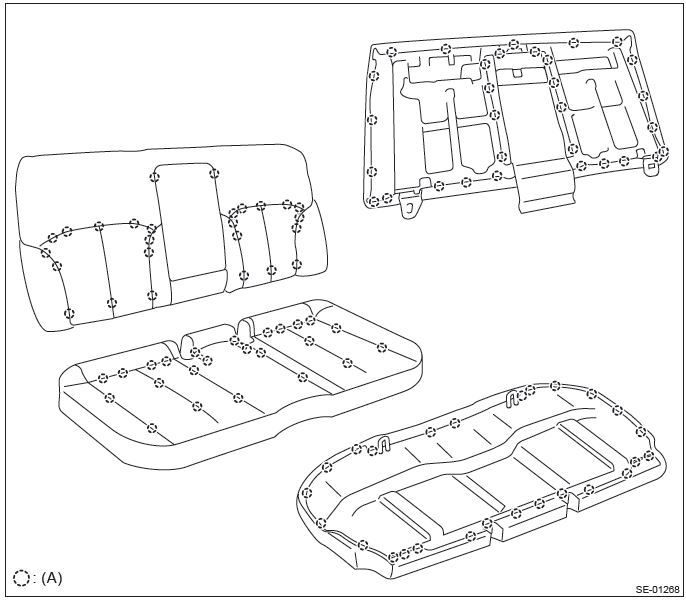
2) Make sure that all hog rings (A) are attached securely.
- Sedan model
- OUTBACK model
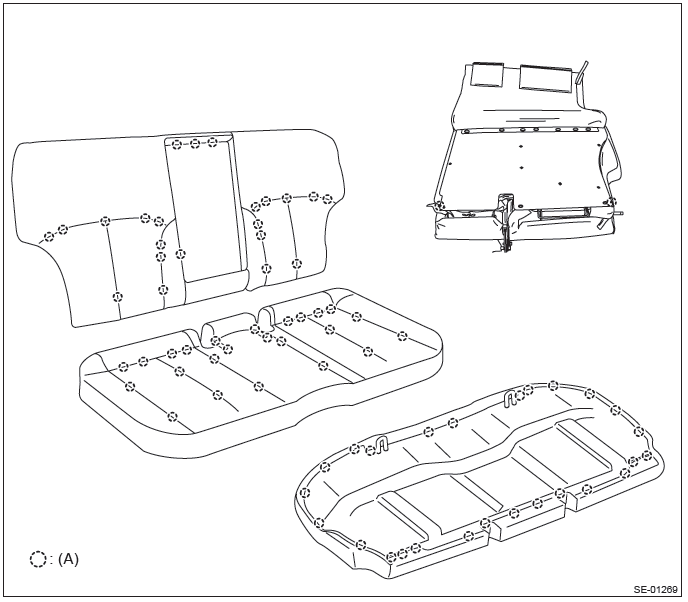
3) Assemble each part in the reverse order of disassembly.
NOTE:
- Do not contaminate or damage the cover.
- While installing the hog rings, prevent the seat from getting wrinkled.
Tightening torque: Refer to "COMPONENT" of "General Description".
Sedan model: <Ref. to SE-7, REAR SEAT (SEDAN MODEL), COMPONENT, General Description.>
OUTBACK model: <Ref. to SE-8, REAR SEAT (OUTBACK MODEL), COMPONENT, General Description.>
4) Before installation, check the following items.
- No break and fray on seat cover.
- No fray or deformation on each wire cable.
5) Install each part in the reverse order of removal.

