Subaru Outback (BR): CVTF Cooler Pipe and Hose
A: REMOVAL
CAUTION:
- Immediately after the vehicle has been running or after idling for a
long time, the CVTF will be hot.
Be careful not to burn yourself.
- If the CVTF is spilt over exhaust pipe, wipe it off with cloth to avoid emitting smoke or causing a fire.
- When removing the CVTF cooler pipe assembly on vehicle side, be careful not to bend the A/C pipe.
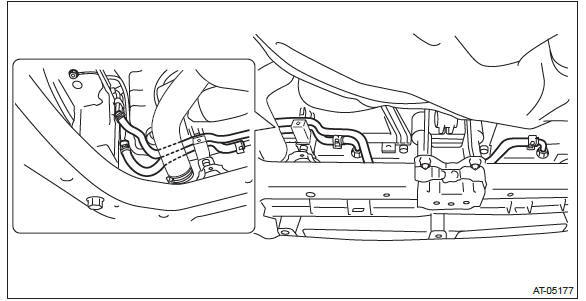
1) Lift up the vehicle.
2) Remove the under cover.
3) Remove the CVTF CVT inlet hose and CVTF CVT outlet hose.
4) Remove the CVTF radiator inlet hose and CVTF radiator outlet hose on radiator side.
CAUTION: Do not use a screwdriver or other pointed tools.
5) Lower the vehicle.
6) Remove the battery.
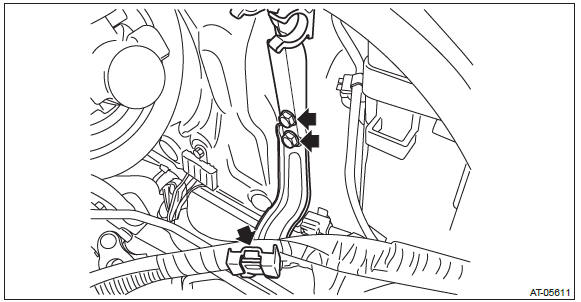
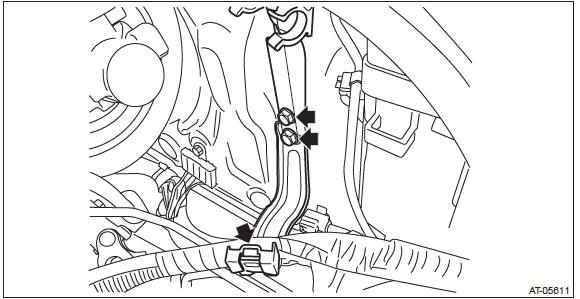
7) Remove the battery cable clip from the bracket, and remove the battery cable bracket.
8) Remove the engine coolant reservoir tank. <Ref. to CO(H4SO)-26, REMOVAL, Reservoir Tank.>
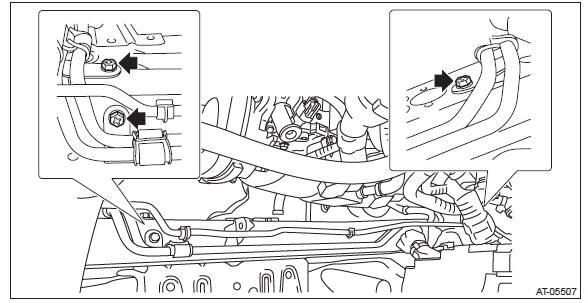
9) Remove the CVTF cooler pipe assembly mounting bolt.
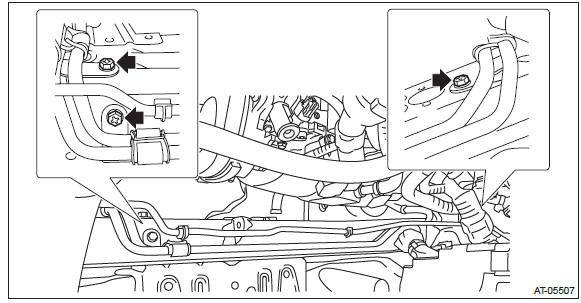
10) Detach the A/C pipe from clip.
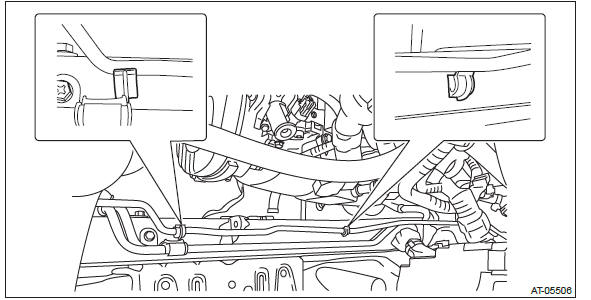
11) Remove the CVTF cooler pipe assembly from the vehicle.
B: INSTALLATION
CAUTION: When installing the CVTF cooler pipe assembly on vehicle side, be careful not to bend the A/C pipe.
1) Install the CVTF cooler pipe assembly to vehicle.
Tightening torque: 7.5 N*m (0.76 kgf-m, 5.5 ft-lb)
2) Install the A/C pipe to clip.
3) Install the battery cable bracket, and install the battery cable clip to the bracket.
Tightening torque: 7.5 N*m (0.76 kgf-m, 5.5 ft-lb)
4) Install the engine coolant reservoir tank. <Ref. to CO(H4SO)-26, INSTALLATION, Reservoir Tank.>
5) Lift up the vehicle.
6) Install the CVTF CVT inlet hose and CVTF CVT outlet hose.
NOTE: Use new CVTF CVT inlet hose and CVTF CVT outlet hose.
7) Install the CVTF radiator inlet hose and CVTF radiator outlet hose on radiator side.
NOTE: Use new CVTF radiator inlet hose and CVTF radiator outlet hose.

8) Install the under cover.
9) Lower the vehicle.
10) Install the battery.
11) Adjust the CVTF level and check there is no leakage. <Ref. to CVT-37, ADJUSTMENT, CVTF.>
C: INSPECTION
Repair or replace any faulty hoses, pipes, clamps, and washers found in the inspection below.
- Check for CVTF leaks in joints between the transmission, radiator, pipes, and hoses.
- Check the clamp for deformation.
- Lightly bend the hose and check for cracks in the surface or other damages.
- Pinch the hose with your fingers and check for poor elasticity. Also check for poor elasticity in the parts where the clamp was installed by pressing with your fingernail.
- Check for peeling, cracks, and deformation at the tip of the hose.
READ NEXT:
 Air Breather Hose
A: REMOVAL
1) Remove the air intake boot assembly. <Ref. to IN(H4SO)-8, REMOVAL, Air
Intake Boot.>
2) Remove the two air breather hoses.
3) Remove the oil cap.
B: INSTALLATION
Install in the
Transfer Clutch
A: REMOVAL
1) Remove the transmission assembly from the vehicle. <Ref. to CVT-55,
REMOVAL, Automatic Transmission
Assembly.>
2) Remove the extension case. <Ref. to CVT-138, REMOVAL, Extensi
Transfer Reduction Driven Gear
A: REMOVAL
1) Remove the transmission assembly from the vehicle. <Ref. to CVT-55,
REMOVAL, Automatic Transmission
Assembly.>
2) Remove the extension case. <Ref. to CVT-138, REMOVAL, Extensio
SEE MORE:
All season tires
The factory-installed tires on your new vehicle except 2.5 L turbo models are
all season tires.
All season tires are designed to provide an adequate measure of traction, handling
and braking performance in year-round driving including snowy and icy road conditions.
However all season tires do
Treadwear
The treadwear grade is a comparative rating based on the wear rate of the tire
when tested under controlled conditions on a specified government test course.
For example, a tire graded 150 would wear one and one-half (1- 1/2) times as
well on the government course as a tire graded 100. The rela
