
Subaru Outback (BR): Locking and unlocking from the outside
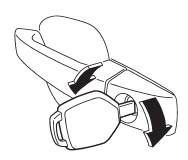
To lock the driver’s door from the outside with the key, turn the key toward the rear. To unlock the door, turn the key toward the front.
Pull the outside door handle to open an unlocked door.
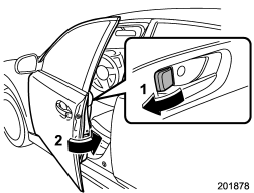
Locking without the key 1) Rotate the lock lever rearward.
2) Close the door.
To lock the door from the outside without the key, rotate the lock lever rearward and then close the door.
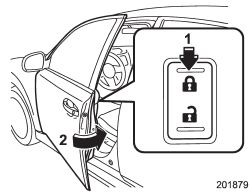
Locking without the key
1) Press the front side of the power door locking switch.
2) Close the door.
To lock the door from the outside using the power door locking switch, press the front side of the switch (“LOCK” side) and then close the door. In this case, all closed doors and the rear gate (Outback) are locked at the same time.
Always make sure that all doors and the rear gate are locked before leaving your vehicle.
NOTE
Make sure that you do not leave the key inside the vehicle before locking the doors from the outside without the key.
READ NEXT:
 Locking and unlocking from the inside
WARNING
Keep all doors locked when you drive, especially when small children are in your
vehicle.
Along with the proper use of seatbelts and child restraints, locking the doors
reduces the chanc
Battery drainage prevention function
If a door or the rear gate (Outback) is not completely closed, the interior lights
will remain illuminated as a result. However, several lights are automatically turned
off by the battery drainage
Power door locking switches
1) Lock
2) Unlock
All doors and the rear gate (Outback) can be locked and unlocked by the power
door locking switches located at the driver’s side and the front passenger’s side
doors. To
SEE MORE:
Connecting a trailer
1. Remove the receiver cover from the hitch receiver tube. Then insert the ball
mount into the hitch receiver tube.
2. Insert the hitch pin into the hole on the hitch receiver tube so that the
pin passes through the ball mount.
3. Insert the safety pin onto the hitch pin securely.
4. Pull
High/low beam change (dimmer)
To change from low beam to high beam, push the turn signal lever forward. When
the headlights are on high beam, the high beam indicator light “”
on the combination meter is also on.
To switch back to low beam, pull the lever back to the detent position.
